Choking is the leading injury in babies under 12 months when they start solids. The right cut size, shape, and softness changes everything.
This free tool consolidates Nibli's individual cutting guides into one searchable place. Pick a food, pick your baby's age, and see exactly how to prep it, backed by WHO, AAP, and NHS guidance.
Each result links to the full deep-dive guide for that food, with allergen notes, recipe ideas, and age-by-age progression.
Universal rules for cutting baby food safely
Three rules apply across every food and every age:
- 1
Match cut size to grasp stage
Before pincer grasp (around 6 to 9 months), use long finger-shaped pieces babies can hold in a fist with food sticking out the top. After pincer grasp (around 9 to 12 months), switch to small bite-sized pieces.
- 2
Soften round and firm foods
Round foods (grapes, blueberries, cherry tomatoes) and firm foods (apple, raw carrot, hard cheese) need quartering, halving lengthwise, or steaming until they squish between your fingers.
- 3
Always supervise feeding
Stay seated with your baby for every meal. Learn infant CPR and choking response. Squishability is a more reliable safety test than any size rule.
How to Cut Nectarine for Baby
Read full cutting guide6–8 months
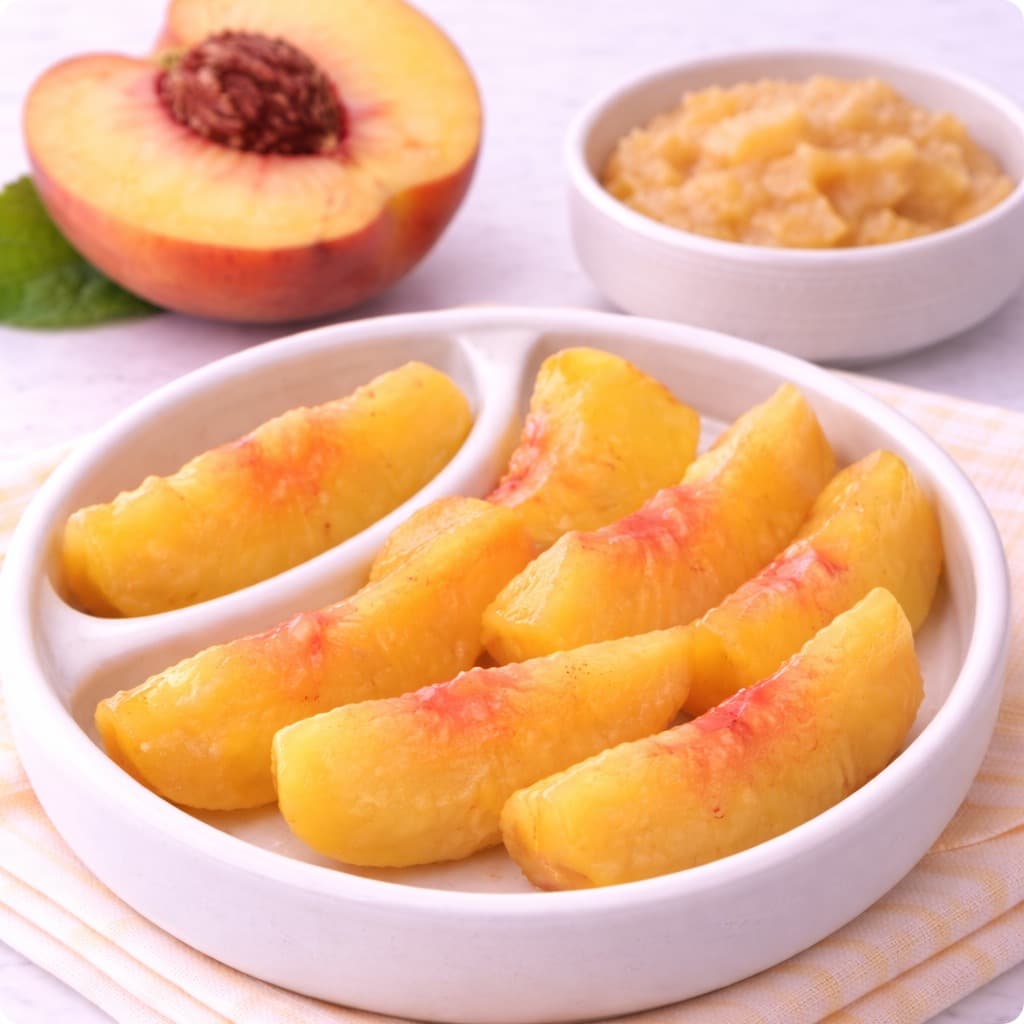
How to cut nectarine for a 6 month old: At 6 months, choose a very ripe, soft nectarine and start by washing it and removing the pit. Slice the fruit into large wedges about 1 to 2 cm thick and roughly the length of an adult finger, so your baby can hold one in a whole-fist grasp with a bit sticking out the top to gnaw on. Large, graspable pieces are safest at this stage because your baby cannot yet pick up small bits and is learning to bring food to the mouth and gum it. If the skin feels slippery or tough and makes the wedge hard to hold, you can peel it or leave a strip on one side to help with grip. You can also lightly mash the flesh with a fork and offer it on a preloaded spoon if you prefer. Avoid small, round, or bite-size pieces at 6 months, and always stay within arm's reach and keep your baby seated upright while eating.
9–11 months
How to cut nectarine for a 9 month old: Around 9 months, many babies are developing the pincer grasp, using the thumb and forefinger to pick up smaller pieces. Wash the nectarine, remove the pit, and cut ripe, soft flesh into small chunks about 1 to 1.5 cm in size, or into thin bite-size strips your baby can pick up and chew. Make sure each piece is soft enough to squash easily between your fingers, and peel the skin if it seems chewy or hard to manage. Because nectarine is slippery, you can roll the pieces in a little baby cereal or ground oats to make them easier to grip. Continue to offer some larger pieces too if your baby still prefers to gnaw, and keep supervising every bite while your baby sits upright.
12+ months
How to cut nectarine for a 12 month old: By 12 months, most toddlers can handle bite-size pieces and are getting better at chewing. Wash the nectarine, remove the pit, and cut the flesh into bite-size chunks about 1.5 cm across, small enough to chew but never so large that they could be swallowed whole. Ripe nectarine is soft enough to leave the skin on at this age, though you can still peel it if your toddler prefers. Offer the pieces on a plate or in a bowl and let your toddler self-feed with fingers or a fork. Keep mealtimes calm and seated, avoid letting your child walk or run with food, and always supervise while they eat.
How to Cut Cauliflower for Baby
Read full cutting guide6–8 months
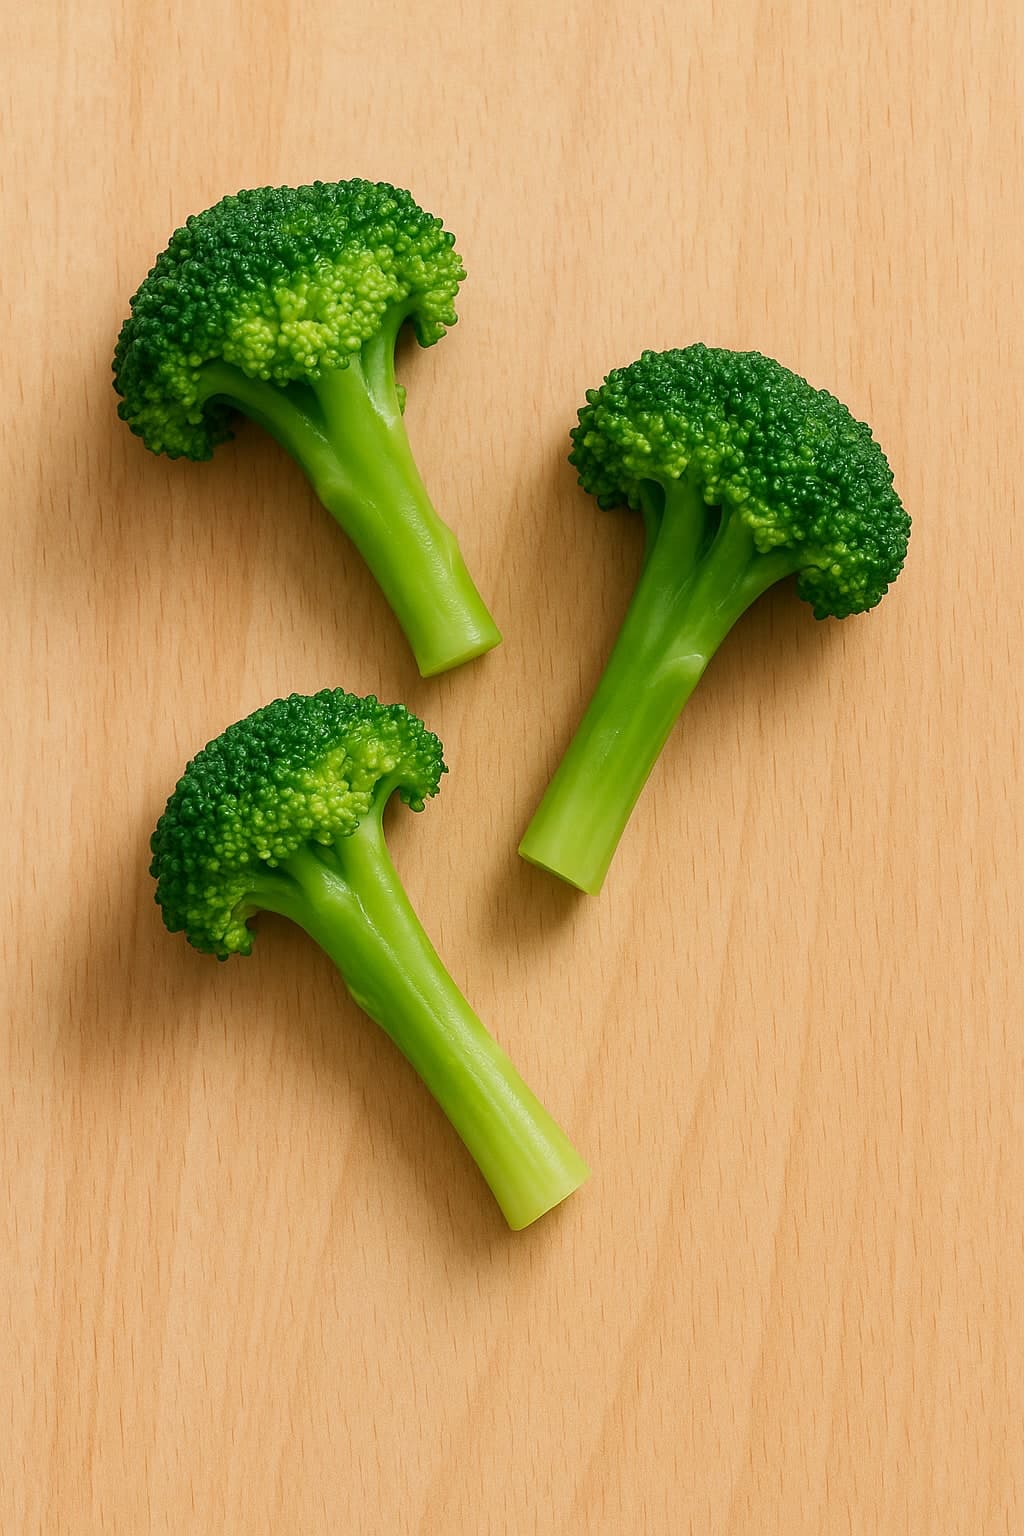
How to cut cauliflower for a 6 month old: At 6 months, babies grab with their whole palm, so give them a large piece they can hold with some sticking out of the fist. Steam or roast cauliflower until very soft, then serve whole florets that are about the size of a golf ball, roughly 4 to 5 cm tall, keeping a length of stem attached as a natural handle. The soft, bushy top is easy to gum, and the stem gives little hands something to grip. Make sure the floret squishes easily when you press it between two fingers; if it feels firm or crunchy, cook it longer. Avoid small, bite-size pieces and hard or raw florets at this age, since they are harder to control and can pose a choking risk.
9–11 months
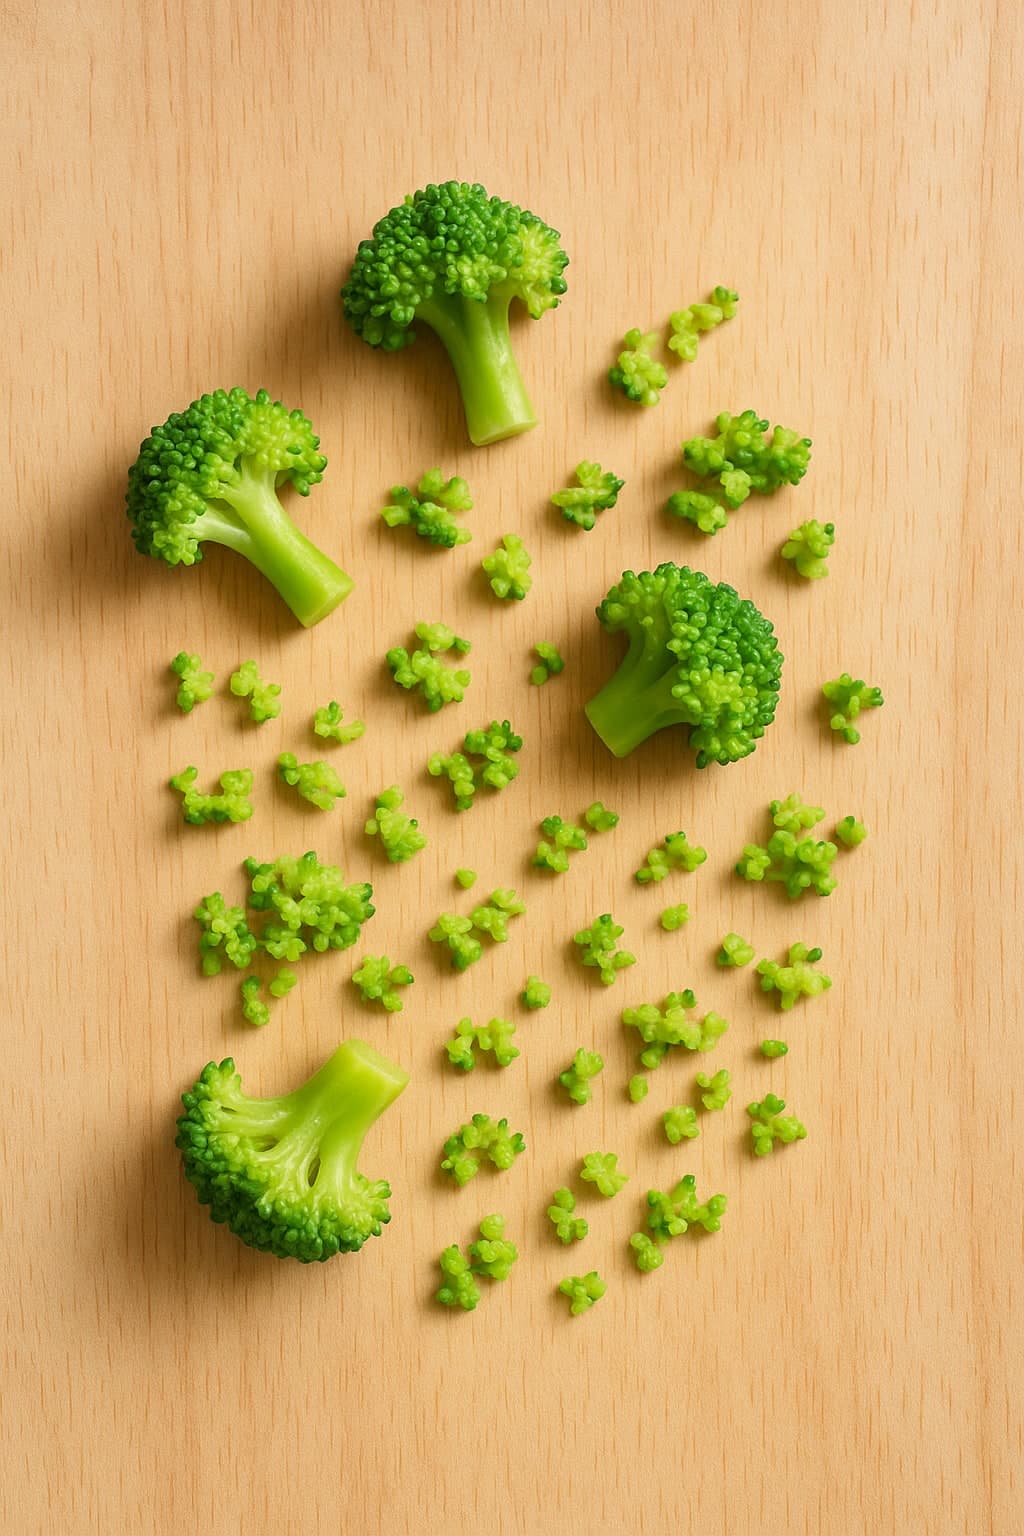
How to cut cauliflower for a 9 month old: Around 9 months, many babies are developing the pincer grasp, picking up smaller pieces with the thumb and forefinger. You can now offer smaller, soft-cooked florets about 2 to 3 cm across, along with a few bite-size pieces of the tender floret top for practice. Keep everything cooked until it is soft enough to mash easily, and break larger florets into smaller, manageable clusters rather than serving thick chunks of dense stem. Offering a mix of one larger floret with a handle and several smaller pieces lets your baby practice both grasps at the same meal.
12+ months
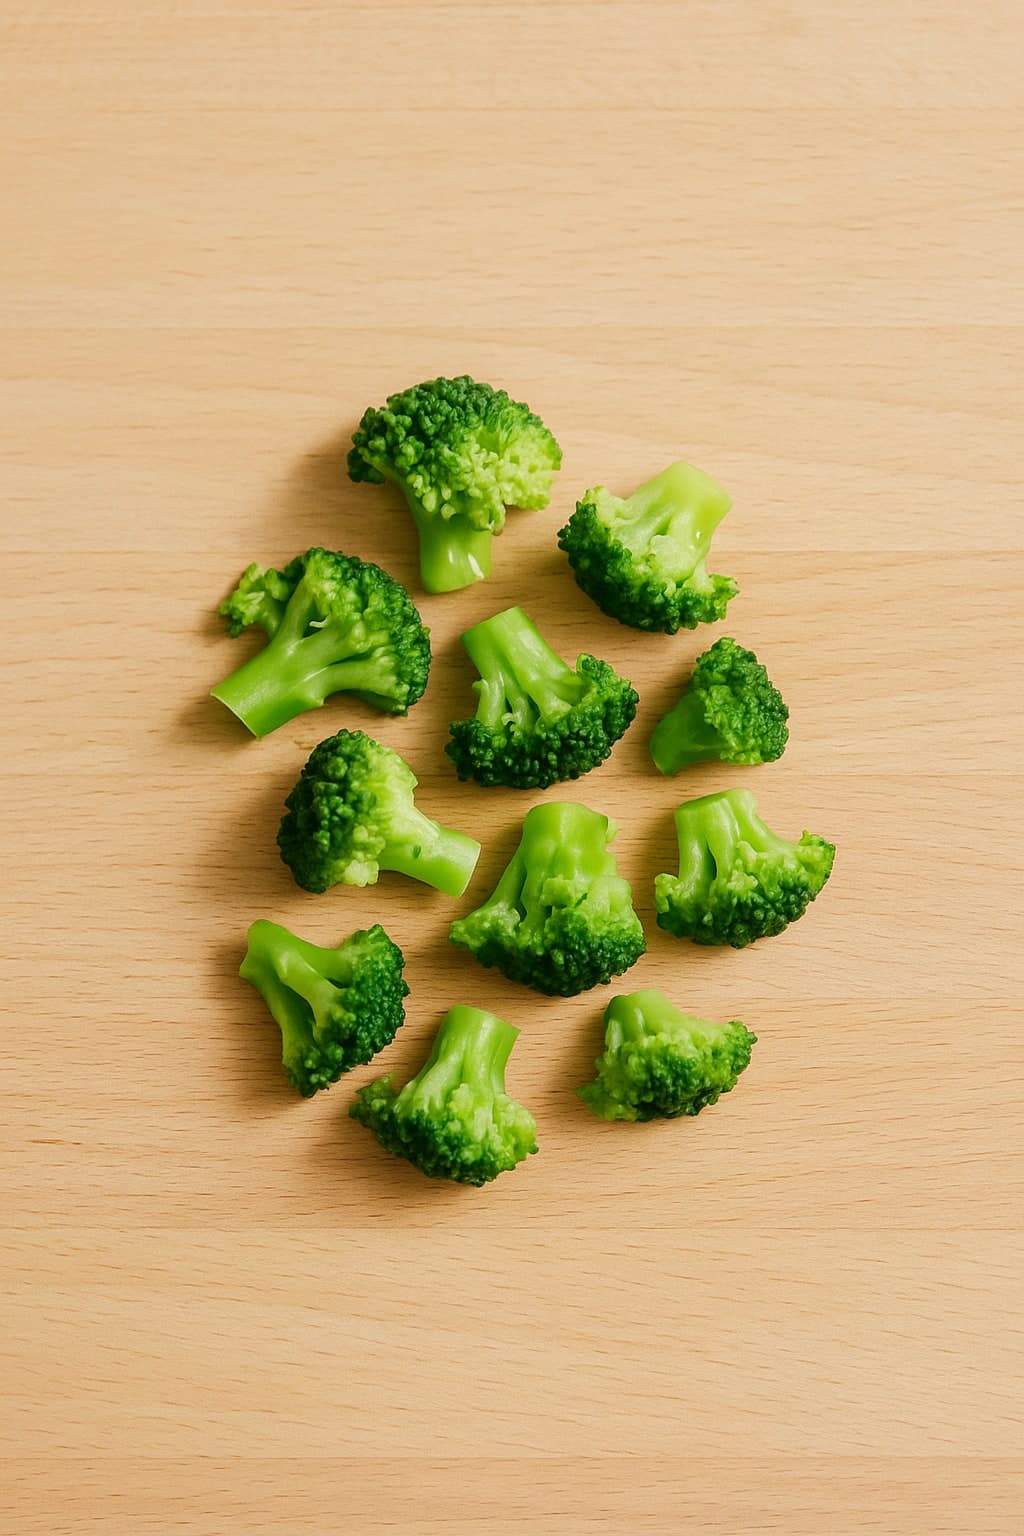
How to cut cauliflower for a 12 month old: By 12 months, most toddlers are skilled at picking up and chewing small pieces, so you can serve bite-size cauliflower cut into pieces about 1 to 1.5 cm. Keep it cooked until tender, and you can introduce slightly more texture as your toddler's chewing improves, though still avoid hard or raw cauliflower, which remains a choking hazard. Chopped cauliflower mixes nicely into pasta, rice, or scrambled eggs, and small roasted pieces make an easy finger food your toddler can self-feed alongside the rest of the family.
How to Cut Butternut Squash for Baby
Read full cutting guide6–8 months
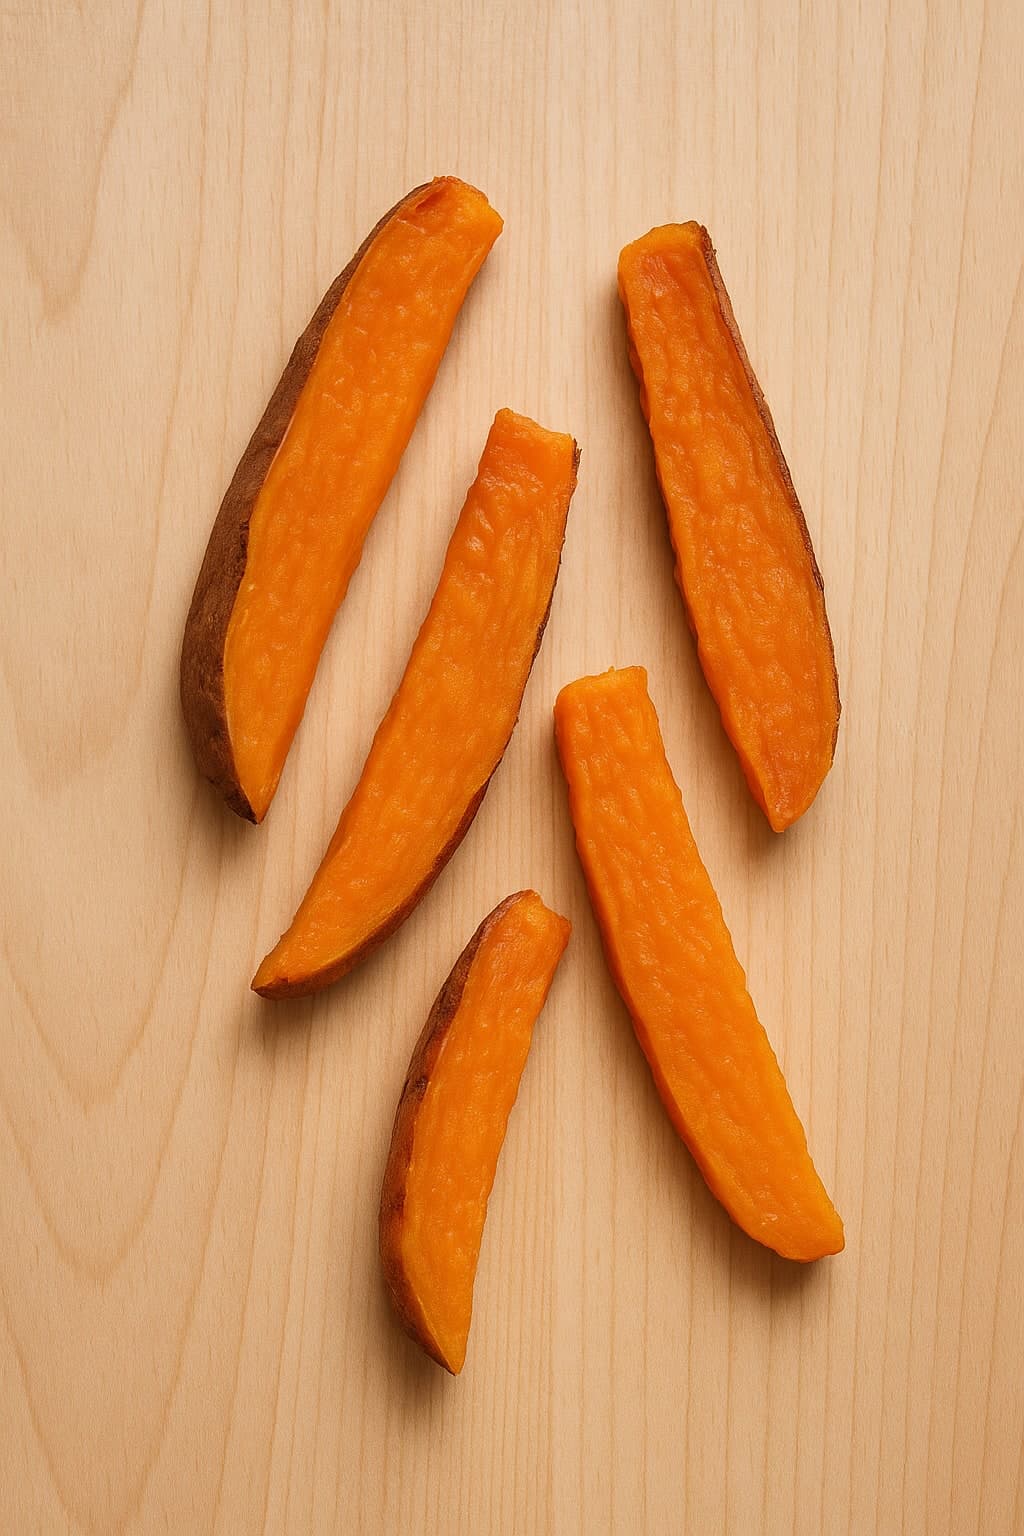
How to cut butternut squash for a 6 month old: At 6 months, babies grab food with a whole-hand (palmar) grasp, so offer pieces long enough to stick out the top of a closed fist. Peel and de-seed the squash, then cut it into thick finger-length batons about 8 to 10 cm long and 1.5 to 2 cm wide, or use long wedges. Roast or steam them until they are very soft and yield easily when you press with gentle finger pressure, like a ripe avocado. The piece should be soft enough to squish but firm enough to hold its shape so your baby can pick it up and gnaw on it. Avoid small cubes, coins, or bite-size chunks at this stage, since round or small firm pieces are a choking hazard, and skip any undercooked or fibrous sections near the skin.
9–11 months
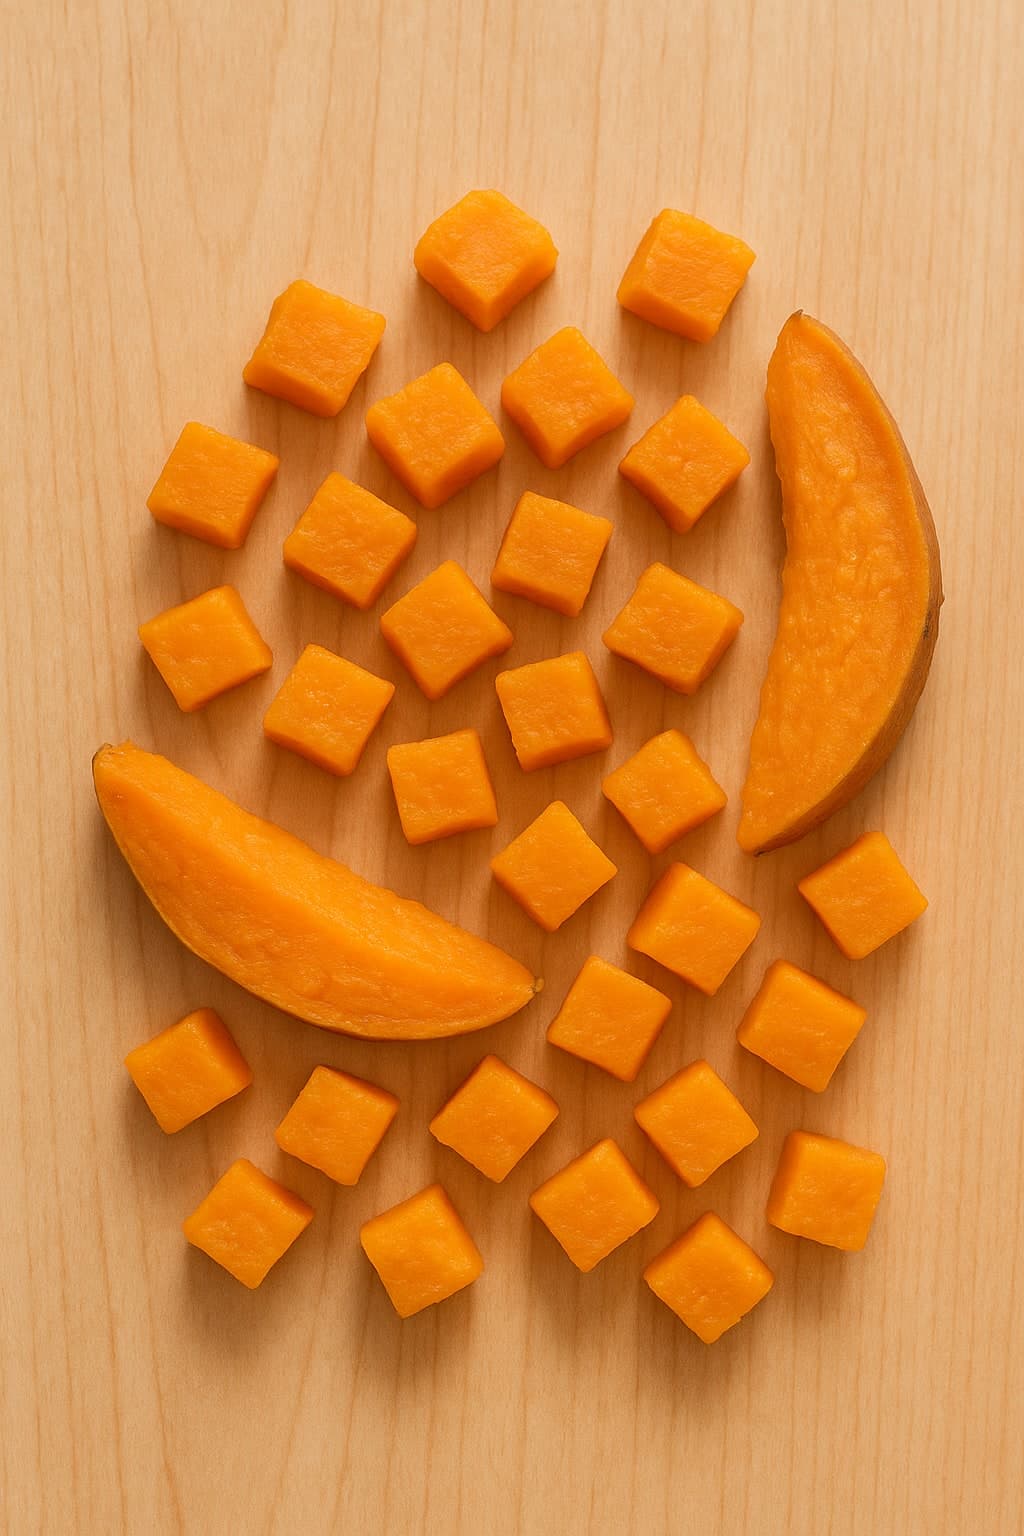
How to cut butternut squash for a 9 month old: Around 9 months, many babies develop the pincer grasp and can pick up smaller pieces between thumb and forefinger. You can now offer soft, cooked butternut squash cut into bite-size pieces roughly 1 to 1.5 cm across, about the size of your fingertip, alongside some of the larger batons your baby may still enjoy. Roasted cubes or mashed squash scooped into small soft mounds work well here. Keep every piece soft enough to squash between two fingers, and continue to avoid any firm, round, or large chunks that have not been cooked through.
12+ months
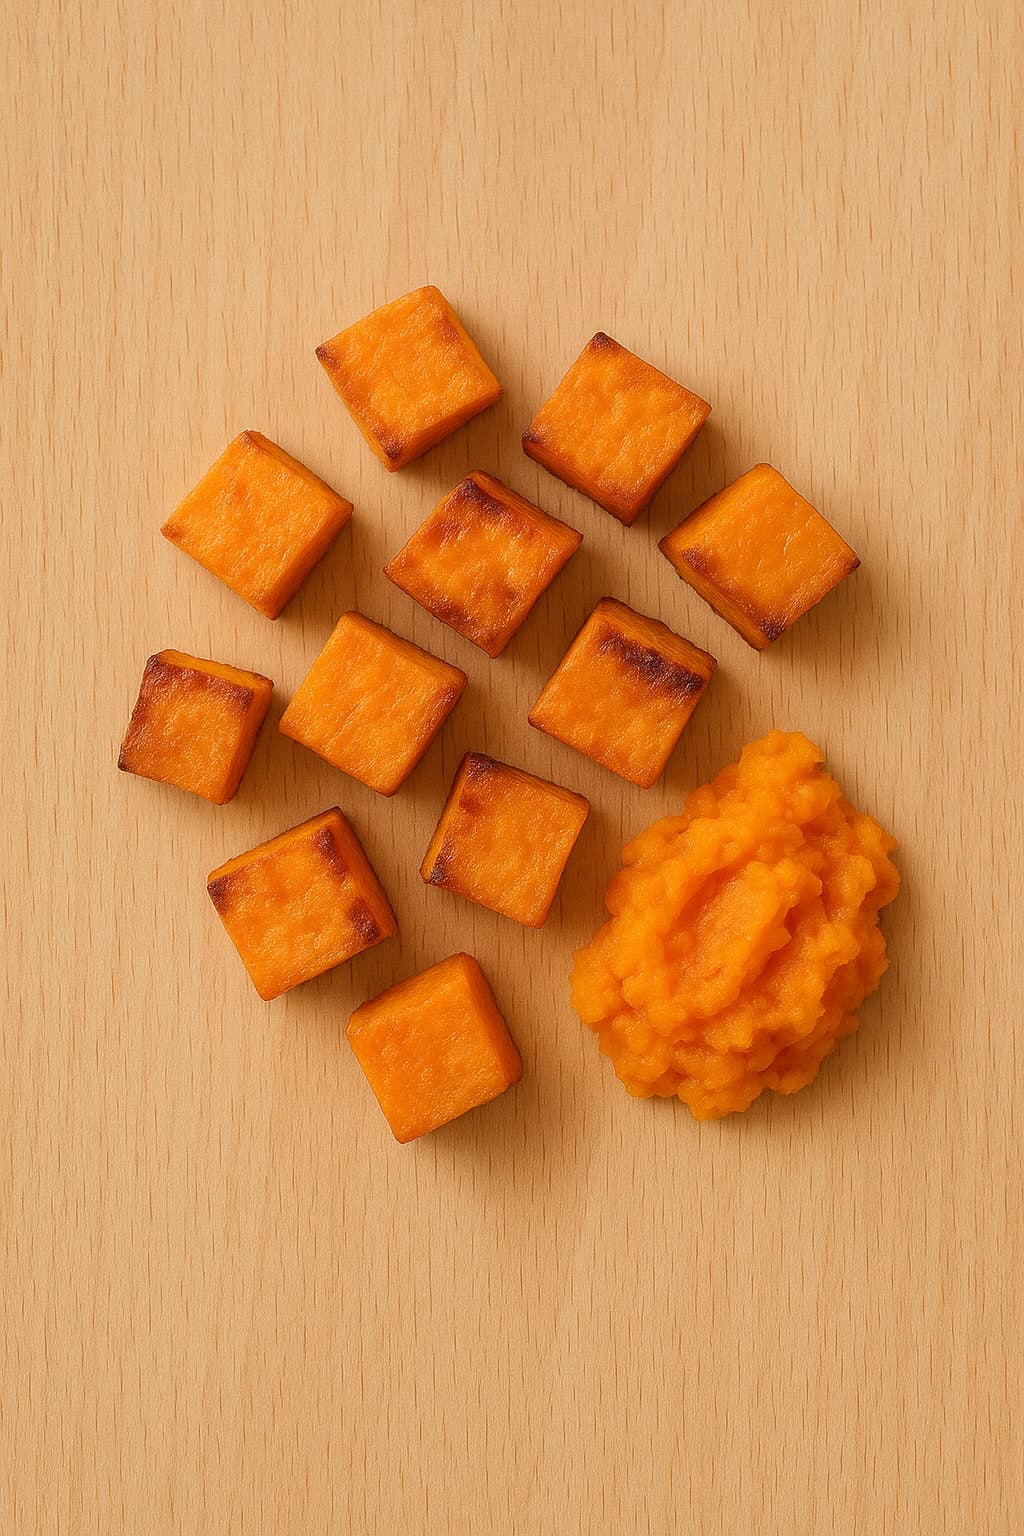
How to cut butternut squash for a 12 month old: By 12 months, most toddlers handle a wider range of textures and can manage smaller bite-size pieces. Cut soft, cooked butternut squash into pieces about 1 to 1.5 cm so they are easy to chew and swallow, and you can serve it diced, mashed, or roasted in chunks. While your toddler is more capable now, squash should still be cooked until tender rather than firm, and pieces should stay small enough to chew comfortably. Always stay within arm's reach and keep mealtimes calm and seated.
How to Cut Pumpkin for Baby
Read full cutting guide6–8 months
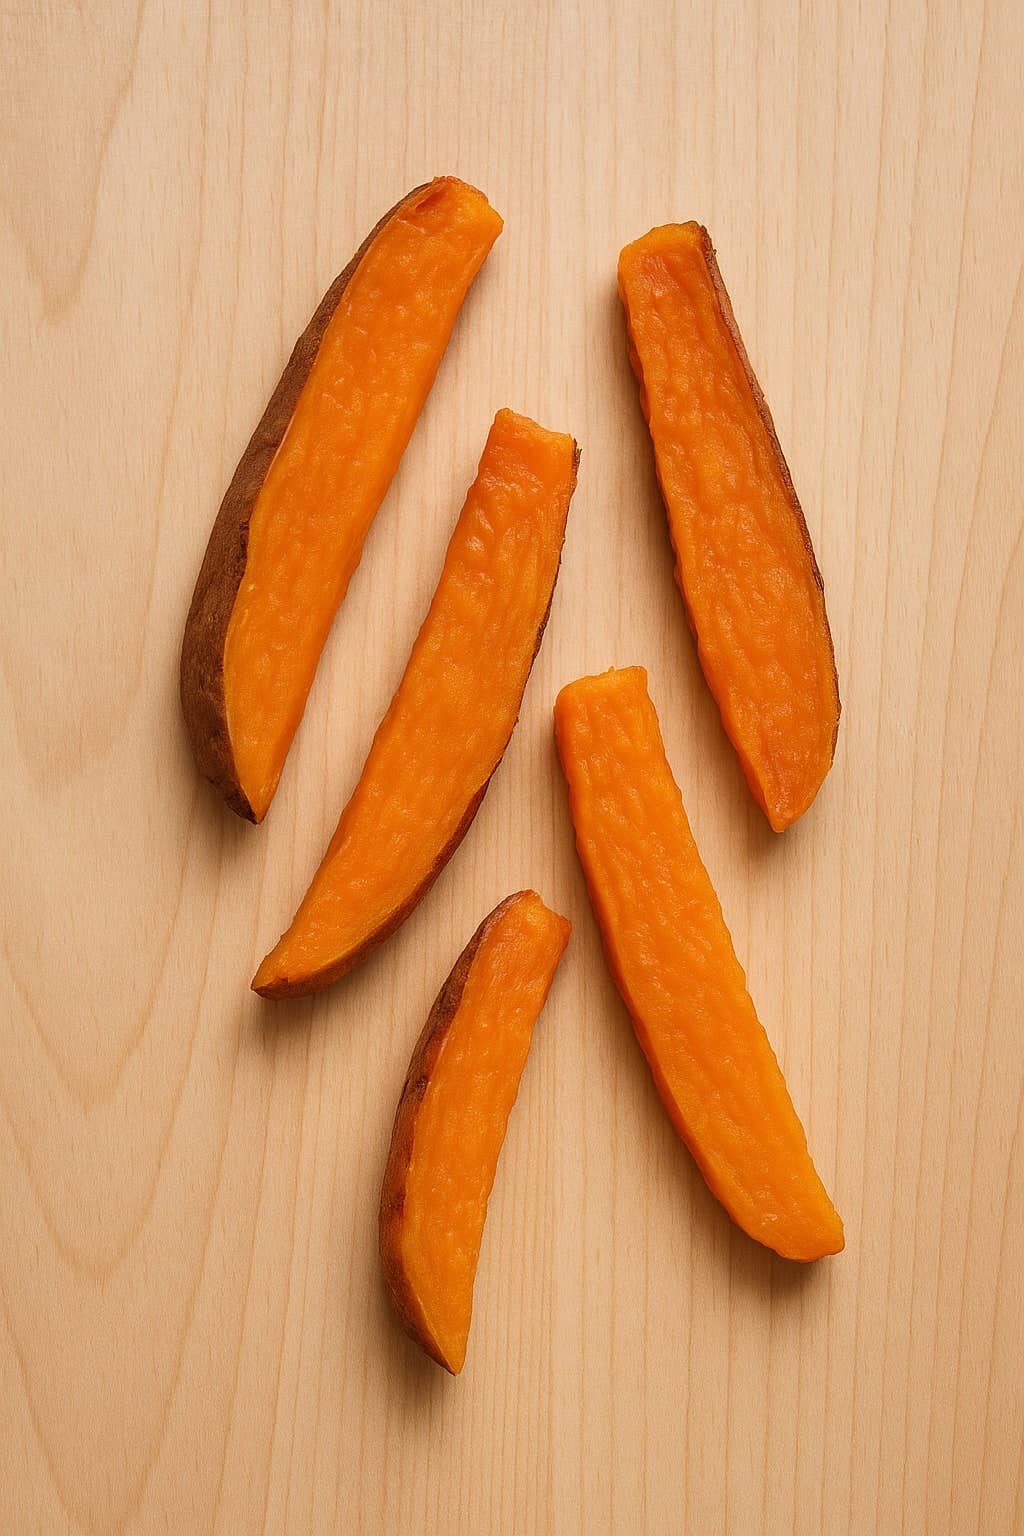
How to cut pumpkin for a 6 month old: At 6 months, babies use a whole-hand (palmar) grasp, so offer pumpkin in pieces large enough to grip with a bit sticking out of the fist. Cut peeled, cooked pumpkin into finger-length sticks or wedges about 5 to 6 cm long and 1.5 to 2 cm thick, roughly the size of an adult finger. Roast or steam until very soft, so it gives way easily when pressed. The piece should be tender enough to mash with gentle pressure but still hold its shape so your baby can self-feed. You can also load a small amount of pumpkin puree onto a pre-loaded spoon and hand it over. Avoid small chunks, cubes, or hard, undercooked pieces at this stage, and always remove the skin and any seeds or stringy pulp.
9–11 months
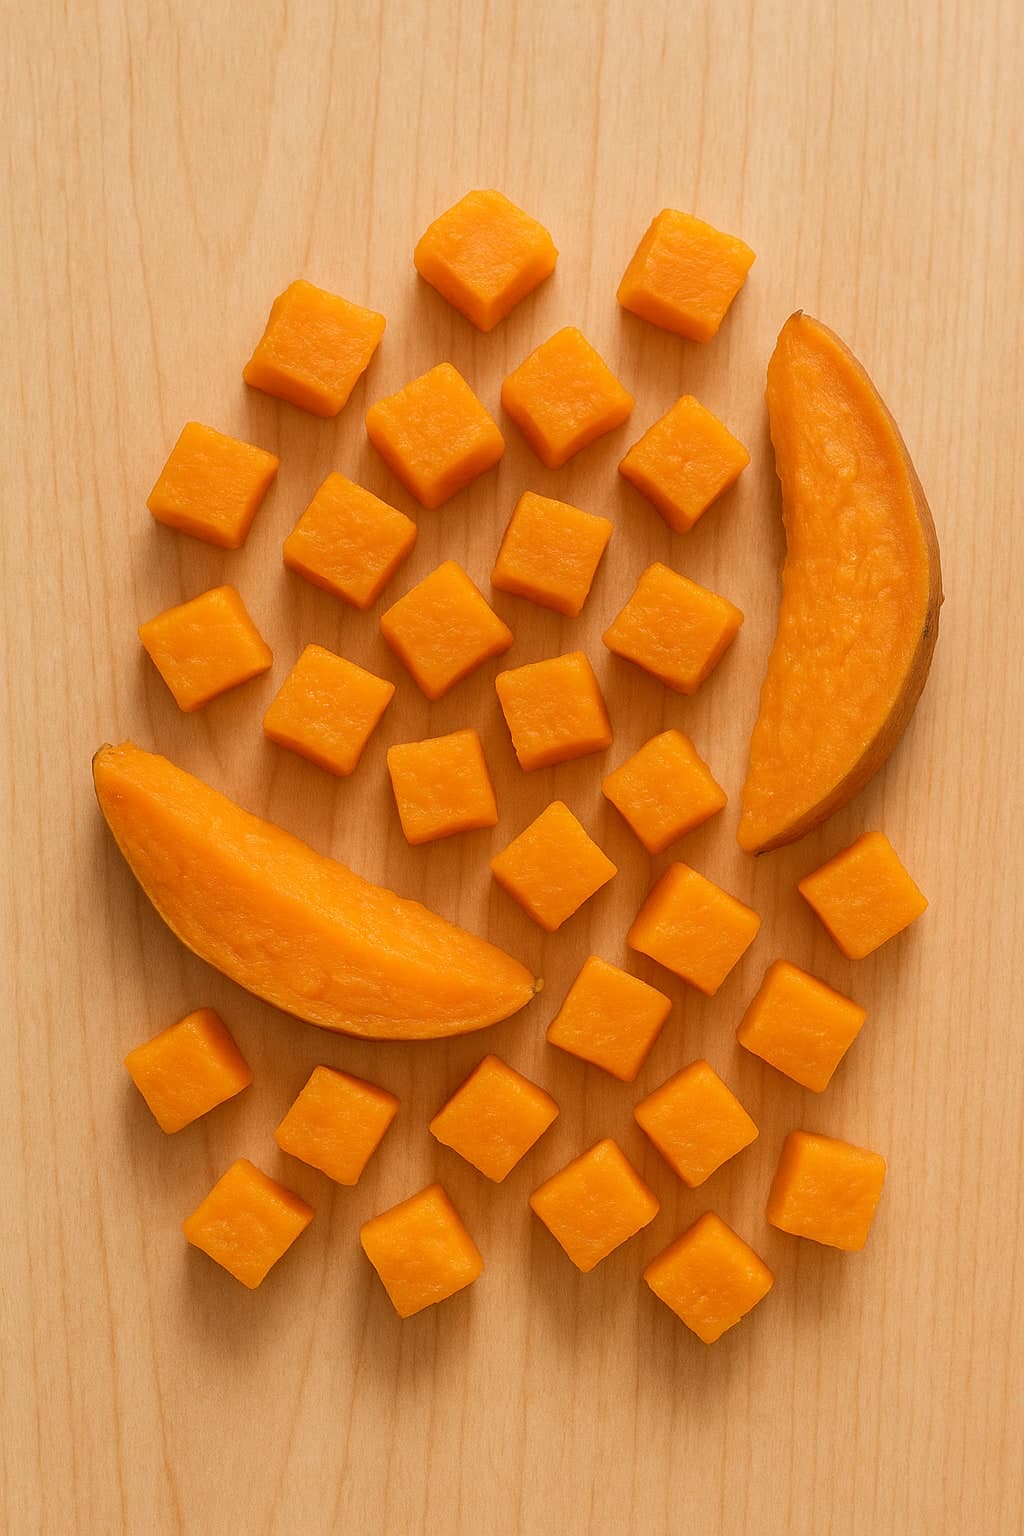
How to cut pumpkin for a 9 month old: By around 9 months, many babies are developing the pincer grasp and can pick up smaller pieces using the thumb and forefinger. Offer soft, cooked pumpkin cut into bite-size pieces about 1 to 1.5 cm, roughly the size of your fingernail. You can also continue offering thicker sticks if your baby still prefers to grab larger pieces, letting them practice biting and breaking off chunks. Keep the pumpkin cooked until soft and squishable, and stay nearby to supervise as your baby works on these smaller, more challenging shapes.
12+ months
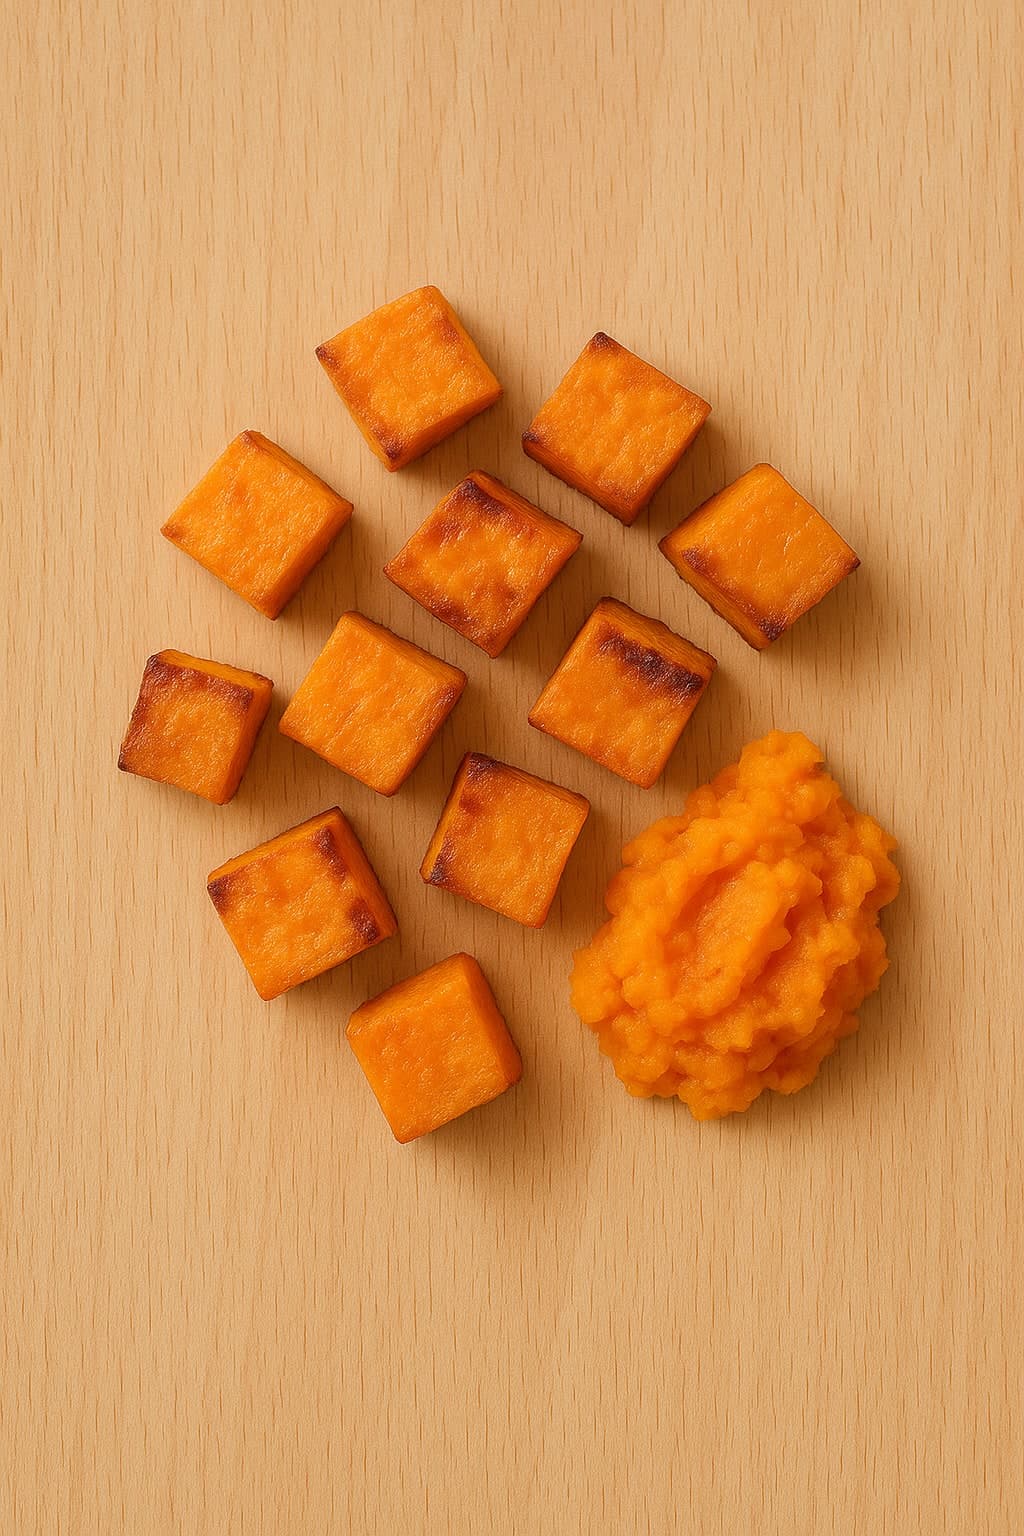
How to cut pumpkin for a 12 month old: At 12 months, most toddlers are confident self-feeders and can handle smaller bite-size portions. Cut soft, cooked pumpkin into pieces about 1 to 1.5 cm, similar to other diced foods on their plate. You can offer it roasted in cubes, mashed, or stirred into family meals. Continue to make sure pieces are soft and easy to chew, since molars are still coming in, and keep mealtimes seated and supervised so your toddler eats calmly rather than rushing.
How to Cut Beetroot for Baby
Read full cutting guide6–8 months
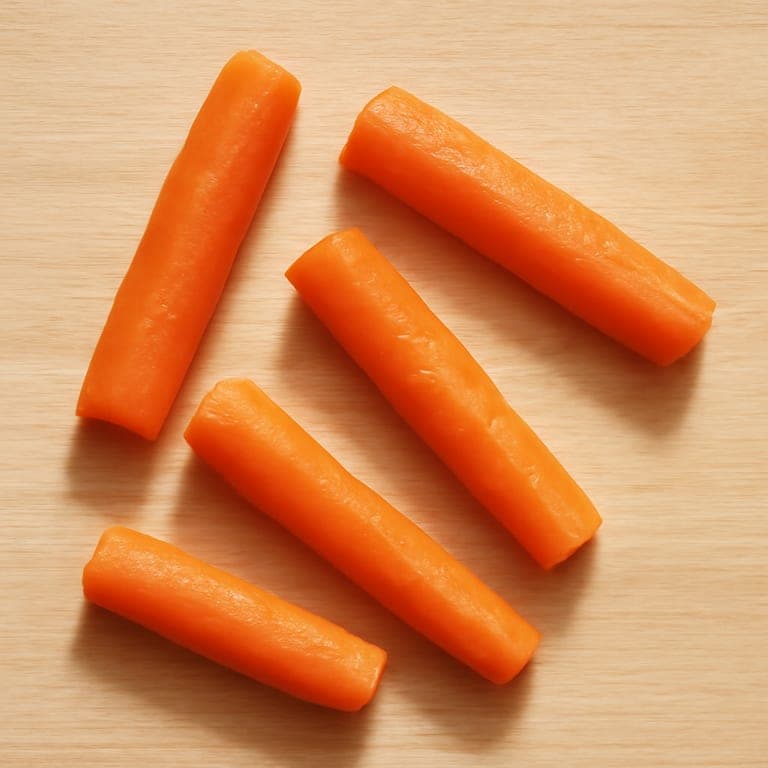
How to cut beetroot for a 6 month old: At 6 months, babies grasp food with the whole palm, so give them a piece big enough to hold with some sticking out of the fist. Cook beetroot until very soft (a fork should slide through with no resistance), then cut it into finger-length sticks about the size of an adult's finger: roughly 8 to 10 cm long and 1.5 to 2 cm wide. Lightly scoring the surface or leaving a slightly rough edge helps small hands grip the slippery, cooked surface. Avoid raw beetroot, hard or undercooked pieces, and small round chunks or coins at this stage, since firm, rounded shapes are a choking risk. Skip added salt, and remember the deep color will stain hands and clothes harmlessly.
9–11 months
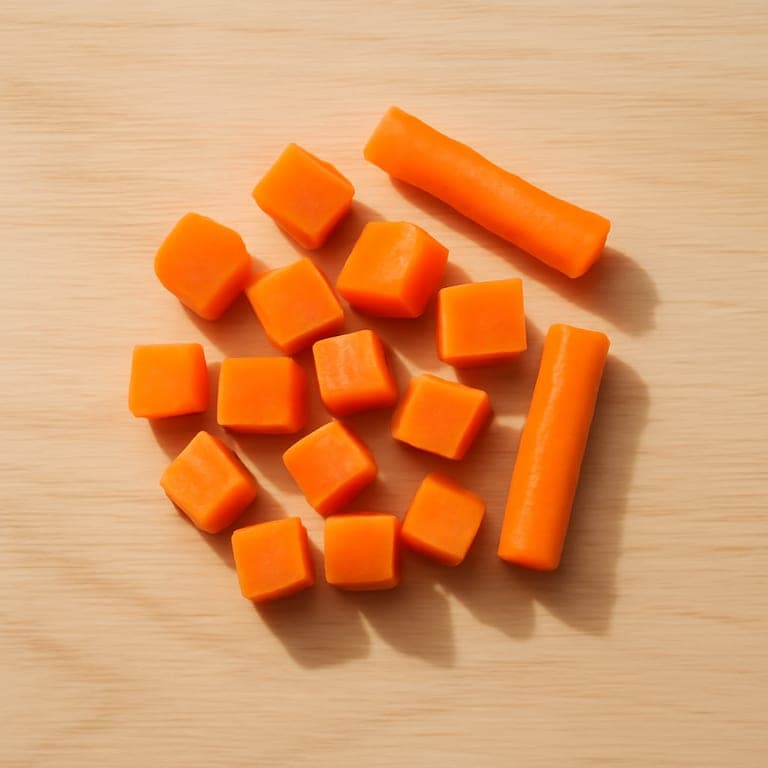
How to cut beetroot for a 9 month old: Around 9 months, many babies are developing the pincer grasp, picking up smaller items between thumb and forefinger. You can begin offering well-cooked beetroot in smaller pieces, such as bite-size cubes or short, thin sticks about 1 to 1.5 cm in size, while still keeping some longer finger-length strips on the tray for easy grabbing. Make sure each piece is soft enough to squash easily between your fingers, and avoid any firm, slippery rounds. Offering a mix of sizes lets your baby practice both raking and the new pincer grip at their own pace.
12+ months
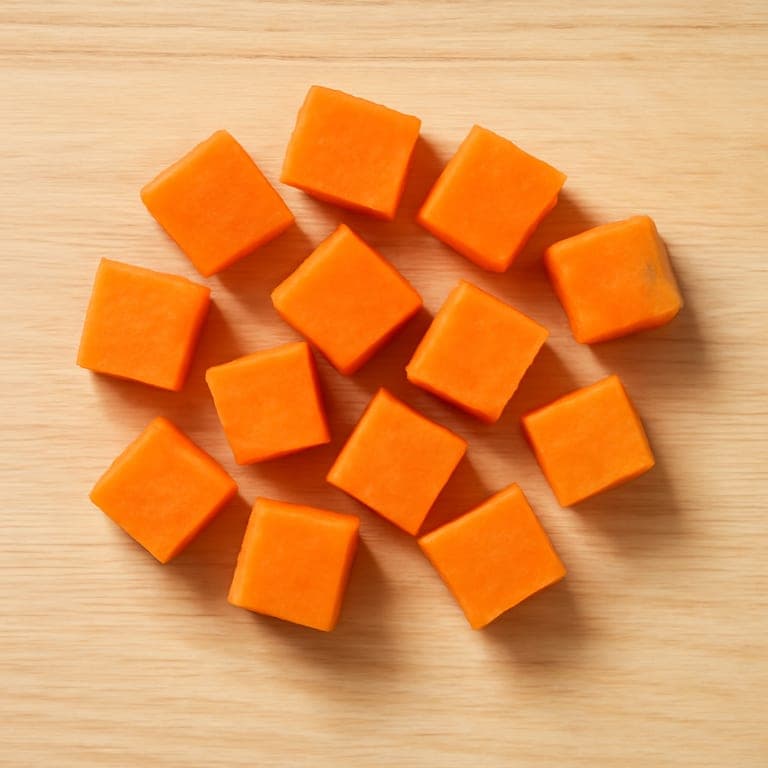
How to cut beetroot for a 12 month old: By 12 months, babies are usually skilled at self-feeding small pieces, so you can serve soft-cooked beetroot in bite-size cubes roughly 1 to 1.5 cm across, the same size you would offer most table foods. Continue to make sure each piece is tender and easy to mash with gentle pressure, and keep pieces small and not perfectly round to lower the choking risk. This is a great age to mix beetroot into family meals, like stirring soft cubes into grains or pasta, so your toddler eats what everyone else is having.
How to Cut Parsnip for Baby
Read full cutting guide6–8 months
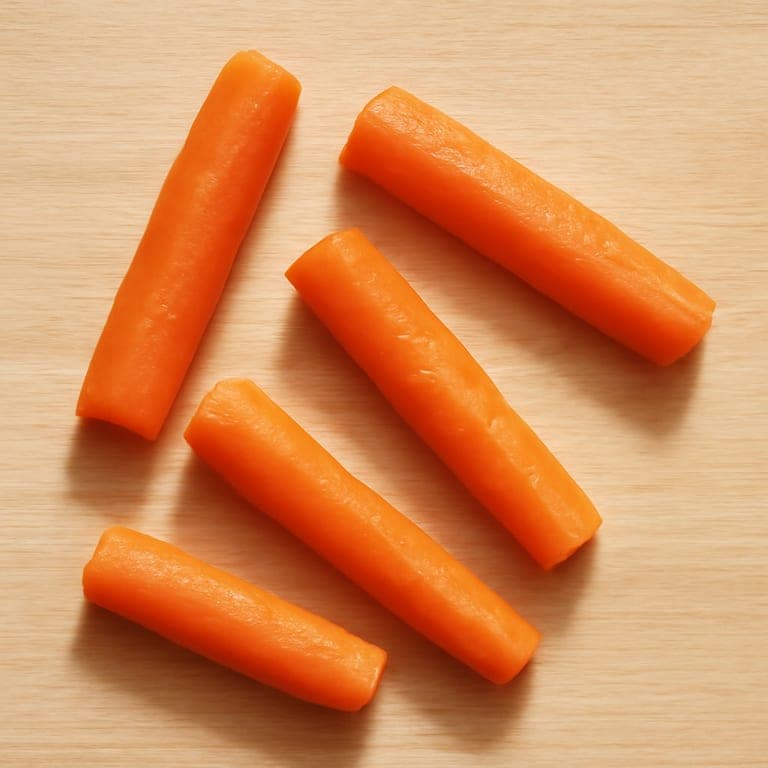
How to cut parsnip for a 6 month old: At 6 months, babies use a whole-hand (palmar) grasp, so offer parsnip in large pieces they can hold with some sticking out of the fist. Cut a peeled parsnip into thick finger-length batons, roughly 8 to 10 cm long and about 2 cm wide, then roast or steam them until completely soft and squishable between your finger and thumb. The piece should bend or give when pressed, not feel firm or crunchy. Avoid raw or undercooked parsnip, small coin-shaped slices, or any hard pieces, since these are choking hazards. If the cooked baton feels slippery, you can roll it in a little baby-safe flour, ground oats, or fine breadcrumbs to make it easier to grip.
9–11 months
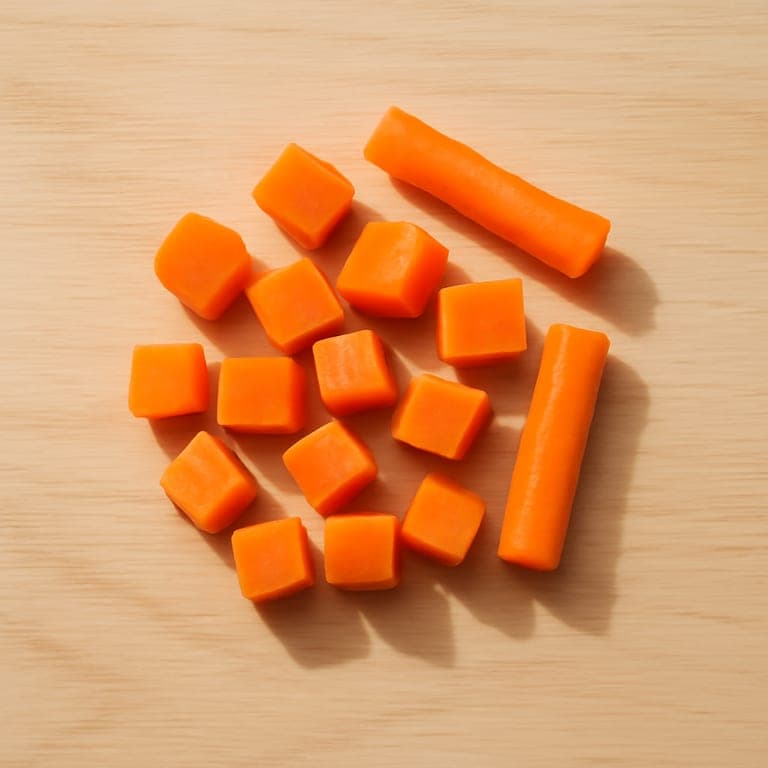
How to cut parsnip for a 9 month old: Around 9 months, many babies are developing the pincer grasp, picking up smaller items between thumb and forefinger. You can now offer smaller, soft-cooked pieces alongside the larger batons. Cut steamed or roasted parsnip into bite-size chunks about 1 to 1.5 cm, or into shorter, thinner sticks that are easy to pick up. Keep everything soft enough to squash easily, and continue to avoid firm or round pieces. Offering a mix of sizes lets your baby practice both grasping and self-feeding at their own pace.
12+ months
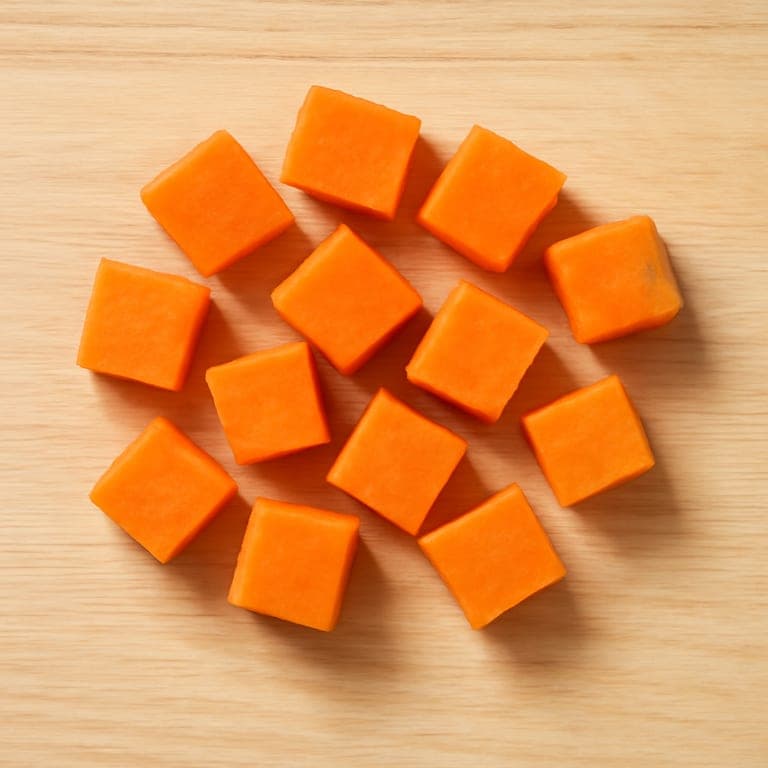
How to cut parsnip for a 12 month old: By 12 months, most toddlers can manage a wider range of textures and smaller pieces. Serve soft-cooked parsnip in bite-size pieces around 1 to 1.5 cm, such as small cubes, short sticks, or chunky mashed portions they can scoop. You can also offer parsnip as part of mixed dishes like mash, soups, or fritters. Keep pieces soft and appropriately small, avoid hard or raw parsnip, and continue to supervise every meal as your toddler builds confidence with self-feeding.
How to Cut Eggplant for Baby
Read full cutting guide6–8 months
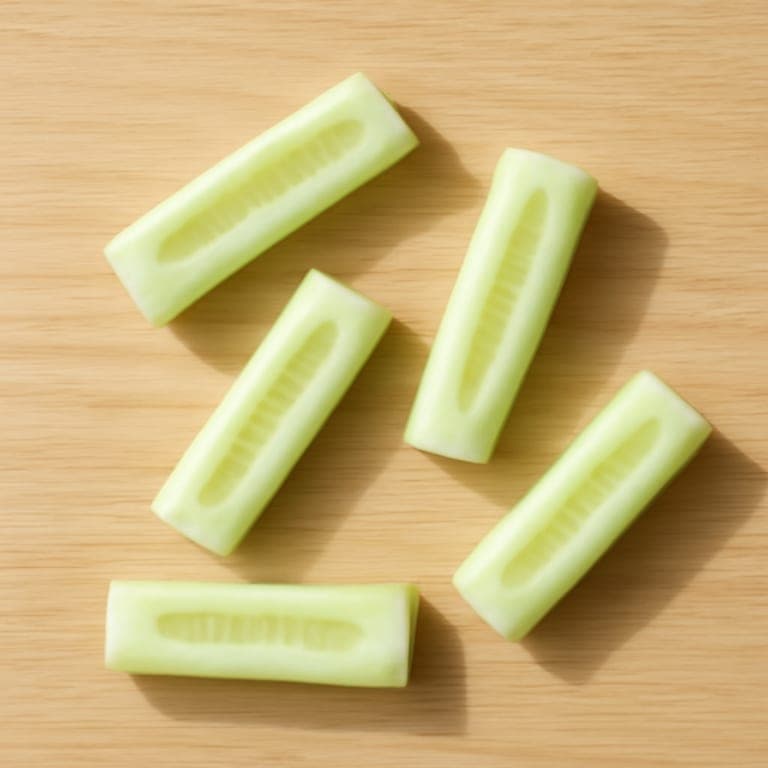
How to cut eggplant for a 6 month old: At 6 months, babies grab food with their whole fist, so offer eggplant in long, finger-shaped pieces they can hold with part sticking out above their grip. Cut a cooked eggplant into wedges or batons about the length of an adult finger, roughly 8 to 10 cm long and 2 cm wide, leaving the soft skin on one side to give little hands something to grip while the exposed flesh stays easy to gnaw. Roast, steam, or braise the pieces until they are very soft and yield easily when pressed, so your baby can mash them with their gums. Avoid small cubes, coins, or bite-size chunks at this age, since round or small pieces are harder to manage and can be a choking hazard, and skip any raw or firm, undercooked eggplant.
9–11 months
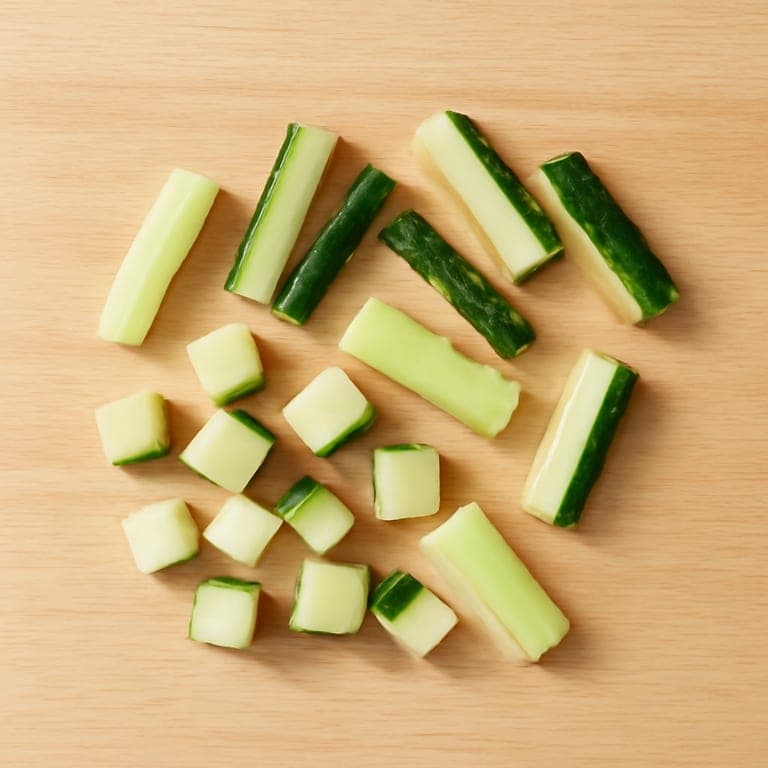
How to cut eggplant for a 9 month old: Around 9 months, many babies are developing a pincer grasp, picking up smaller items between thumb and finger, so you can begin offering smaller pieces alongside the finger-sized batons. Cut soft, cooked eggplant into bite-size pieces roughly 1 to 1.5 cm across, or into shorter strips, making sure each piece is still soft enough to squish between your fingers. You can offer a mix of sizes so your baby can practice both raking and pinching. Continue to cook the eggplant until tender, and remove any especially tough skin if it seems hard for your baby to chew.
12+ months
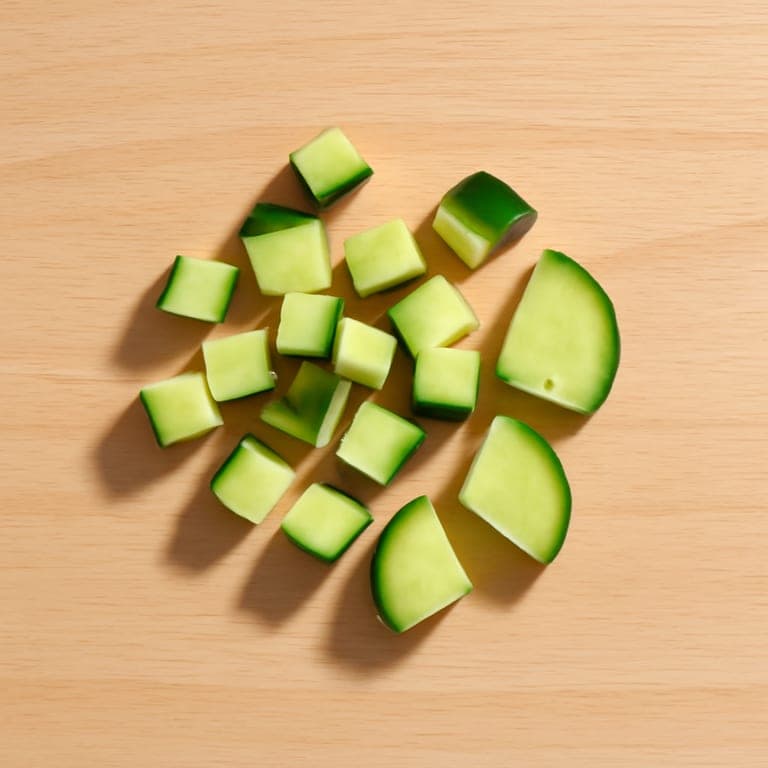
How to cut eggplant for a 12 month old: By 12 months, most toddlers are handling a wider variety of textures and can manage smaller, bite-size pieces well. Cut cooked eggplant into pieces about 1 to 1.5 cm in size, or into short, soft strips your toddler can pick up and feed themselves. The eggplant should still be cooked until soft and tender, but you can experiment with more texture and flavor, such as lightly roasted cubes or eggplant folded into family meals. Keep offering a variety of shapes so your toddler keeps building their chewing and self-feeding skills.
How to Cut Cherries for Baby
Read full cutting guide6–8 months
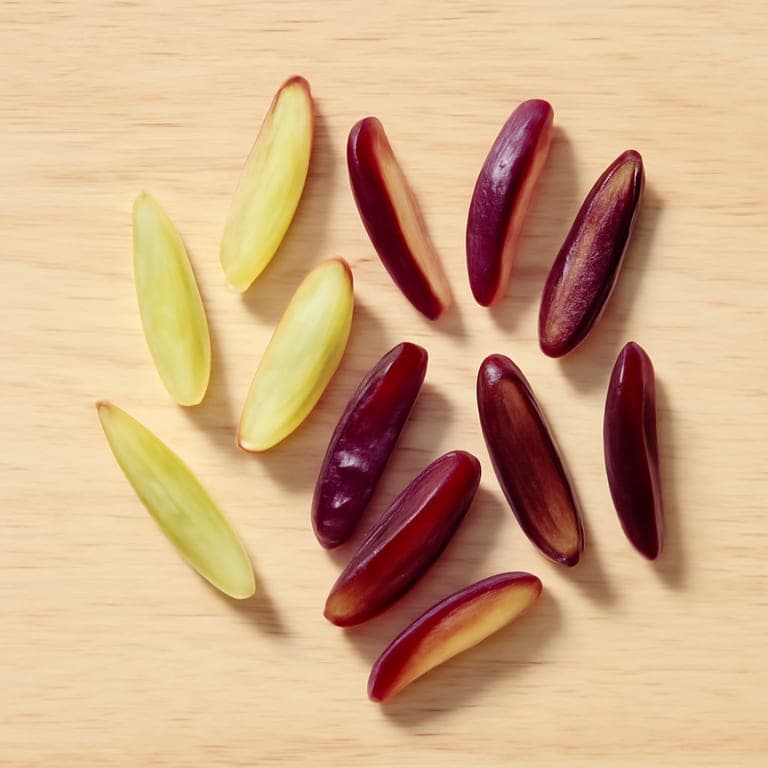
How to cut cherries for a 6 month old: At 6 months, choose soft, ripe cherries and always remove the pit and stem first. Slice each pitted cherry in half, then flatten or gently smash each half so it is no longer round and springy; a round or whole cherry is a choking hazard and should never be offered. You can also mash the flesh and smear it onto a preloaded spoon, swirl it into yogurt or oatmeal, or mix it into a puree. The aim at this age is soft, squishable pieces with no firm skin chunks or rounded shapes that could block the airway. Skip dried cherries, cherry pits, and anything you cannot easily mash between two fingers.
9–11 months
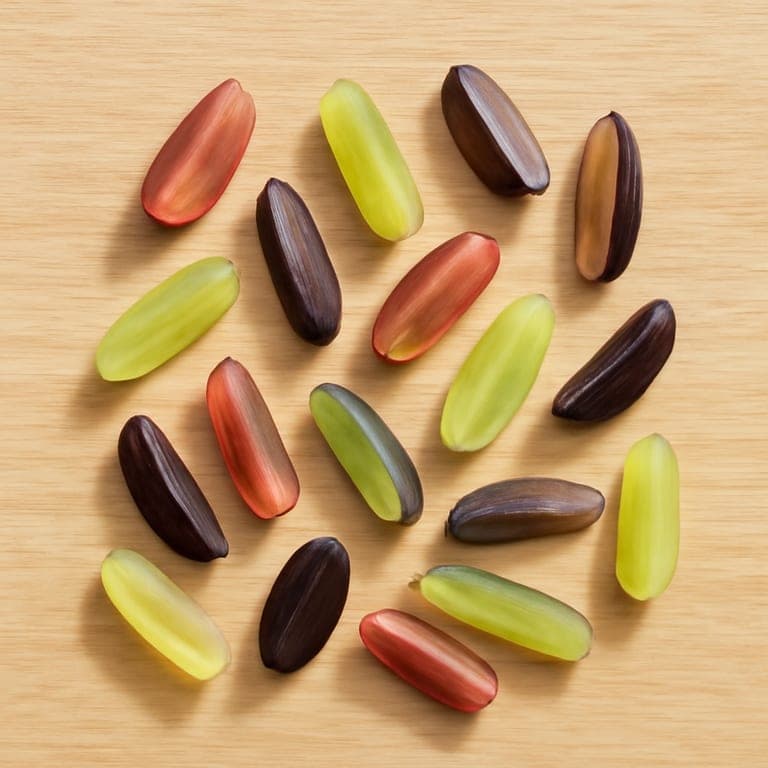
How to cut cherries for a 9 month old: By 9 months many babies are developing the pincer grasp, picking up smaller pieces between thumb and finger. Continue to pit and stem every cherry, then cut each one into small pea-size pieces, roughly 0.5 cm, so there is no rounded whole shape left to choke on. Soft, ripe flesh is best because it gives way easily if a piece is swallowed before it is fully chewed. If your baby is still getting the hang of small pieces, you can keep offering smashed halves or a thick cherry mash alongside the bite-size bits while those fine motor skills sharpen.
12+ months
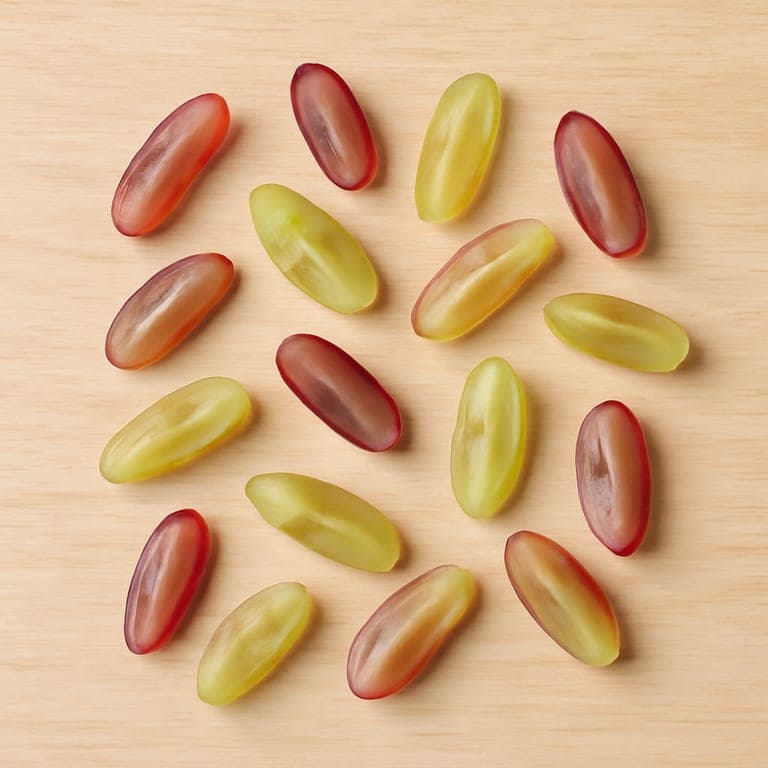
How to cut cherries for a 12 month old: At 12 months, most toddlers can handle bite-size pieces, but cherries still need attention because of their round shape. Always pit and stem the cherry, then cut it into quarters or small pieces no larger than about 1 cm so nothing stays whole and rounded. Stay nearby and keep mealtimes calm and seated, since active or distracted eating raises choking risk at this age. As your toddler chews well and confidently, you can gradually offer slightly larger pieces, but keep avoiding whole cherries and never serve one with the pit still inside.
How to Cut Papaya for Baby
Read full cutting guide6–8 months
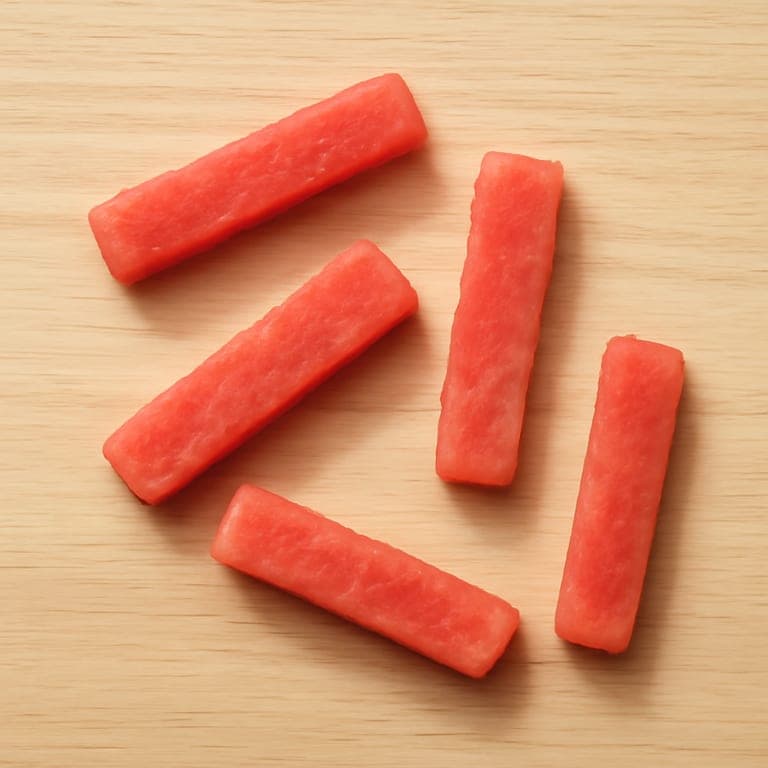
How to cut papaya for a 6 month old: At 6 months, babies grasp food with their whole palm, so offer papaya in pieces big enough to hold with a bit sticking out of the fist. Cut a ripe, peeled, deseeded papaya into long wedges or spears about the length and width of an adult finger, roughly 8 to 10 cm long and 2 to 3 cm thick. Leaving a little of the firmer flesh near the skin can help the spear hold its shape so it does not turn to mush before your baby gets it to their mouth. Avoid small chunks, cubes, or any seeds at this stage, since these are harder to pick up and can be a choking risk. Always remove the black seeds and the skin before serving.
9–11 months
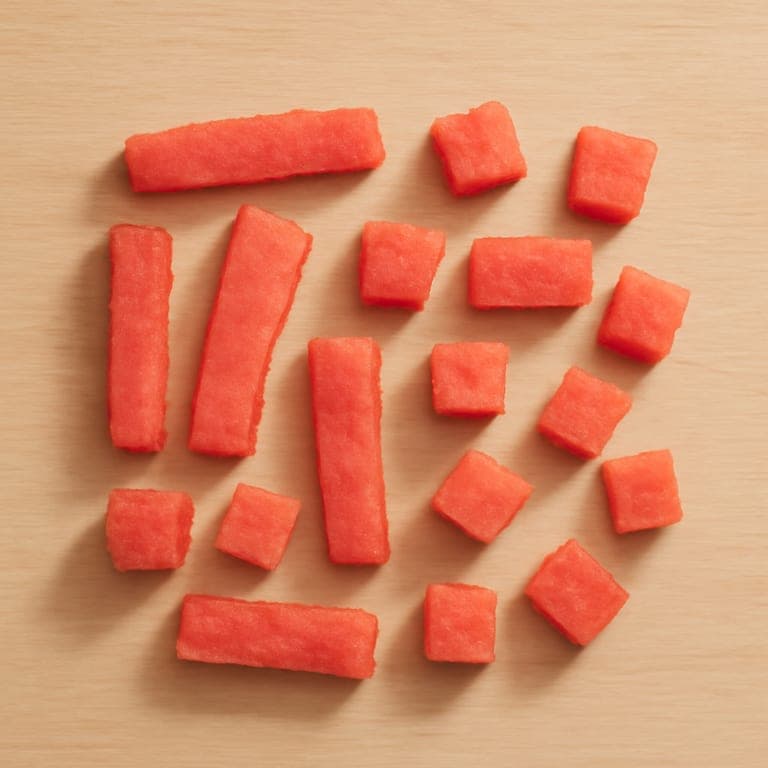
How to cut papaya for a 9 month old: Around 9 months, many babies are developing the pincer grasp, the ability to pick up smaller pieces between thumb and forefinger. You can start offering papaya in smaller pieces about 1 to 2 cm in size, roughly the size of your fingertip. Because ripe papaya is so soft, these little pieces are easy to gum and swallow. Keep some larger spears available too, since babies often move between sizes as they practice. Continue to remove all seeds and skin, and offer pieces one or two at a time so your baby is not tempted to stuff their mouth.
12+ months
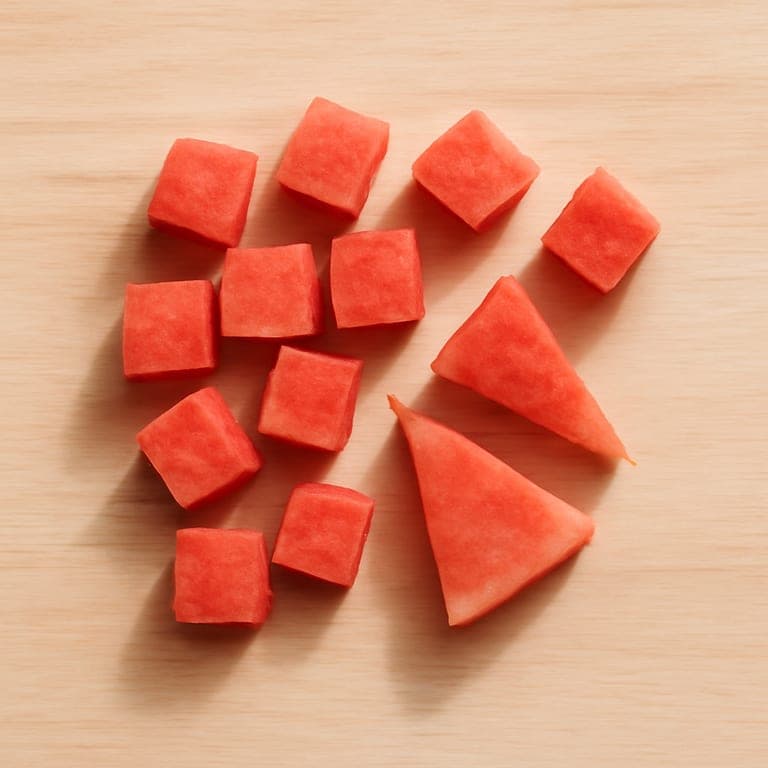
How to cut papaya for a 12 month old: By 12 months, most toddlers handle bite-size food well and enjoy feeding themselves. Cut ripe papaya into small cubes about 1 to 1.5 cm, an easy bite-size that fits their growing skills. You can serve these loose on the tray, mixed into yogurt, or offered on a preloaded spoon. Stay nearby while your toddler eats, encourage them to take one piece at a time, and keep removing all seeds and skin before serving.
How to Cut Zucchini for Baby
Read full cutting guide6–8 months
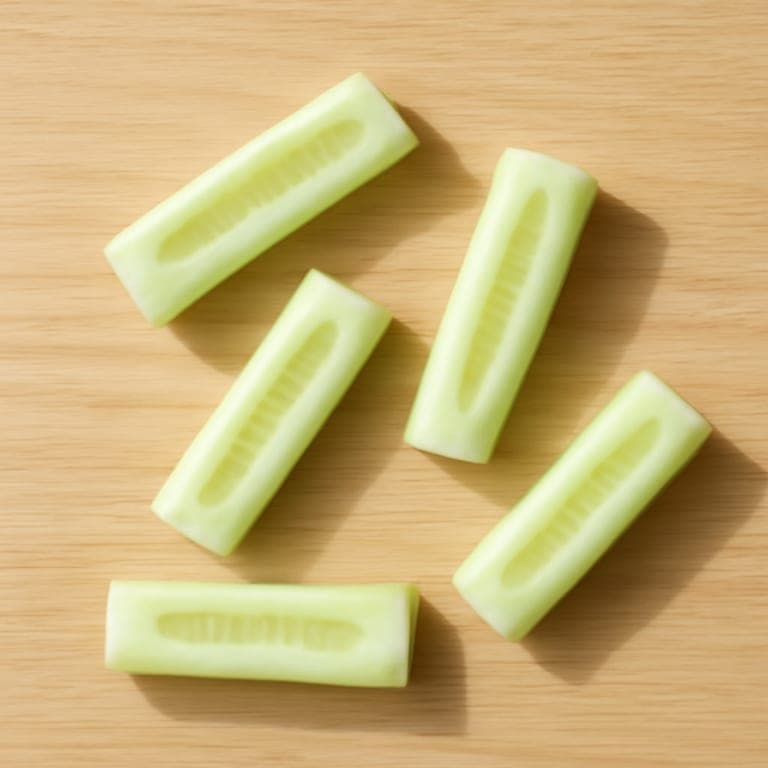
How to cut zucchini for a 6 month old: At 6 months, babies grab food with their whole palm, so offer zucchini in long, finger-shaped sticks that stick out above the fist. Cut a zucchini into batons about 8 to 10 cm long and 1.5 to 2 cm thick, leaving the soft skin on for grip. Steam or roast the sticks until they are soft enough to squish easily between your finger and thumb, which makes them gummable and safe. Avoid serving raw zucchini at this age, since it is firm and harder to manage, and skip small rounds, coins, or bite-size cubes, which are a choking risk for babies who cannot yet pick up and control little pieces.
9–11 months
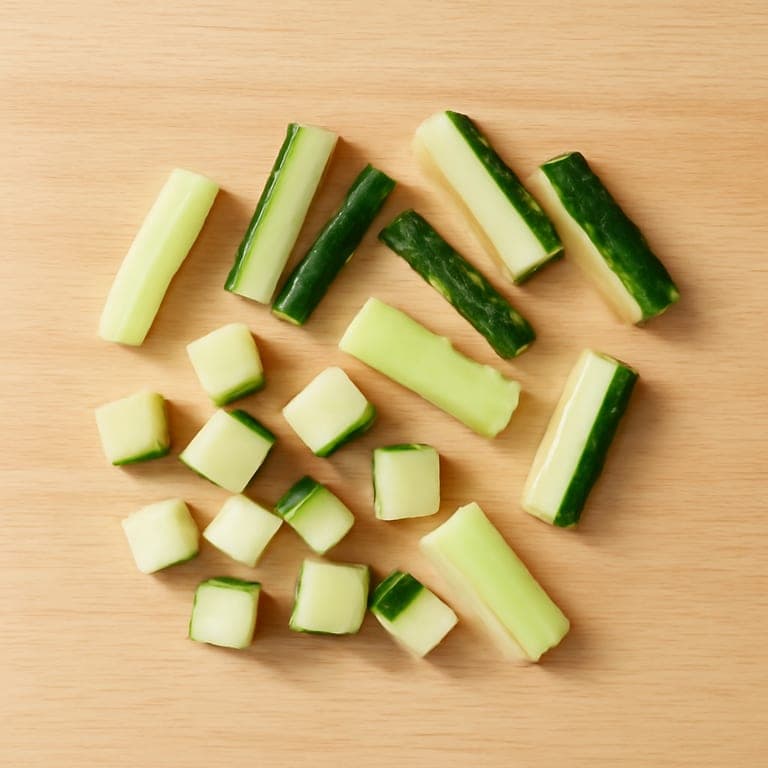
How to cut zucchini for a 9 month old: Around 9 months, many babies are developing the pincer grasp, using thumb and forefinger to pick up smaller pieces. You can now offer cooked zucchini in smaller bite-size pieces about 1 to 1.5 cm, roughly the size of your fingertip. Keep the zucchini soft by steaming or roasting so each piece squishes easily, and offer a mix of small pieces and a few longer sticks as your baby practices both grasping and self-feeding. Continue to avoid hard, raw, or rounded coin-shaped slices.
12+ months
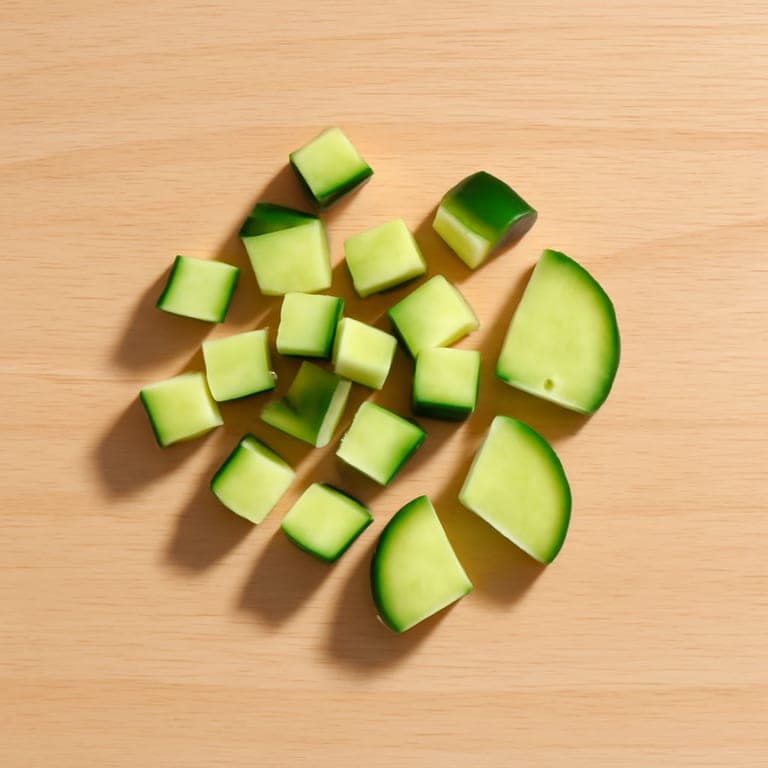
How to cut zucchini for a 12 month old: By 12 months, most toddlers can handle small, soft pieces and are getting better at chewing. Offer cooked zucchini in bite-size pieces about 1 to 1.5 cm, halved or quartered as needed so nothing is round enough to block the airway. You can serve it in stir-fries, mixed into pasta, or alongside other finger foods. Keep pieces soft and small, supervise every meal, and continue to skip large chunks and firm raw zucchini until your child chews confidently.
How to Cut Potato for Baby
Read full cutting guide6–8 months
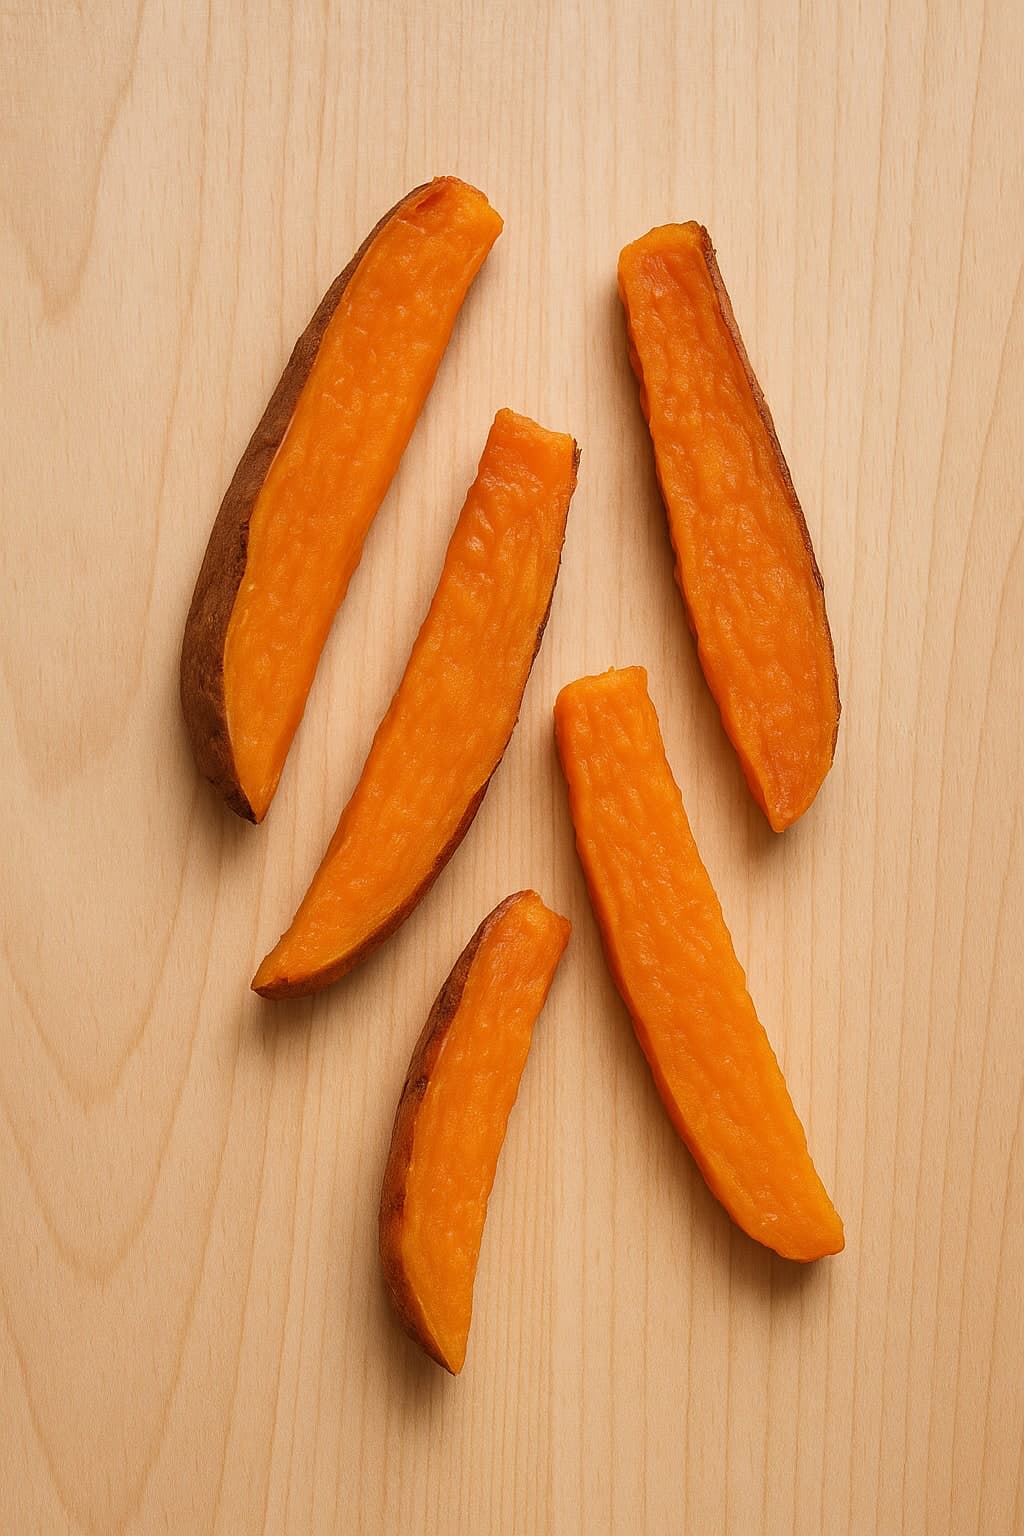
How to cut potato for a 6 month old: At 6 months, babies use a whole-hand (palmar) grasp, so they need pieces big enough to grab with a bit sticking out of the fist. Cook potato until very soft, then cut peeled potato into finger-shaped sticks about the size of an adult's finger, roughly 6 to 8 cm long and 1.5 to 2 cm thick. Soft wedges work well too. The potato should be tender enough to squish easily between your finger and thumb, so it gently mashes in baby's mouth. You can also serve a scoopable mound of unseasoned mashed potato, lightly thinned with breast milk, formula, or water, and preloaded onto a spoon. Avoid small cubes, coins, and round chunks at this age, since they are easy to choke on, and skip any hard, crispy, or undercooked pieces.
9–11 months
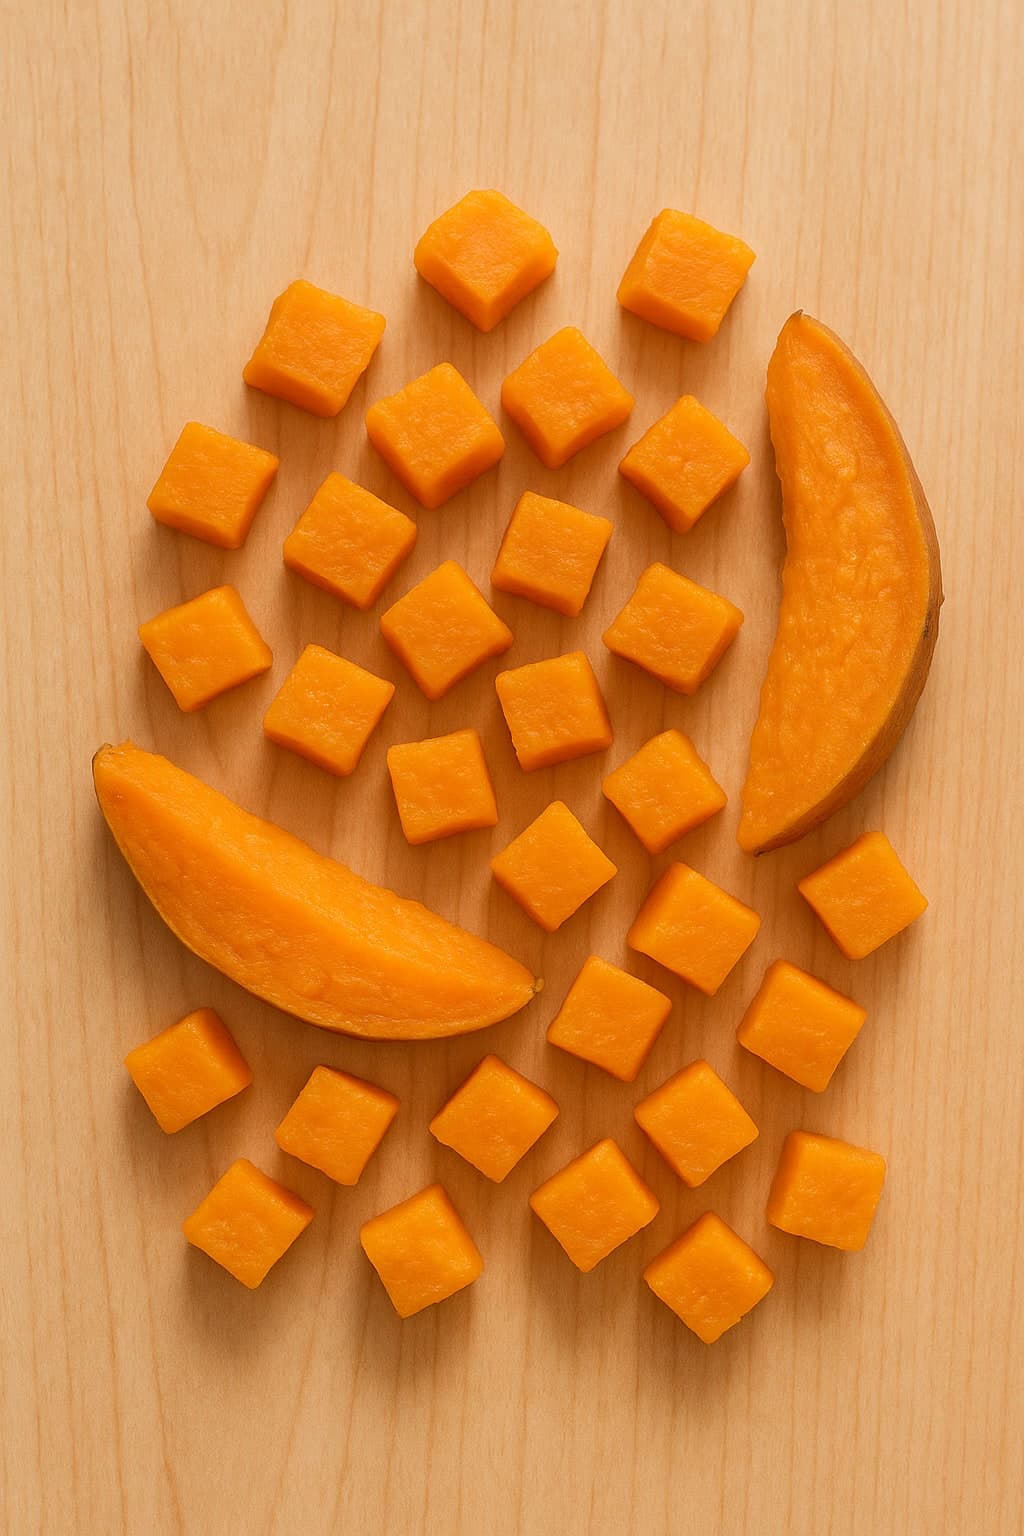
How to cut potato for a 9 month old: Around 9 months, many babies develop the pincer grasp and can pick up smaller pieces between thumb and forefinger. You can now offer soft potato in smaller bite-size pieces, roughly 1 to 1.5 cm, such as small soft cubes or torn pieces of cooked potato, alongside the finger-length sticks your baby may still prefer. Keep everything fork-soft and squishable, watch the size so pieces are easy to gum, and continue to avoid hard, crunchy, or fried potato.
12+ months
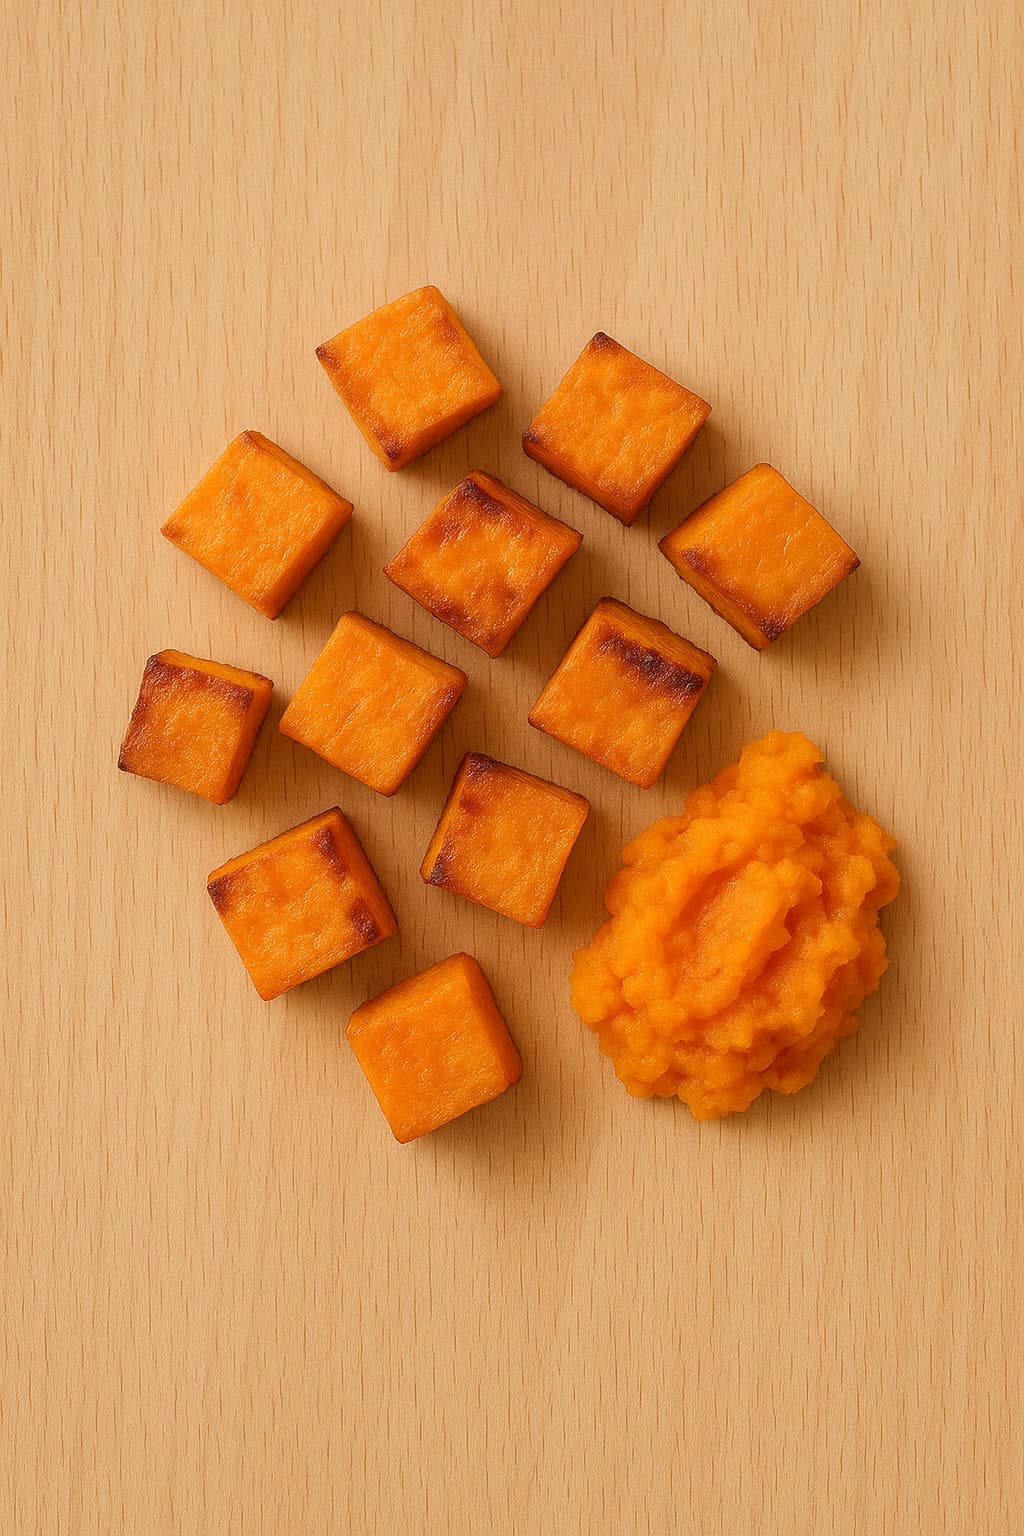
How to cut potato for a 12 month old: By 12 months, most toddlers handle a wider range of textures and self-feed more confidently. Serve soft potato in bite-size pieces about 1 to 1.5 cm, like small cubes, soft wedges, or chunks of baked potato with the skin removed or very soft. Lightly seasoned family-style potato dishes are usually fine now if low in salt. Keep pieces soft and small, avoid whole or large firm chunks, and always supervise meals while your toddler is eating.
How to Cut Bell pepper for Baby
Read full cutting guide6–8 months
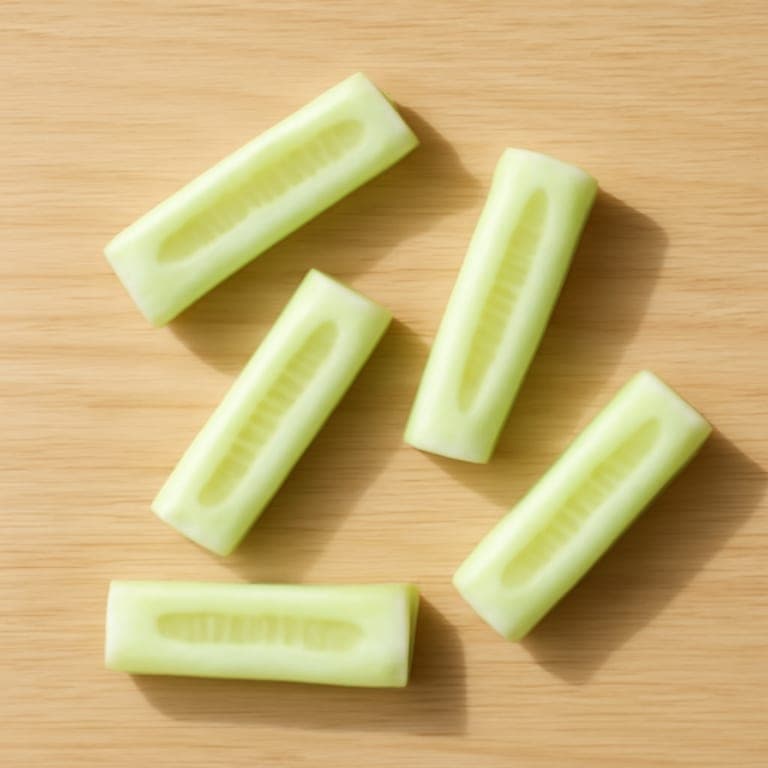
How to cut bell pepper for a 6 month old: At 6 months, serve bell pepper roasted, steamed, or sautéed until very soft, and remove the slippery skin once it is cooked since the peel can be tough and hard to gum. Cut the softened pepper into long strips about the length and width of an adult finger, roughly 8 to 10 cm long and 1.5 to 2 cm wide, so your baby can grasp one end while the other end sticks out of a closed fist. This shape is ideal for a palmar grasp at this age. Avoid serving raw bell pepper, thin or small pieces that could be inhaled, and any large chunks of leftover skin. Always remove the seeds and the white pith, and make sure each piece is soft enough to squish easily between your fingers before serving.
9–11 months
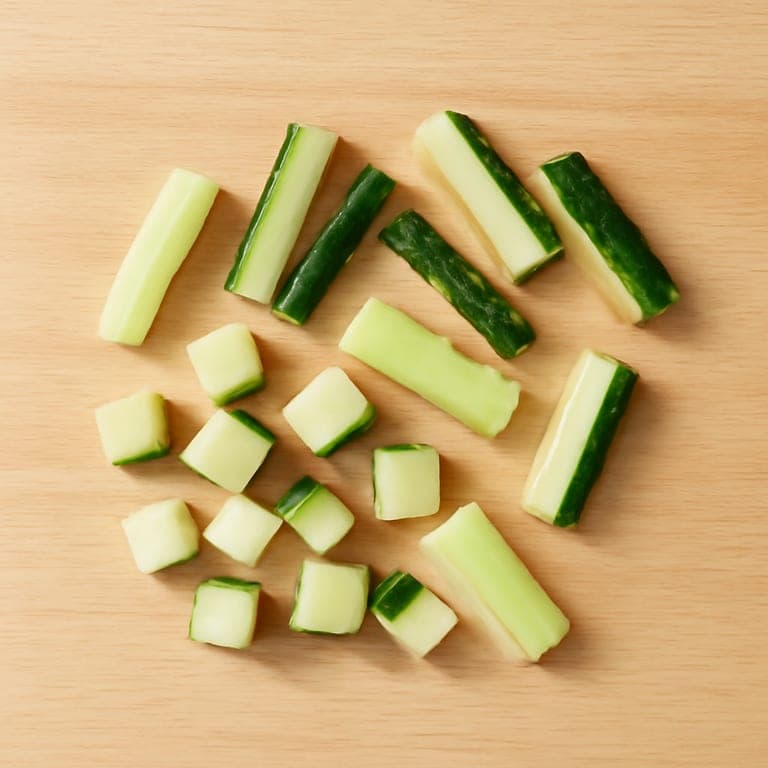
How to cut bell pepper for a 9 month old: Around 9 months, many babies are developing a pincer grasp and can pick up smaller pieces with their thumb and forefinger. You can offer cooked bell pepper in smaller strips or in pieces about 1 to 1.5 cm in size, still soft enough to mash with gentle pressure. If your baby is chewing well, you can begin leaving the skin on softer cooked pieces, but watch how they handle it and peel it off if it seems too chewy. Continue to avoid raw, firm pieces and anything round or hard. Offering a mix of finger-length strips and bite-size pieces helps your baby practice both grasping and self-feeding skills.
12+ months
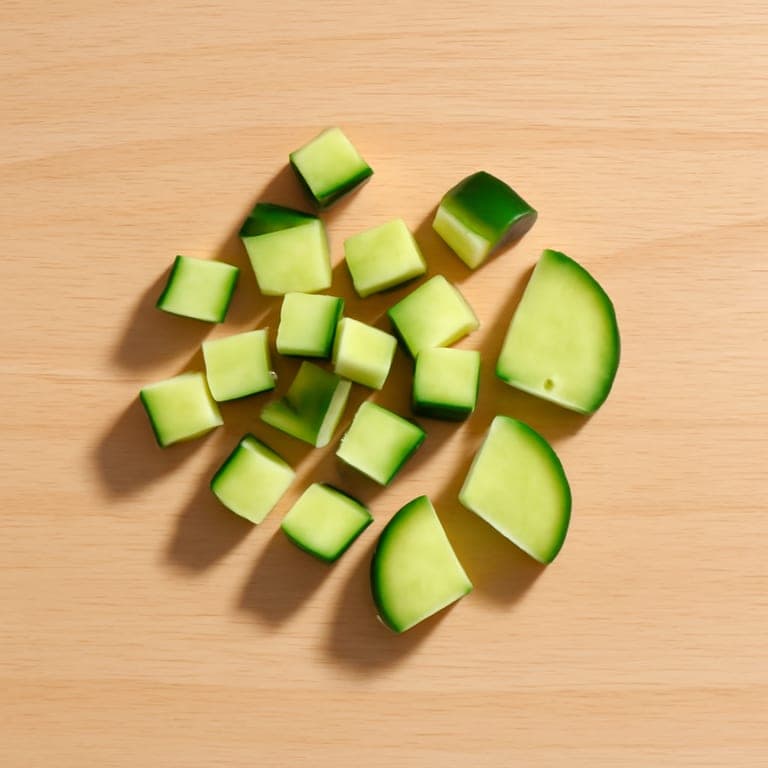
How to cut bell pepper for a 12 month old: By 12 months, most toddlers can handle bite-size pieces and a wider range of textures. Cut cooked or tender-crisp bell pepper into small pieces roughly 1 to 1.5 cm across, which are easy to pick up and chew. You can begin to offer thin strips of raw bell pepper if your child is chewing confidently, but keep raw pieces small and thin since the skin is firm, and always supervise. Continue to remove any tough skin that does not soften and stay nearby while your toddler eats. As always, serve bell pepper seated and never while your child is walking, playing, or in a moving car.
How to Cut Melon for Baby
Read full cutting guide6–8 months
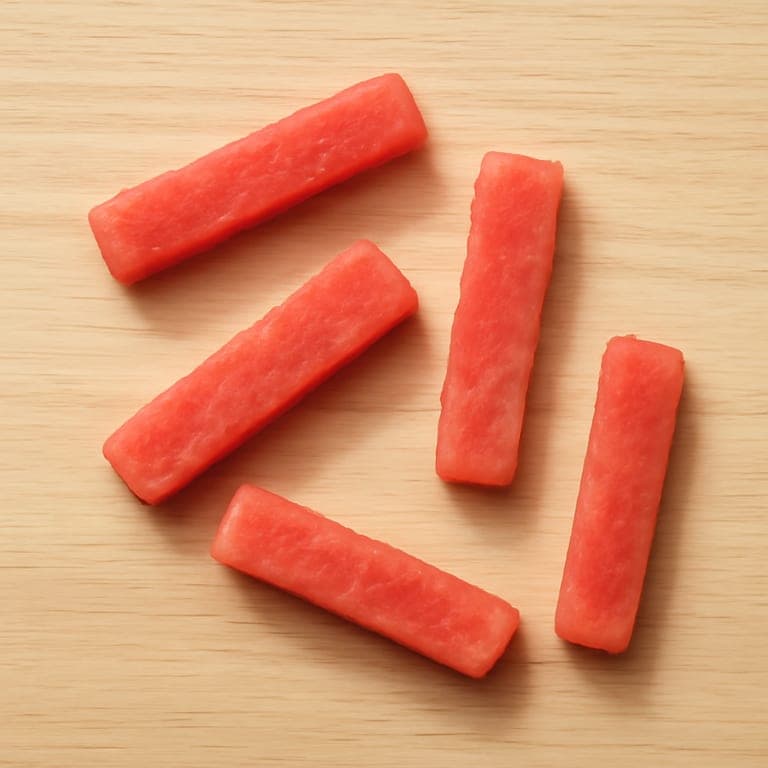
How to cut melon for a 6 month old: At 6 months, babies use a whole-hand (palmar) grasp, so cut melon into long, finger-shaped spears about the length and width of an adult finger, roughly 8 to 10 cm long and 1.5 to 2 cm thick. This lets your baby hold the spear in their fist while gnawing on the top portion that sticks out. Make sure the melon is very ripe and soft so it gives way easily against the gums. Remove all rind, which is too firm to chew, and scoop out every seed. Because ripe melon can be slippery, leaving a little texture on the surface or rolling the spear in infant cereal helps your baby keep a grip. Avoid small chunks, cubes, or bite-size pieces at this stage, since they are easy to swallow whole and raise the choking risk.
9–11 months
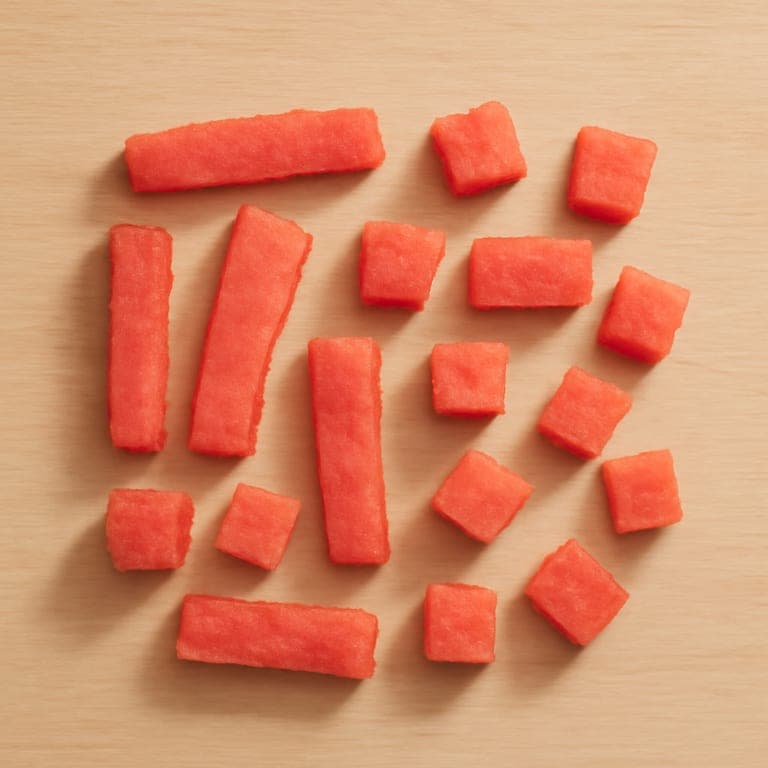
How to cut melon for a 9 month old: Around 9 months, many babies are developing the pincer grasp, picking up smaller items between thumb and forefinger. You can begin offering smaller pieces of soft, ripe melon, such as bite-size cubes about 1 to 1.5 cm, or thinner short strips that are easy to pick up. You may still offer larger spears alongside the smaller pieces, since some babies go back and forth as they practice. Keep the melon soft enough to squish between your fingers, remove all rind and seeds, and watch as your baby learns to manage the new shapes. A light dusting of cereal or coconut can still help with slippery pieces.
12+ months
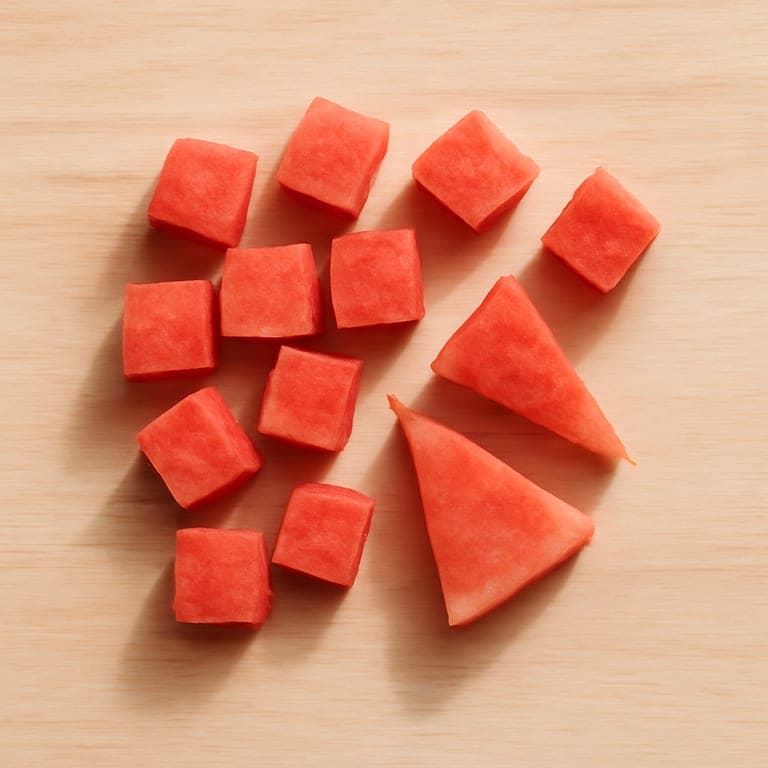
How to cut melon for a 12 month old: By 12 months, most toddlers can handle a variety of bite-size pieces and are chewing more confidently. Cut ripe melon into small, manageable cubes or short sticks roughly 1.5 cm in size, small enough to chew and swallow safely but large enough to pick up easily. Continue to remove all rind and seeds, and keep choosing soft, ripe melon over firm pieces. Stay close and watch while your toddler eats, and encourage them to take one piece at a time rather than stuffing several into their mouth at once.
How to Cut Blackberries for Baby
Read full cutting guide6–8 months
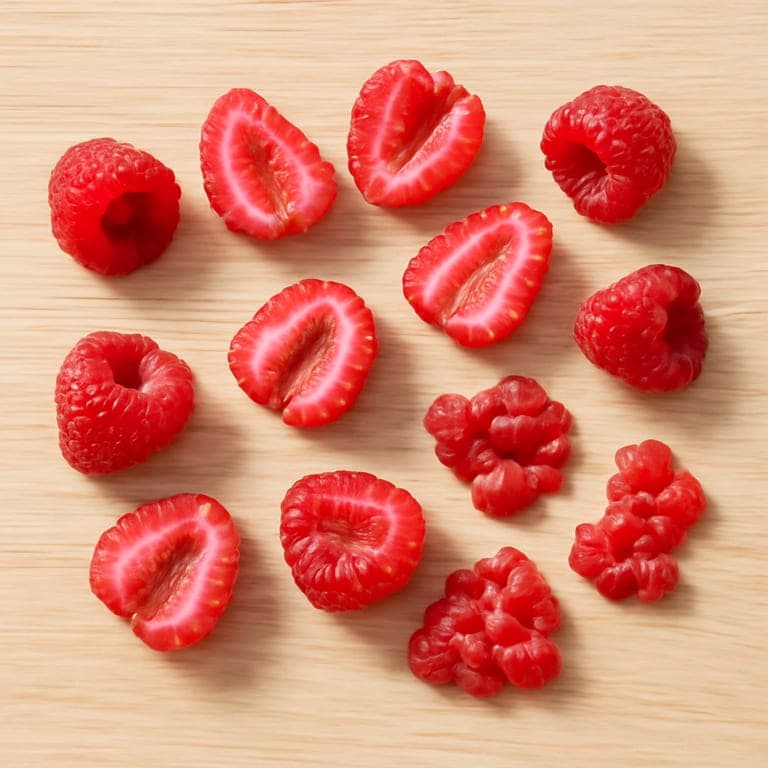
How to cut blackberries for a 6 month old: At 6 months, babies use a whole-hand (palmar) grasp and are still learning to manage food, so make blackberries as flat and graspable as possible. Choose ripe, very soft berries and cut each one lengthwise into halves or quarters, roughly the size of an adult fingertip (about 1 to 1.5 cm pieces), then gently flatten or smash each piece between your fingers so it is squishable and not round. You can also mash blackberries into a thick puree or stir them into yogurt or oatmeal, which is a great low-mess way to introduce the flavor. Avoid serving whole blackberries, and skip any firm, underripe, or seedy-hard berries, since their round shape and size are a choking risk at this stage.
9–11 months
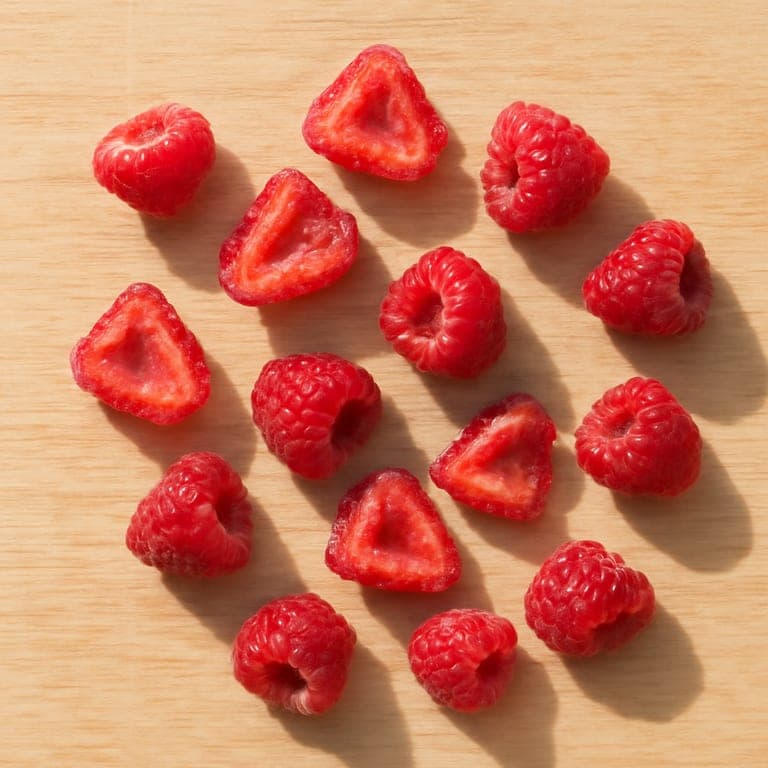
How to cut blackberries for a 9 month old: Around 9 months, many babies develop the pincer grasp, picking up small pieces between thumb and forefinger, so you can offer smaller bits. Cut soft, ripe blackberries into quarters or small pea-size pieces (about 0.5 to 1 cm) and lightly smash any that still feel firm so they squish easily. Watch your baby eat, encourage them to pick up pieces themselves, and keep avoiding whole berries until your child is chewing confidently.
12+ months
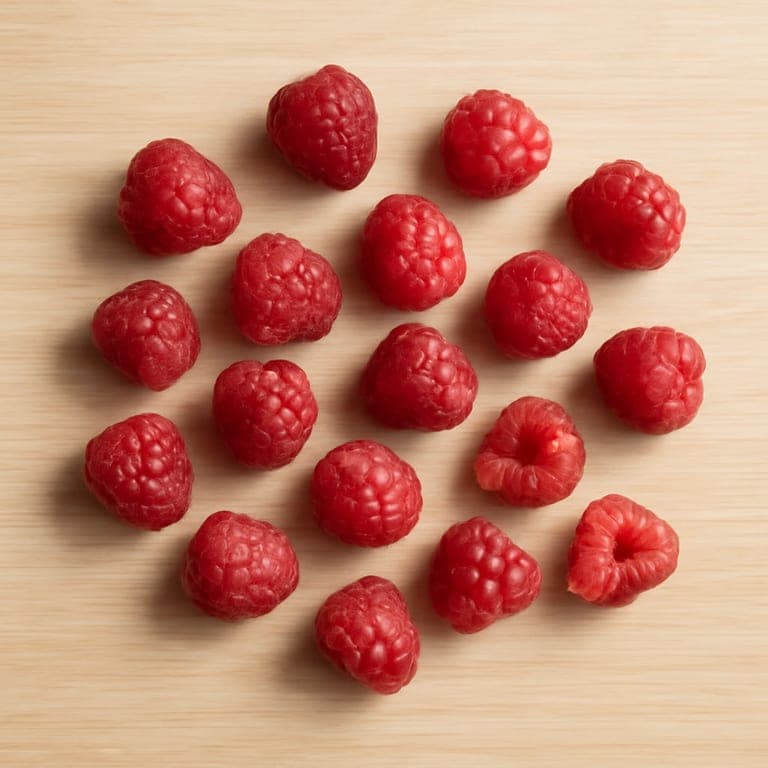
How to cut blackberries for a 12 month old: By 12 months, most toddlers chew more effectively and can handle bite-size pieces, so you can serve blackberries cut in halves or quarters (roughly 1 cm pieces) rather than whole. Some children may be ready for whole soft blackberries around this age, but because berries are round and firm at the center, halving or quartering them is the safer choice while your toddler is still mastering chewing. Always stay close, keep your child seated and calm while eating, and serve berries that are ripe and soft.
How to Cut Celery for Baby
Read full cutting guide6–8 months
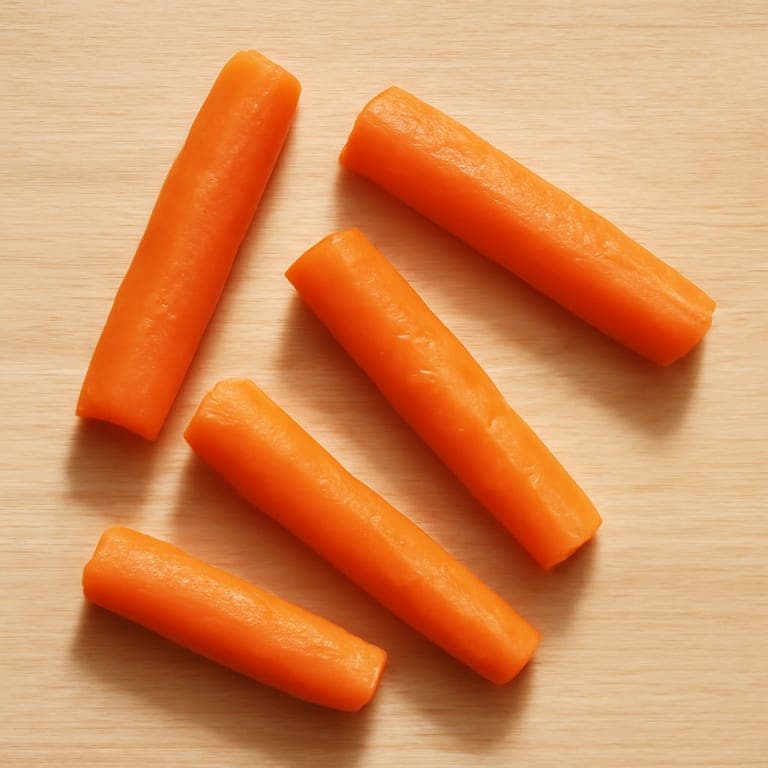
How to cut celery for a 6 month old: At 6 months, raw celery is too firm and stringy to be safe, so always cook it first. Steam or simmer celery until it is completely soft and squishes easily between your finger and thumb, then cut along the stalk to remove any tough strings. Serve it as a soft, flat finger-length strip about 8 to 10 cm long and 1 to 2 cm wide, so your baby can grasp it with the end sticking out of a closed fist. Alternatively, finely mince or mash the cooked celery and stir it into purees, mashed potato, or other soft foods. Avoid any raw celery, hard or fibrous pieces, and small round chunks at this stage, as these are choking hazards.
9–11 months
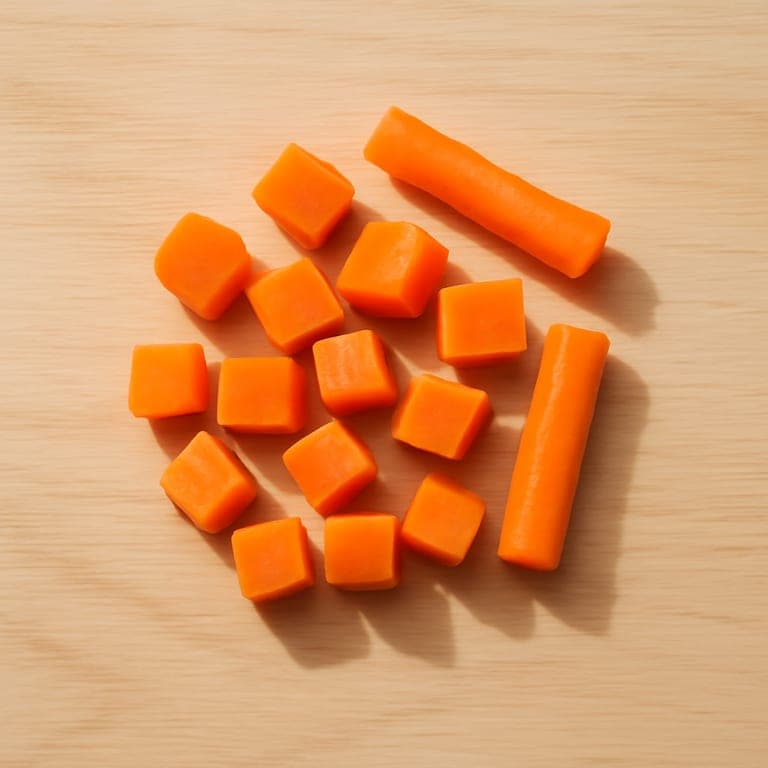
How to cut celery for a 9 month old: Around 9 months, many babies are developing a pincer grasp and can pick up smaller pieces using the thumb and forefinger. Continue to cook celery until very soft and remove the stringy outer fibers, then cut it into small, soft pieces roughly 1 to 1.5 cm in size, or thin short strips your baby can easily mash with their gums. Finely diced cooked celery also works well mixed into soft scrambled egg, lentils, or stews. Keep watching for any tough or stringy bits, and continue to avoid raw celery, which remains too hard to chew safely.
12+ months
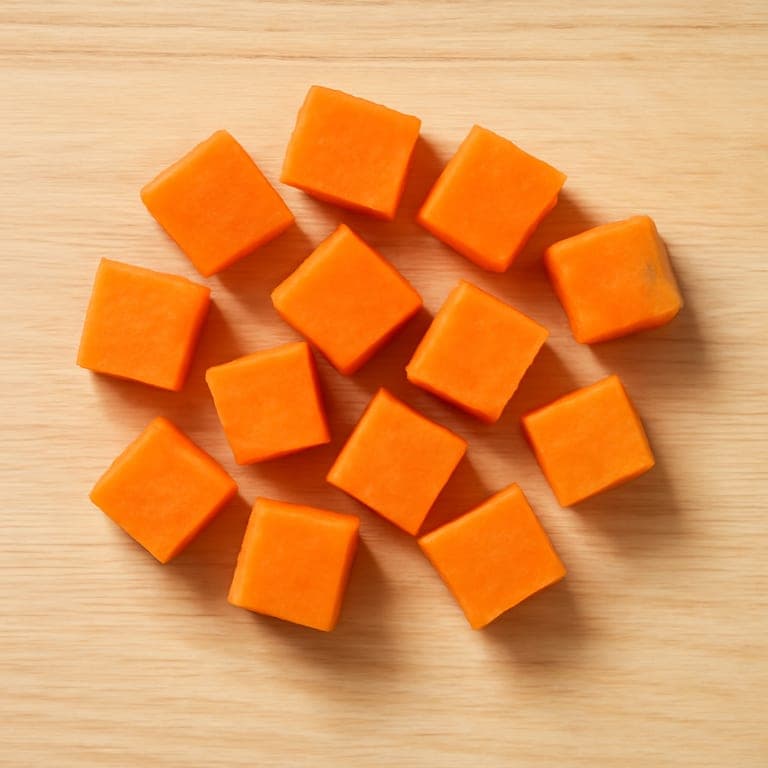
How to cut celery for a 12 month old: By 12 months, your toddler has more chewing skill and can handle smaller, bite-size pieces. Cooked celery can be diced into soft pieces about 1 cm across and offered on its own or mixed into family meals like soups, casseroles, and rice dishes. If you want to introduce raw celery, grate it finely or shave it into very thin slivers and always remove the strings first, since raw celery sticks and large chunks stay a choking risk well into the toddler years. Continue to supervise every meal and keep pieces small and soft.
How to Cut Salmon for Baby
Read full cutting guide6–8 months
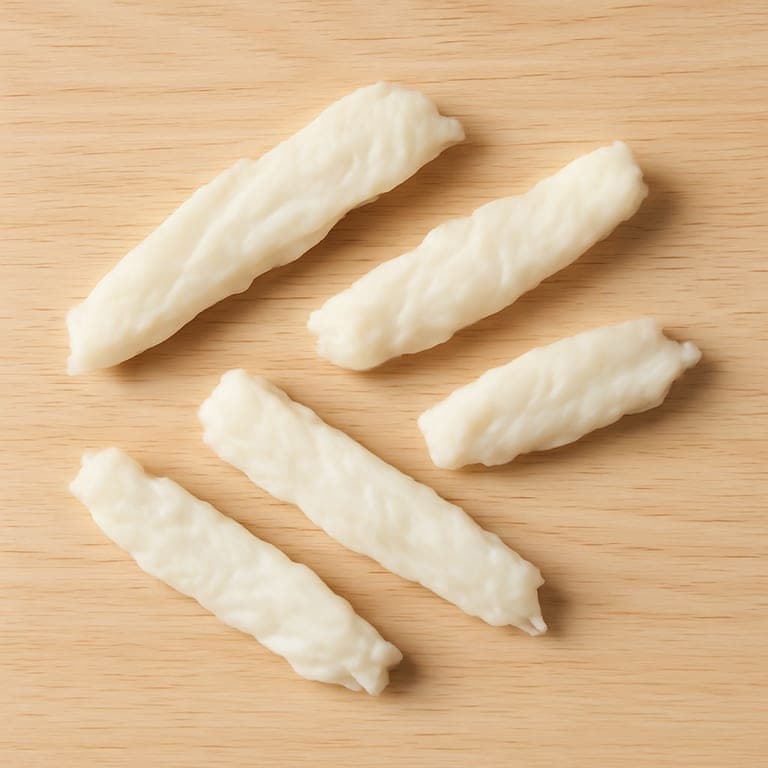
How to cut salmon for a 6 month old: At 6 months, offer salmon in large, easy-to-grab pieces your baby can hold in a whole fist with some sticking out the top. Cook a fillet until it flakes easily, then cut a soft strip roughly the length and width of an adult finger, about 6 to 8 cm long and 1.5 to 2 cm wide. The flesh should be soft enough to squish between your thumb and finger. Carefully remove all skin and pin bones first. Avoid small flakes or bite-size chunks at this age, since babies do not yet have the pincer grasp to pick them up and they are harder to manage safely. A long strip lets your baby gnaw, suck, and gum the fish while keeping a firm grip.
9–11 months
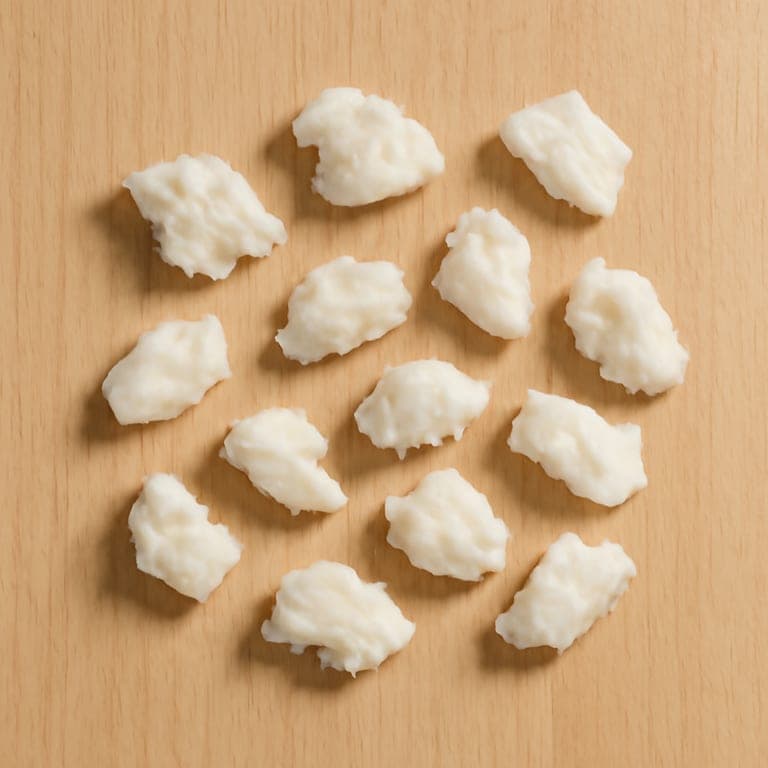
How to cut salmon for a 9 month old: Around 9 months many babies are developing the pincer grasp, the ability to pick up smaller items between thumb and forefinger. Now you can flake cooked salmon into soft, pea-to-grape-size pieces, roughly 1 to 1.5 cm, and scatter them on the tray for your baby to practice picking up. You can still offer finger-length strips alongside the flakes if your baby prefers them. Keep checking every piece for pin bones, make sure the salmon is soft and moist rather than dry or firm, and let your baby self-feed at their own pace.
12+ months
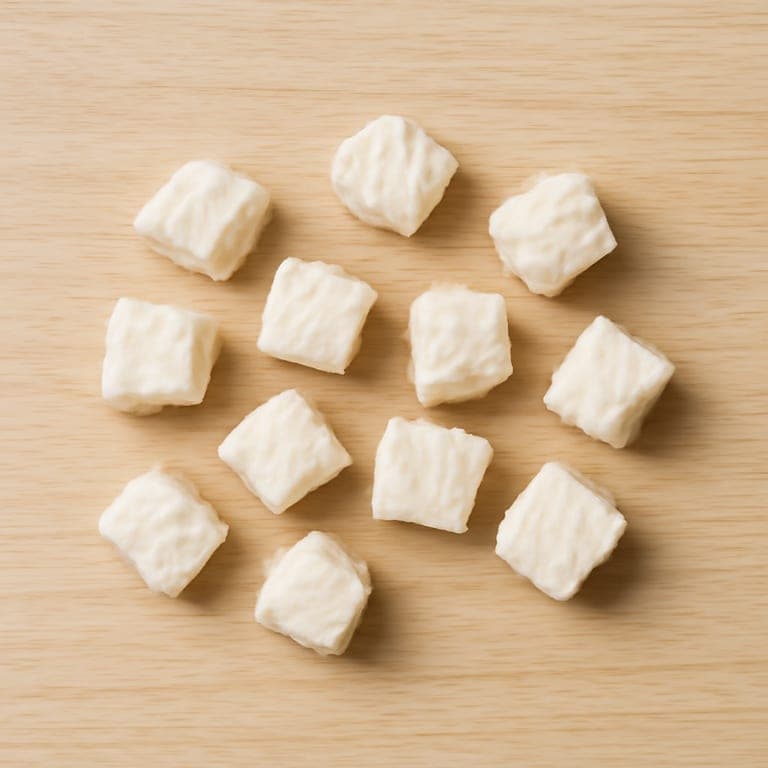
How to cut salmon for a 12 month old: By 12 months most toddlers can handle smaller, bite-size pieces of salmon, around 1 to 1.5 cm cubes or natural flakes, mixed into meals like pasta, rice, or mashed potato. The fish should still be soft, moist, and free of bones and skin. Offer a variety of textures and continue to keep portions small and manageable. Even though your toddler is more skilled at chewing, always serve salmon flaked or cut small and stay nearby while they eat.
How to Cut Asparagus for Baby
Read full cutting guide6–8 months
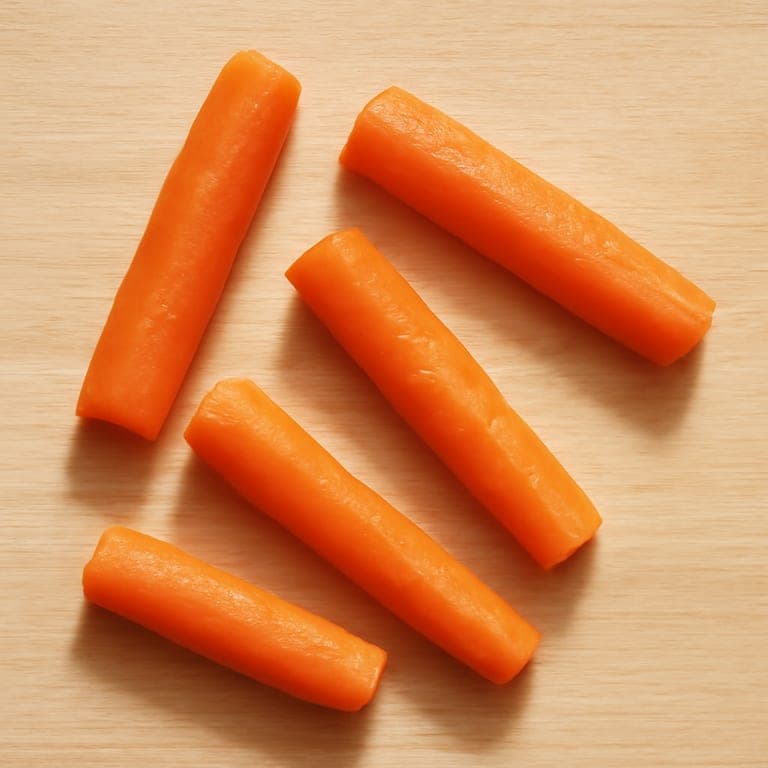
How to cut asparagus for a 6 month old: At 6 months, babies grasp food with their whole palm, so offer asparagus as long, soft spears that stick out the top of a closed fist. Cook the spears until very tender, until they bend easily and can be mashed with gentle pressure, then leave them whole and full length, roughly the length of an adult finger (about 8 to 10 cm). Trim away the tough, woody bottom of the stalk, since that part stays fibrous and stringy even after cooking. A long, soft spear lets your baby hold one end and gum the tip. Avoid serving raw or firm spears, and skip small, bite-size coins at this stage, since round pieces are a choking risk for a baby who cannot yet pick up small items or chew well.
9–11 months
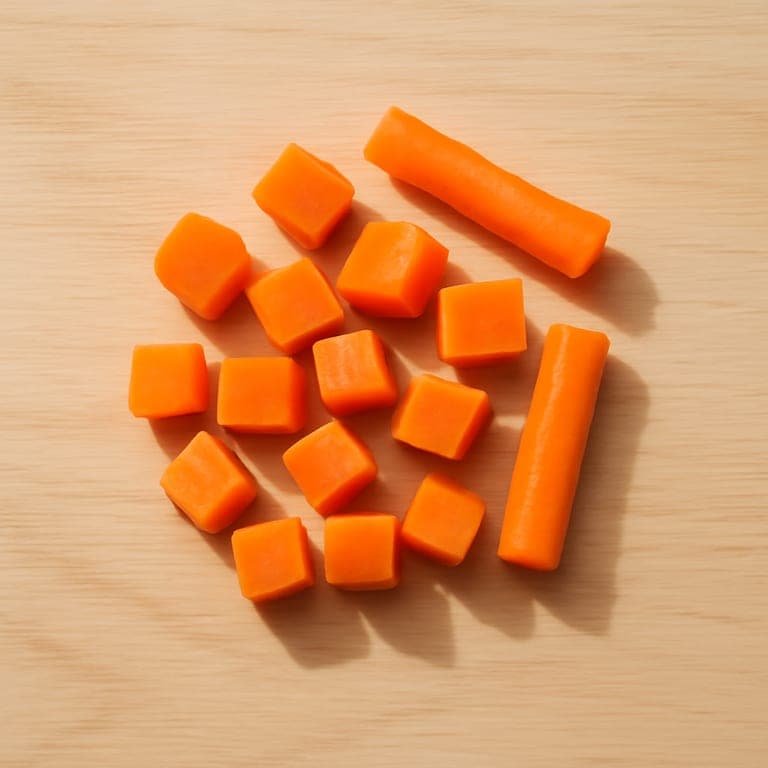
How to cut asparagus for a 9 month old: Around 9 months, many babies are developing the pincer grasp, the ability to pick up smaller pieces between thumb and forefinger. You can keep offering soft full-length spears, but you can also start cutting cooked asparagus on a diagonal into shorter lengths of about 2 to 3 cm to give your baby practice with their new skill. Keep the pieces soft enough to squish easily, and lightly flatten any thicker stalks so they are not too round. Continue to remove the woody base, and stay close while your baby self-feeds.
12+ months
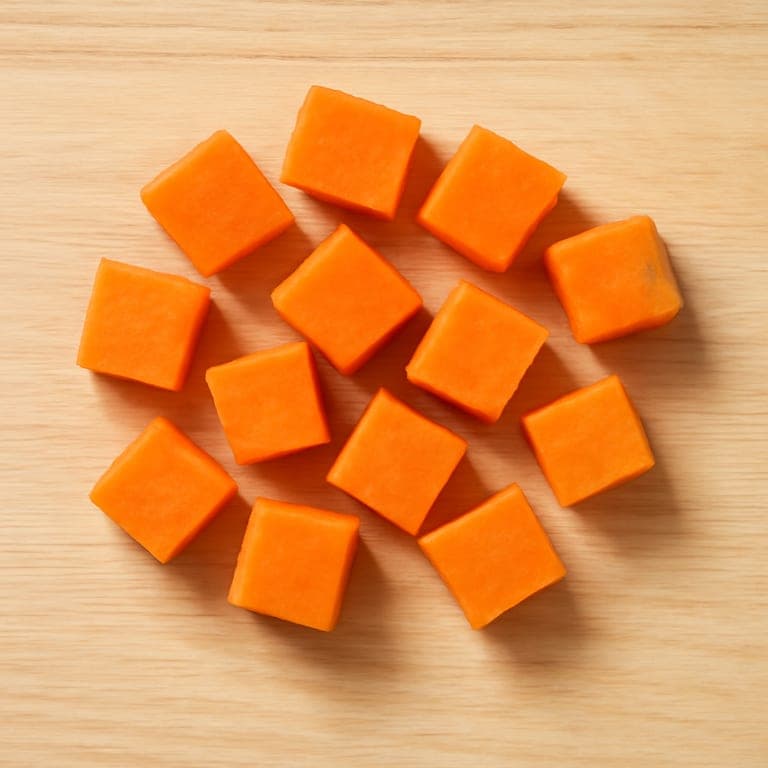
How to cut asparagus for a 12 month old: By 12 months, many toddlers can manage smaller bite-size pieces and are chewing more confidently. Cut soft-cooked asparagus into bite-size lengths of about 1 to 2 cm, including the tender tips, so your toddler can pick them up and chew them. You can also mix chopped asparagus into other foods like scrambled eggs, pasta, or rice. Keep pieces soft, avoid any tough or stringy ends, and always supervise meals, since choking is still a risk at this age.
How to Cut Green beans for Baby
Read full cutting guide6–8 months
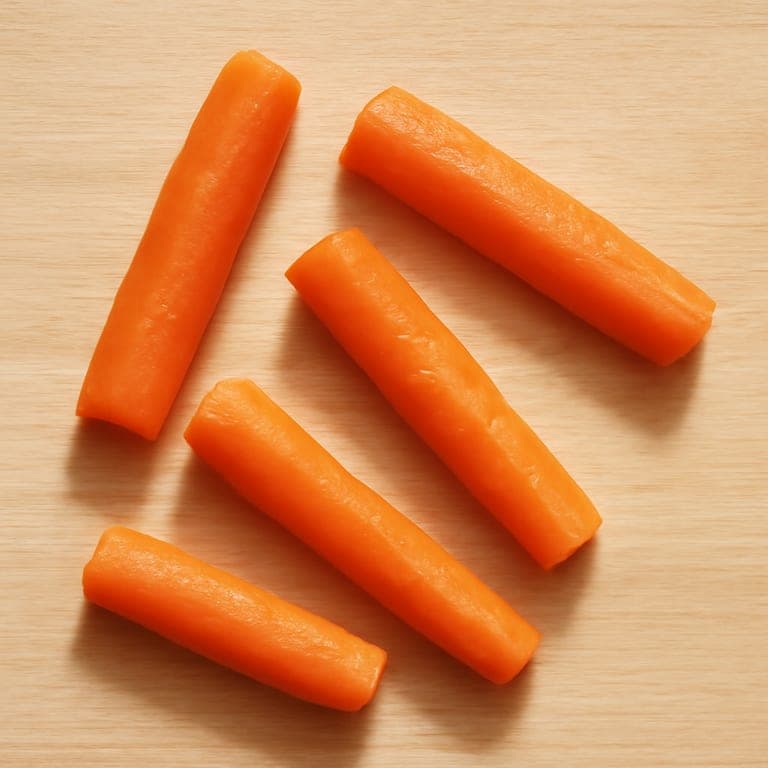
How to cut green beans for a 6 month old: At 6 months, babies use a whole-hand (palmar) grasp, so offer green beans in a shape they can grip with a bit sticking out of the fist. Steam or boil whole green beans until they are very soft and can be mushed easily between your fingers, then serve them whole at their natural length of about 8 to 10 cm, or trim to at least 6 cm so a piece extends above your baby's fist. The bean should be soft enough to gum and break apart with light pressure. Avoid serving green beans raw or undercooked, since a firm, crunchy bean is a choking hazard. Also skip small, bite-size pieces and whole rounds at this age, as a young baby cannot yet manage them safely.
9–11 months
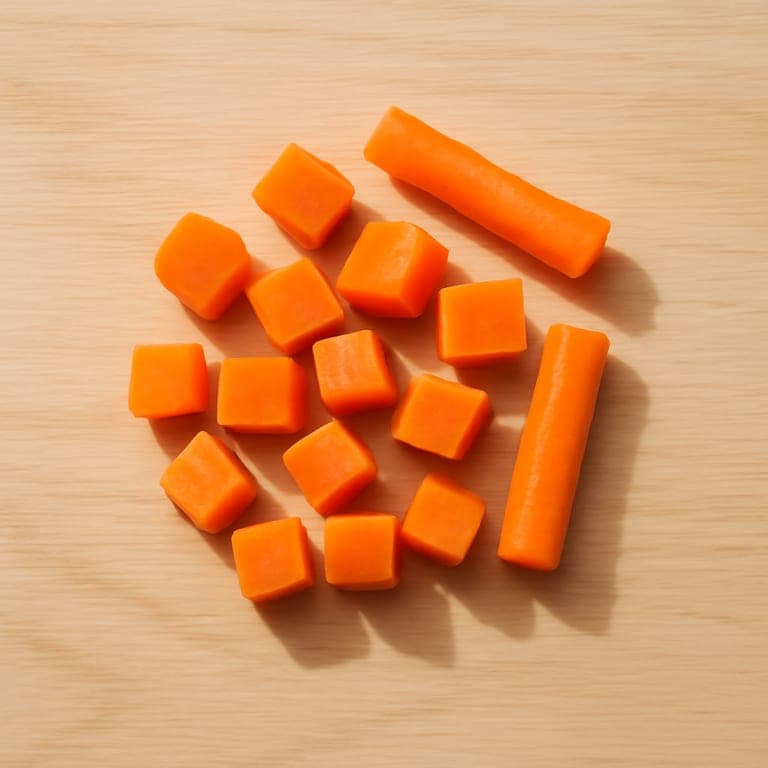
How to cut green beans for a 9 month old: Around 9 months, many babies are developing the pincer grasp, picking up smaller pieces between thumb and forefinger. You can still offer soft, whole-length beans, but you can also begin cutting cooked green beans lengthwise into thin strips or slicing them into shorter 2 to 3 cm pieces that your baby can practice picking up. Make sure the beans stay very soft and easy to squash. If you serve smaller rounds, slice them so they are not perfectly round, and keep watching that each piece squashes easily so it never poses a choking risk.
12+ months
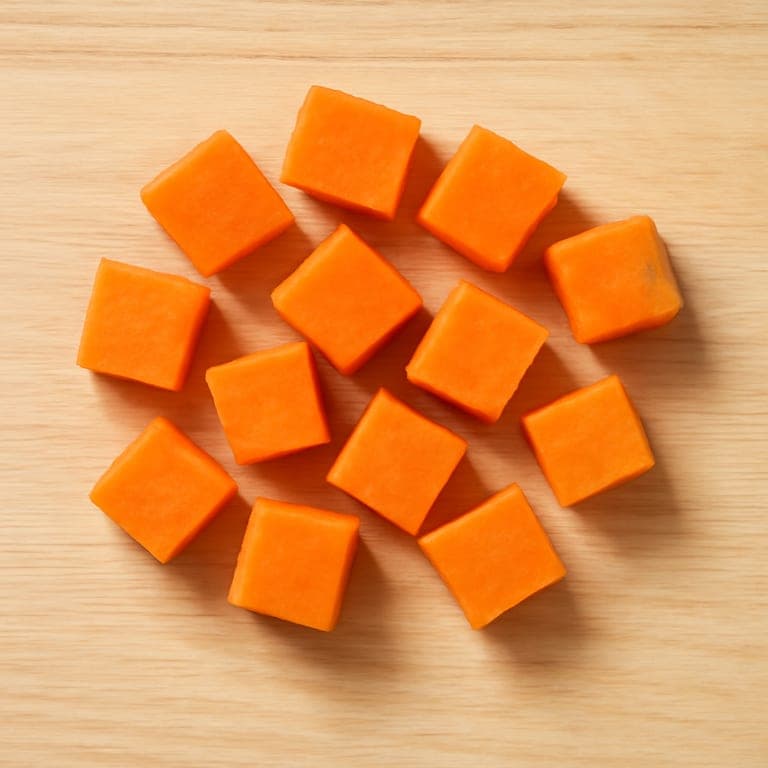
How to cut green beans for a 12 month old: By 12 months, most toddlers can manage bite-size foods and are getting better at chewing. Cut cooked, soft green beans into bite-size pieces about 1 to 2 cm long, which are easy for a toddler to pick up and chew. Continue to cook the beans until tender, and avoid raw or very firm beans, which remain harder to chew safely at this age. As your toddler's chewing skills grow, you can gradually offer slightly larger pieces, always staying close and supervising every meal.
How to Cut Tofu for Baby
Read full cutting guide6–8 months
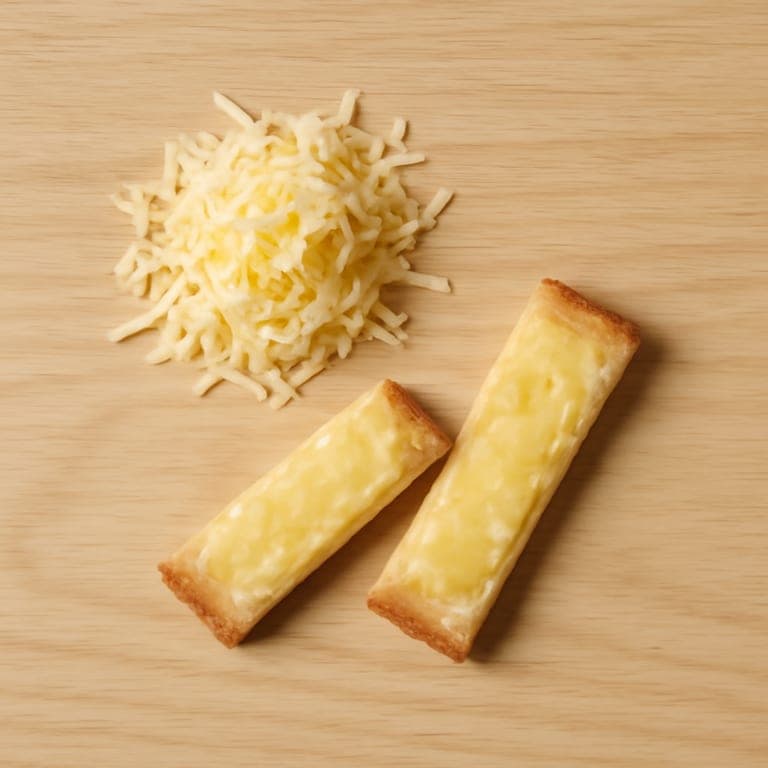
How to cut tofu for a 6 month old: At 6 months, babies use a whole-hand palmar grasp, so give them pieces big enough to grab with a fist and stick out the top. Choose firm or extra-firm tofu so it holds its shape, then cut it into thick finger-length strips about the size of an adult finger, roughly 6 to 8 cm long and 1.5 to 2 cm wide. The soft texture lets your baby gum and squish the tofu easily. You can lightly coat the strips in a thin layer of baby cereal, ground nuts, or fine breadcrumbs to make them less slippery and easier to hold. Avoid small cubes or bite-size pieces at this stage, since they are harder to pick up and can be a choking risk, and skip silken tofu for self-feeding strips because it falls apart in the hand.
9–11 months
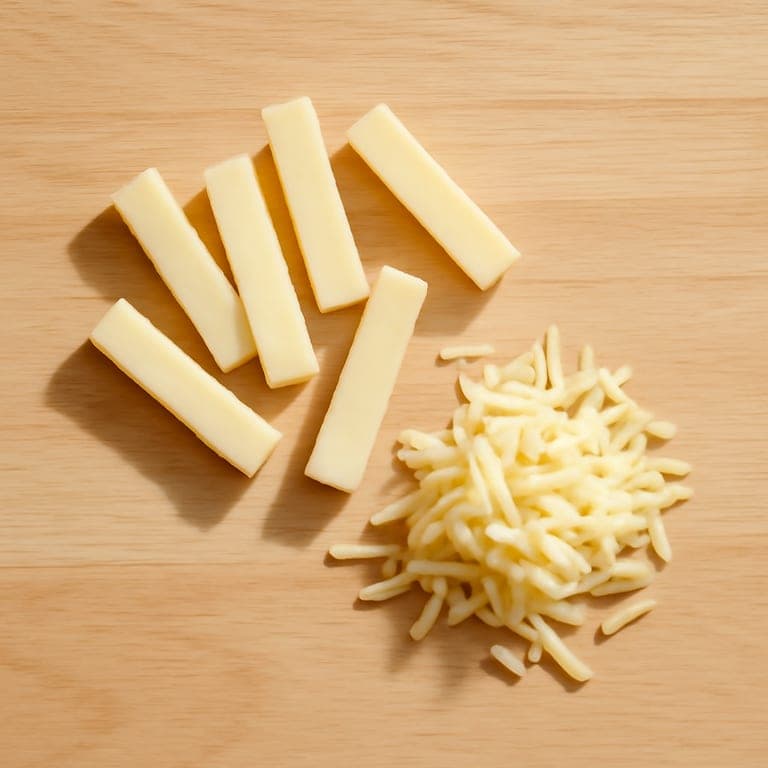
How to cut tofu for a 9 month old: Around 9 months, many babies are developing the pincer grasp, using thumb and forefinger to pick up smaller bits. You can now offer firm or extra-firm tofu cut into smaller pieces, such as cubes about 1 to 1.5 cm or short, thin strips your baby can grasp between finger and thumb. Keep the pieces soft and easy to gum, and offer a mix of sizes so your baby can practice the pincer grasp while still managing the food safely. Continue to supervise closely and let your baby set the pace.
12+ months
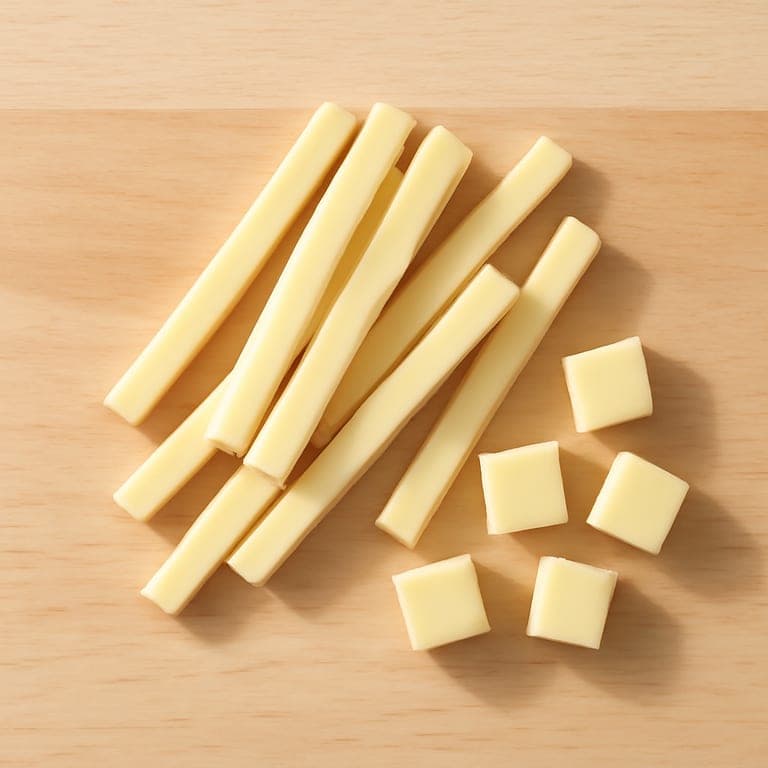
How to cut tofu for a 12 month old: By 12 months, most toddlers can handle bite-size pieces and may be using a spoon or fork. Cut firm or extra-firm tofu into small cubes about 1.5 cm, or into bite-size pieces that match what the rest of the family is eating. You can also start serving cubes mixed into stir-fries, pasta, or grain bowls, or lightly pan-fried for a firmer texture. Keep pieces soft enough to squish and always offer them while your child is seated and supervised.
How to Cut Strawberries for Baby
Read full cutting guide6–8 months
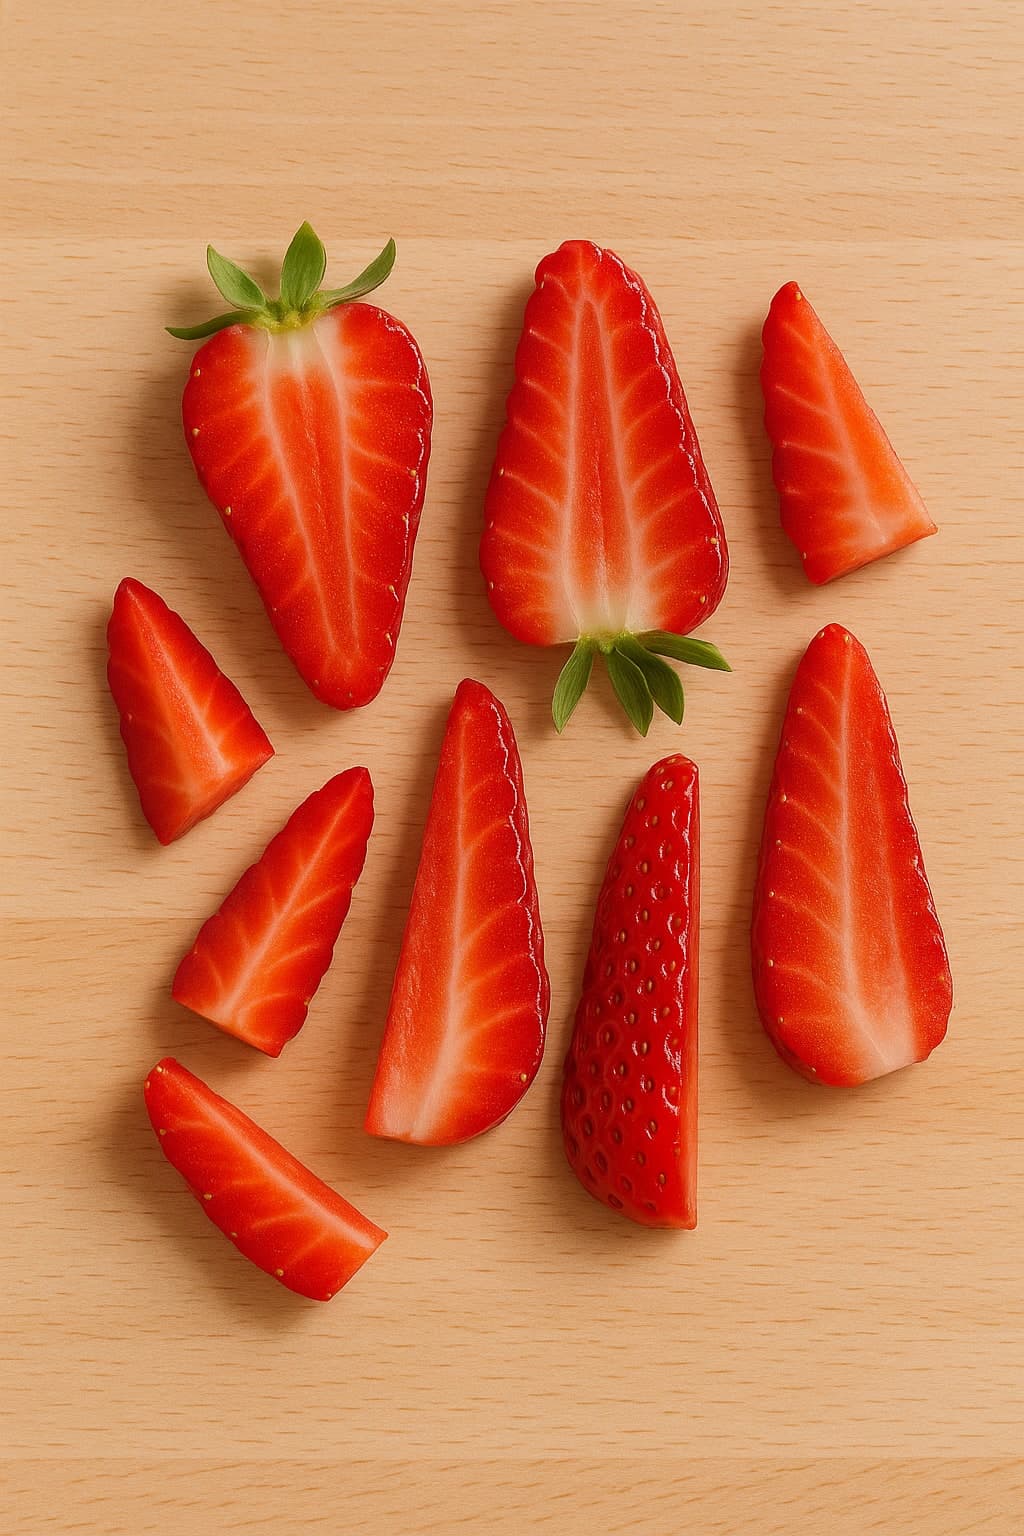
How to cut strawberries for a 6 month old: Cut strawberries lengthwise into thin slices or quarters (not round slices). Each piece should be flat and easy to grasp. Avoid whole strawberries - quartered pieces reduce choking risk and let babies gum the flesh.
9–11 months
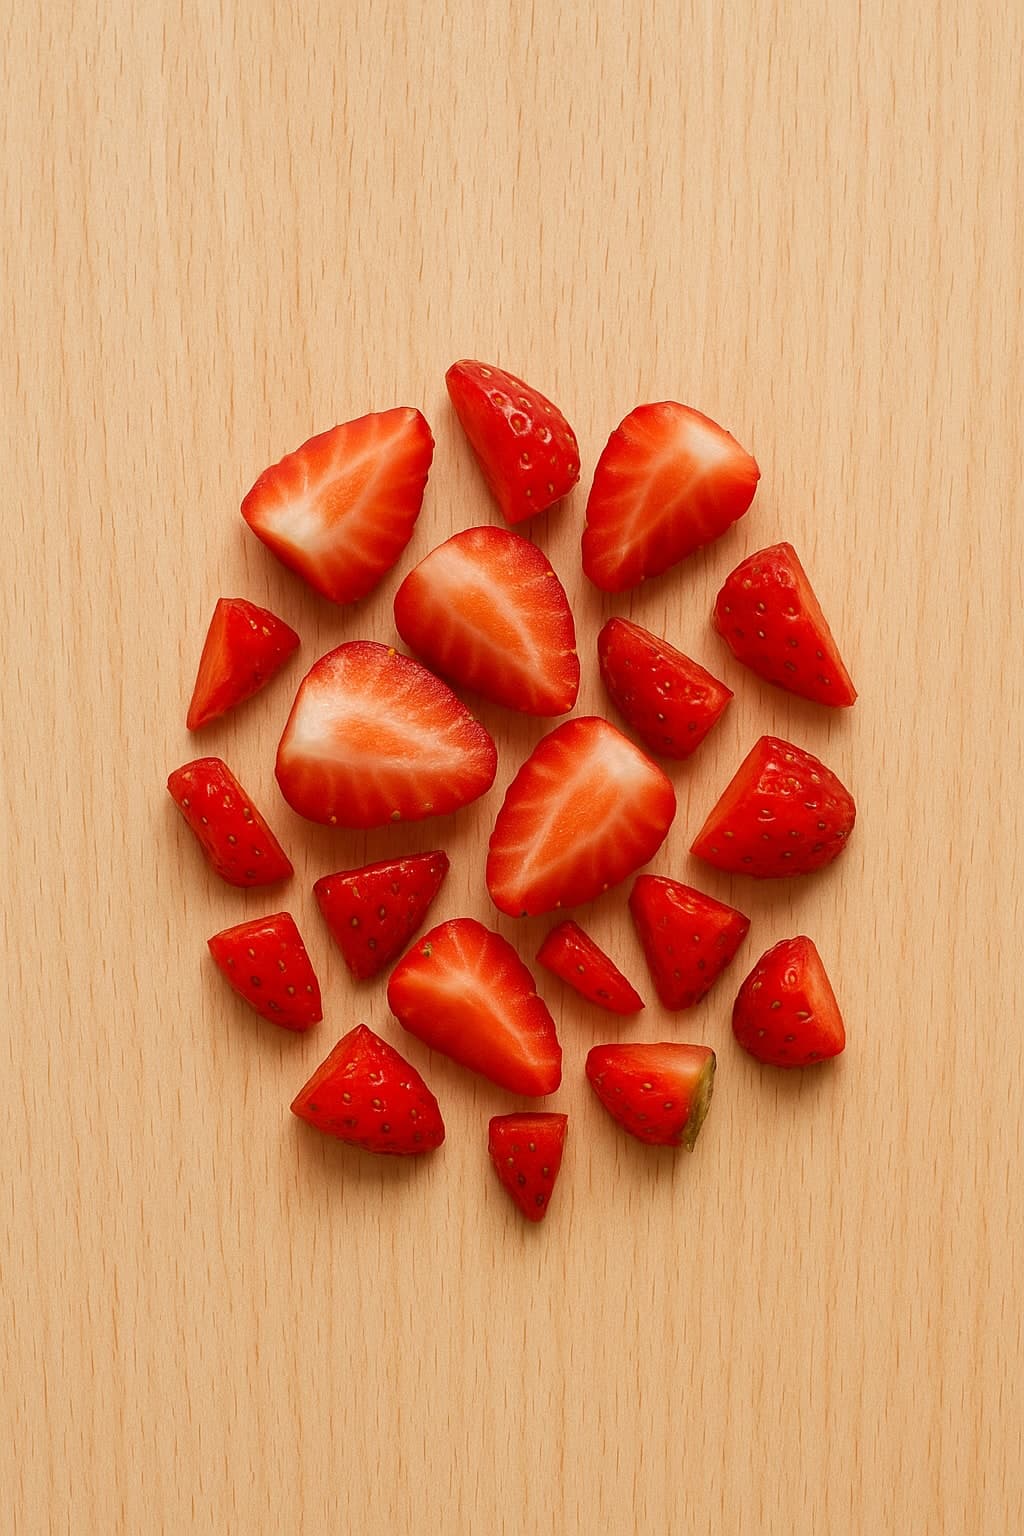
How to cut strawberries for a 9 month old: As babies develop pincer grasp, you can offer smaller pieces - halved or quartered strawberries. Make sure pieces are still soft and mashable. Strips or small chunks work well.
12+ months
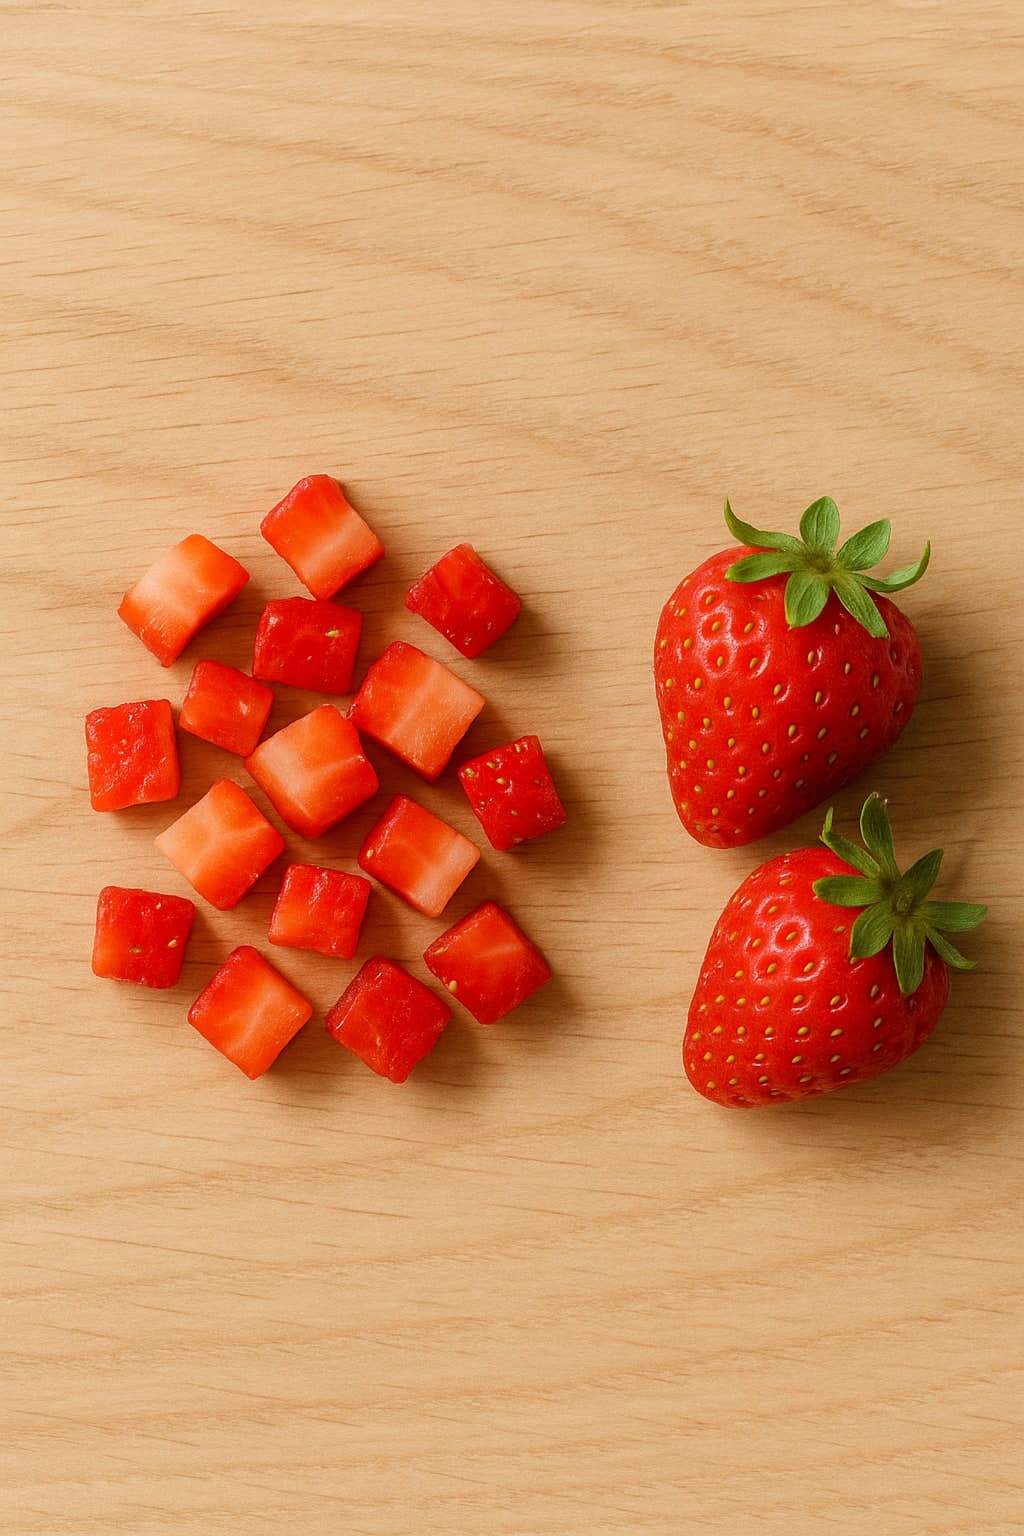
How to cut strawberries for a 12 month old: Toddlers can handle bite-sized pieces. Quarter or dice strawberries into small, manageable pieces. They can also enjoy whole strawberries if they are soft and your child handles them well.
How to Cut Blueberries for Baby
Read full cutting guide6–8 months
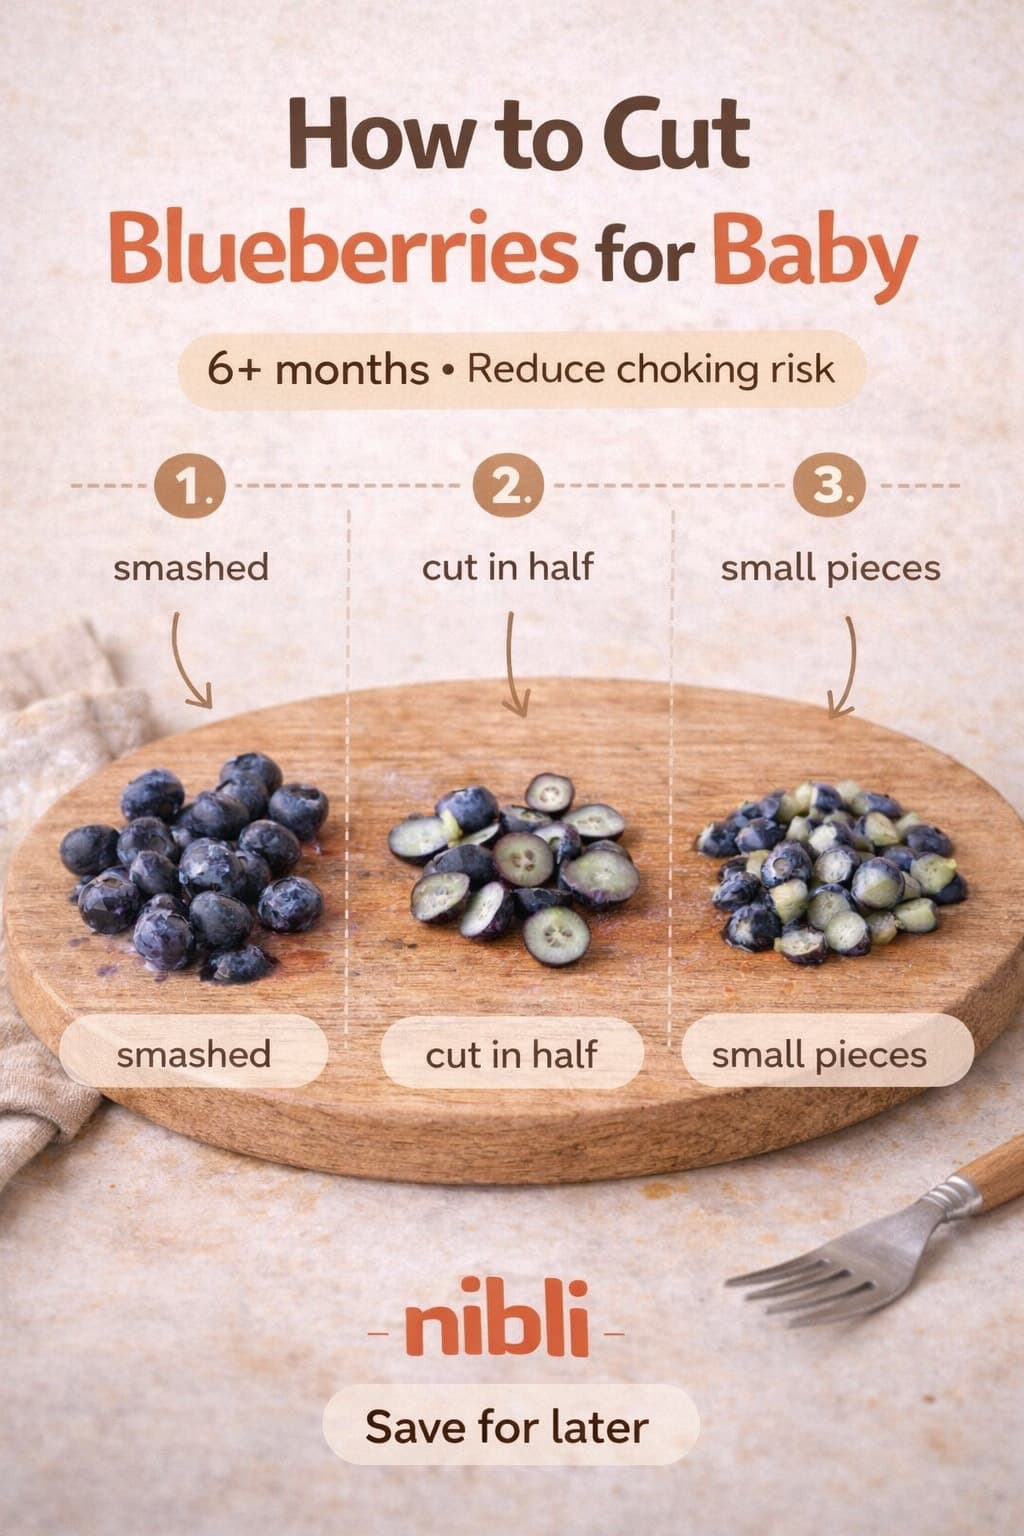
How to cut blueberries for a 6 month old: Squash or flatten blueberries with the back of a fork, or cut each berry into quarters. This prevents them from rolling to the back of the throat. Offer a few pieces at a time.
9–11 months
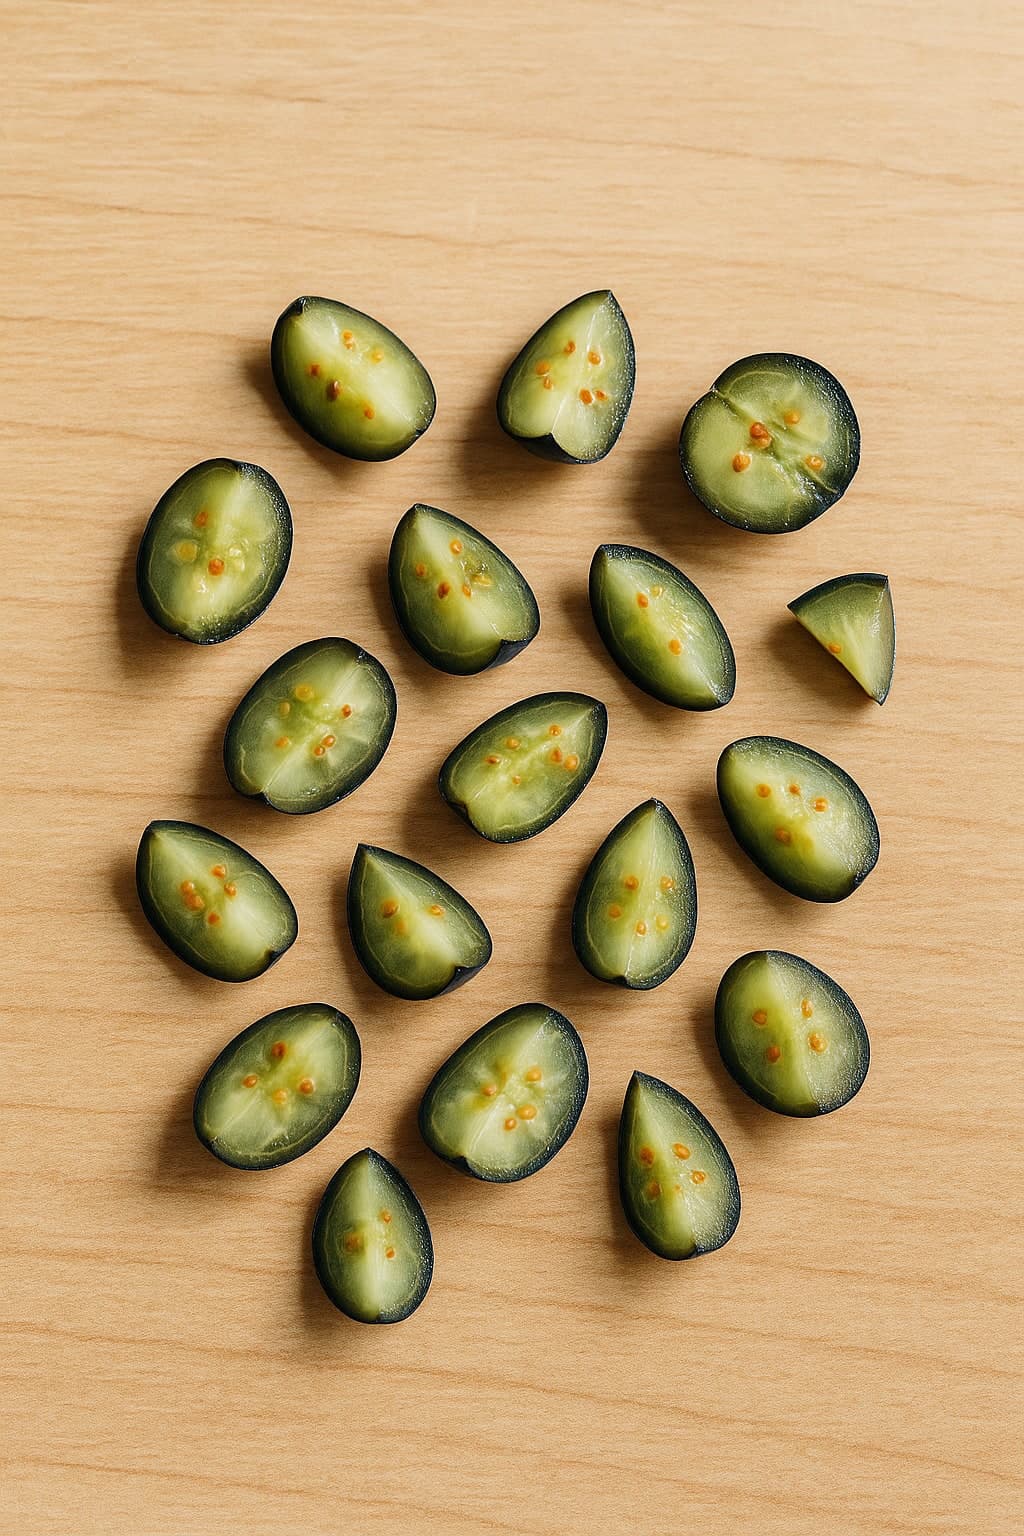
How to cut blueberries for a 9 month old: Halve or quarter blueberries. As babies develop pincer grasp, smaller pieces are easier to pick up. Still avoid whole blueberries - they remain a choking risk.
12+ months
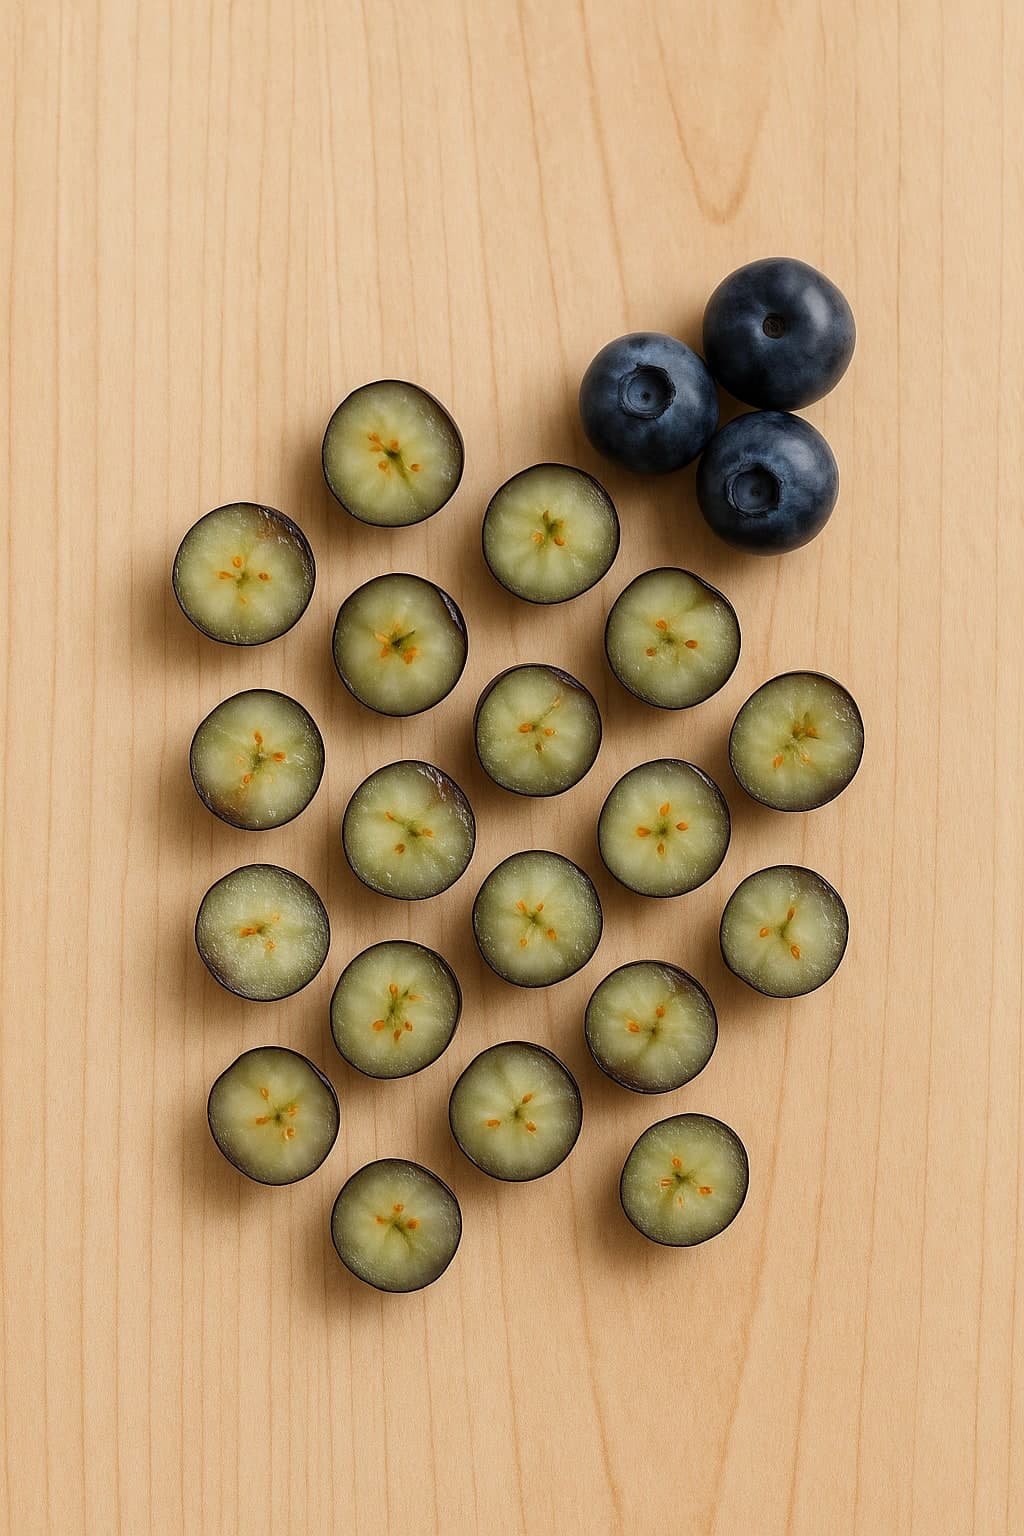
How to cut blueberries for a 12 month old: Toddlers can handle halved blueberries. Some parents still squash or quarter until confident their child chews well. Use your judgement based on your child's eating skills.
How to Cut Apple for Baby
Read full cutting guide6–8 months
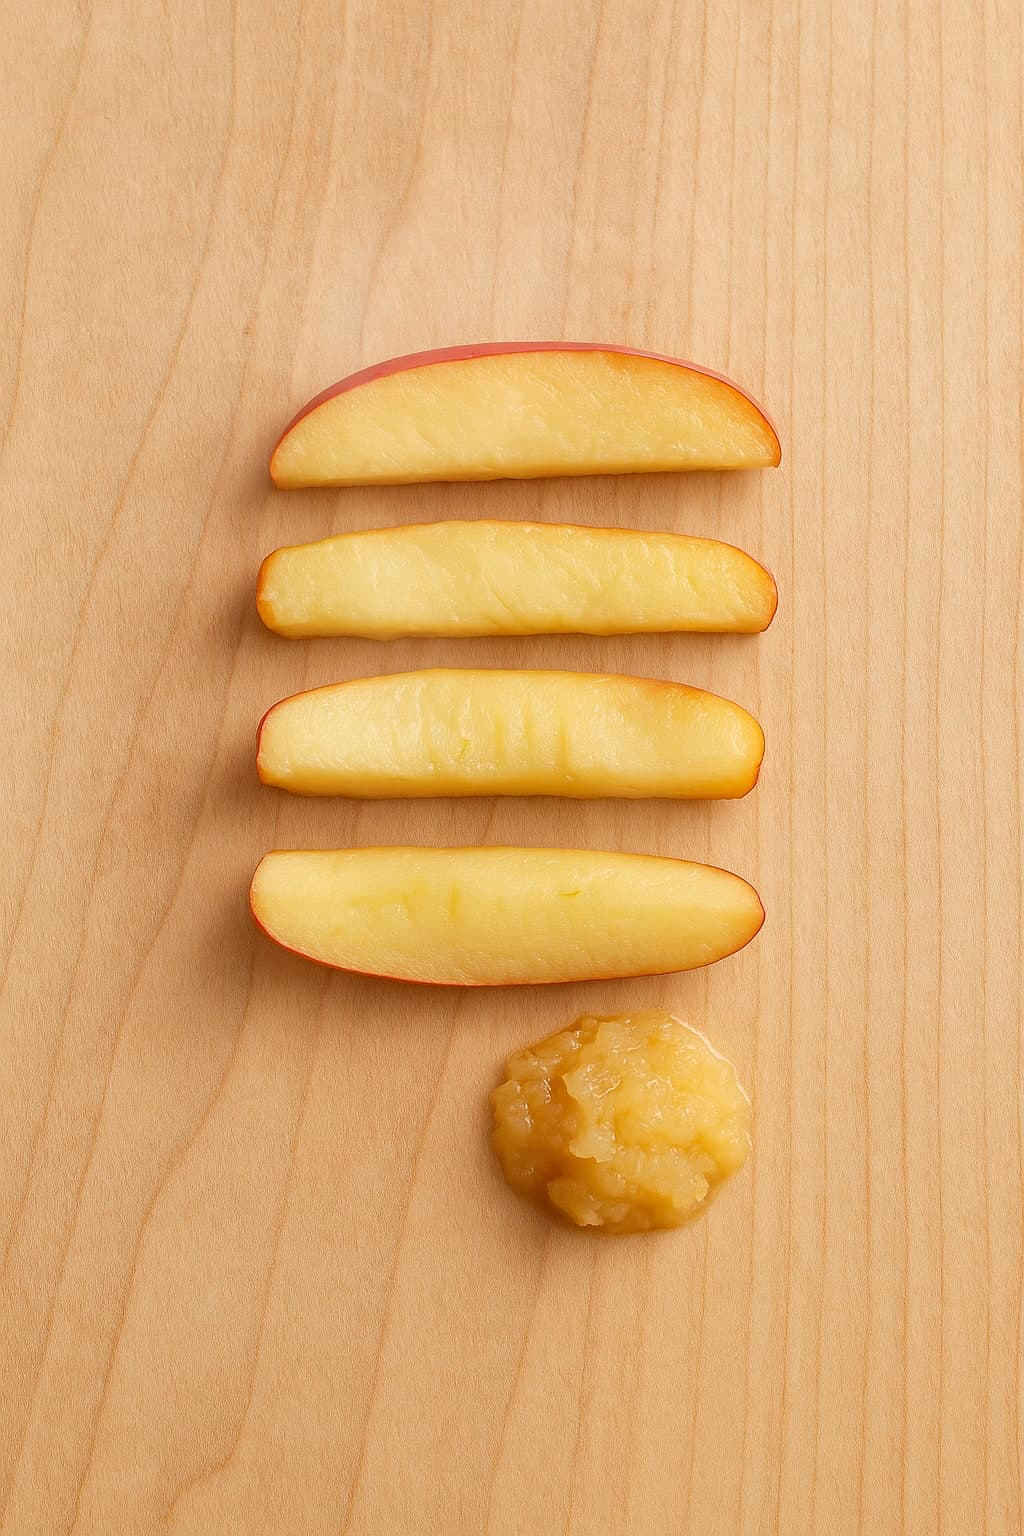
How to cut apple for a 6 month old: Steam or bake apple until very soft. Cut into thick wedges or strips that babies can hold. Leave some peel on for grip if desired. The apple should mash easily between your fingers.
9–11 months
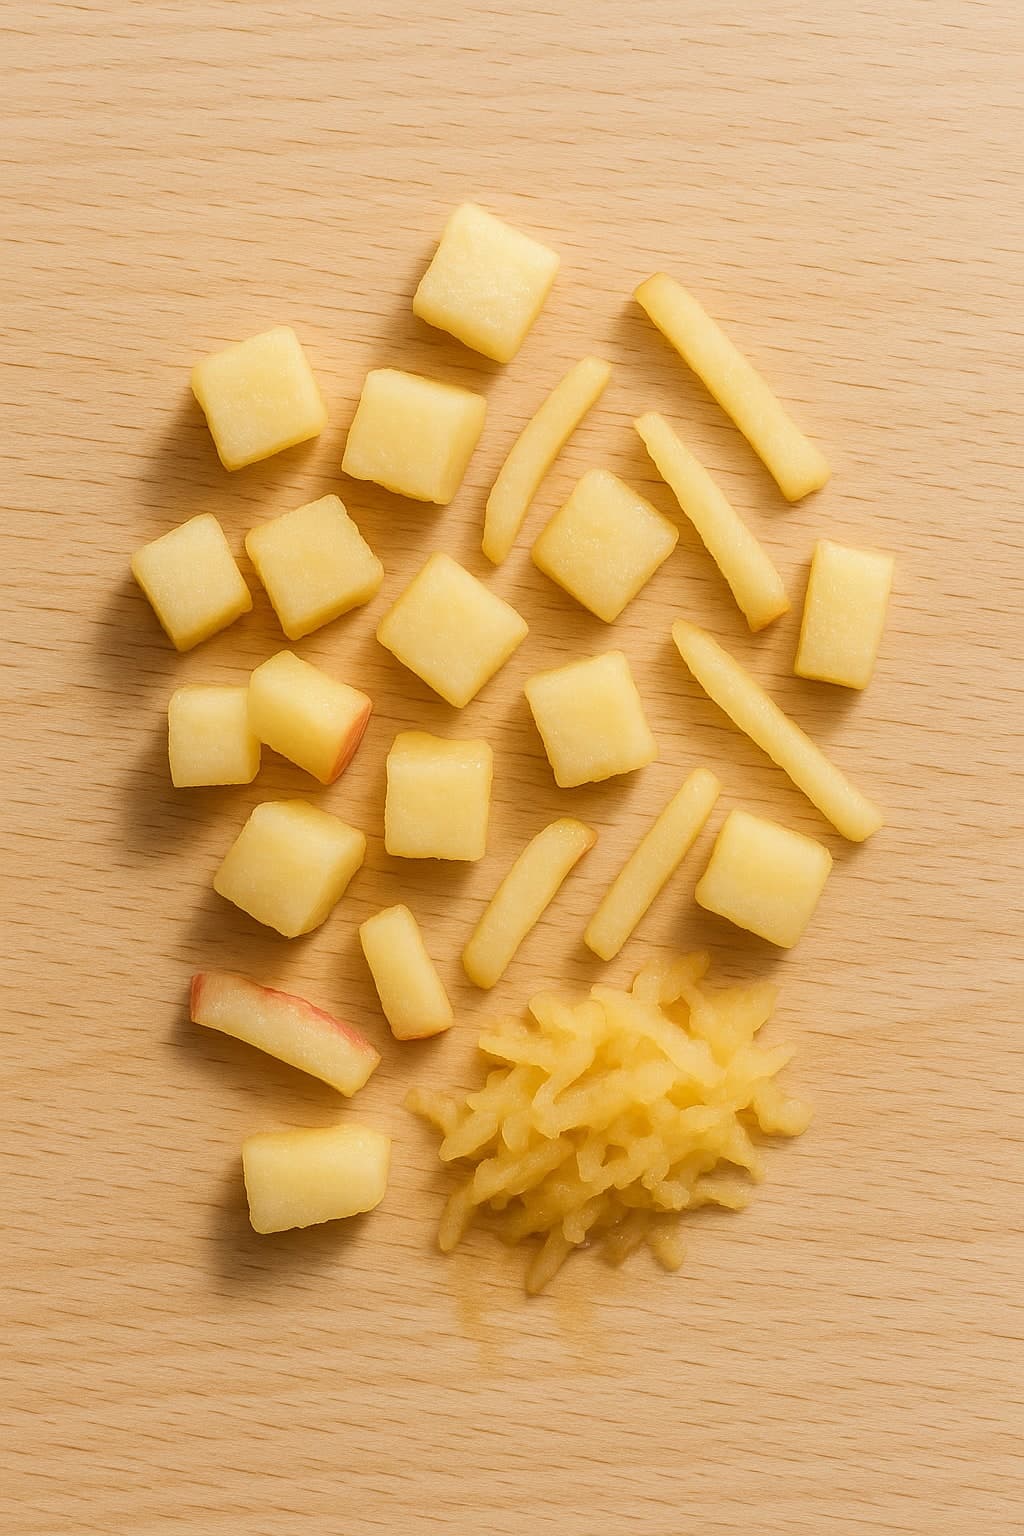
How to cut apple for a 9 month old: Offer soft-cooked apple in smaller wedges or chunks. As pincer grasp develops, small soft pieces work well. You can also grate very ripe apple for a softer texture.
12+ months
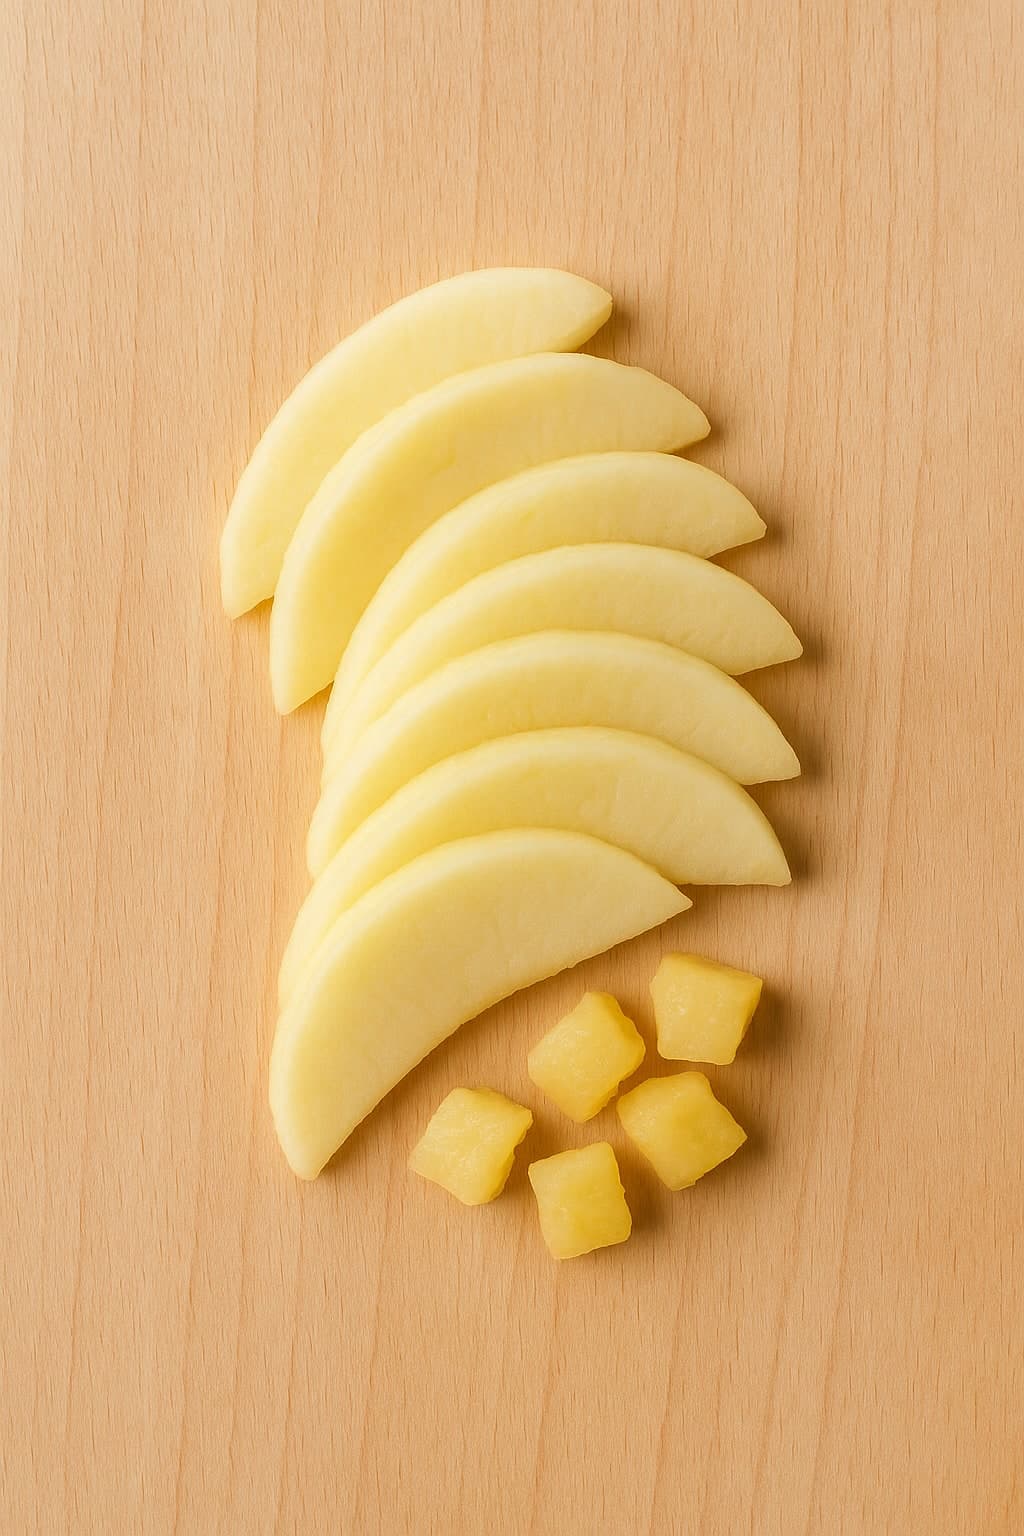
How to cut apple for a 12 month old: Toddlers can have thin slices of very ripe, soft apple, or cooked apple in bite-sized pieces. Raw apple is still a choking risk - ensure it is soft enough to mash.
How to Cut Broccoli for Baby
Read full cutting guide6–8 months
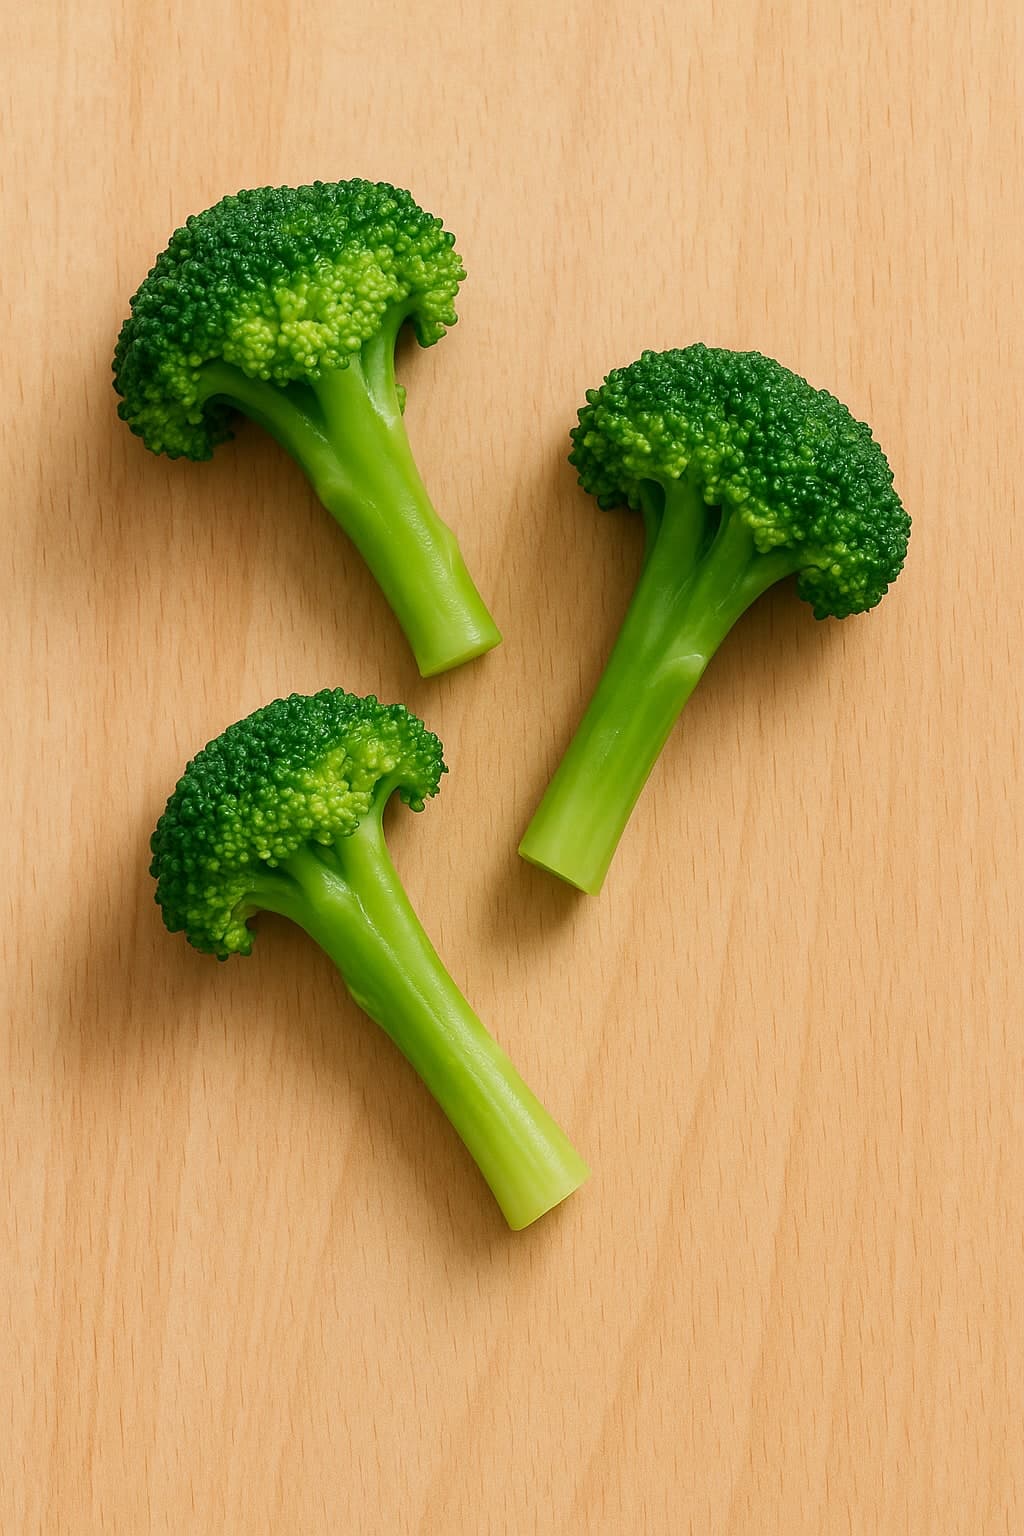
How to cut broccoli for a 6 month old: Steam broccoli until the florets are soft. Serve whole florets with a long stem - the stem acts as a natural handle for babies to hold. The floret head should be soft enough to gum.
9–11 months
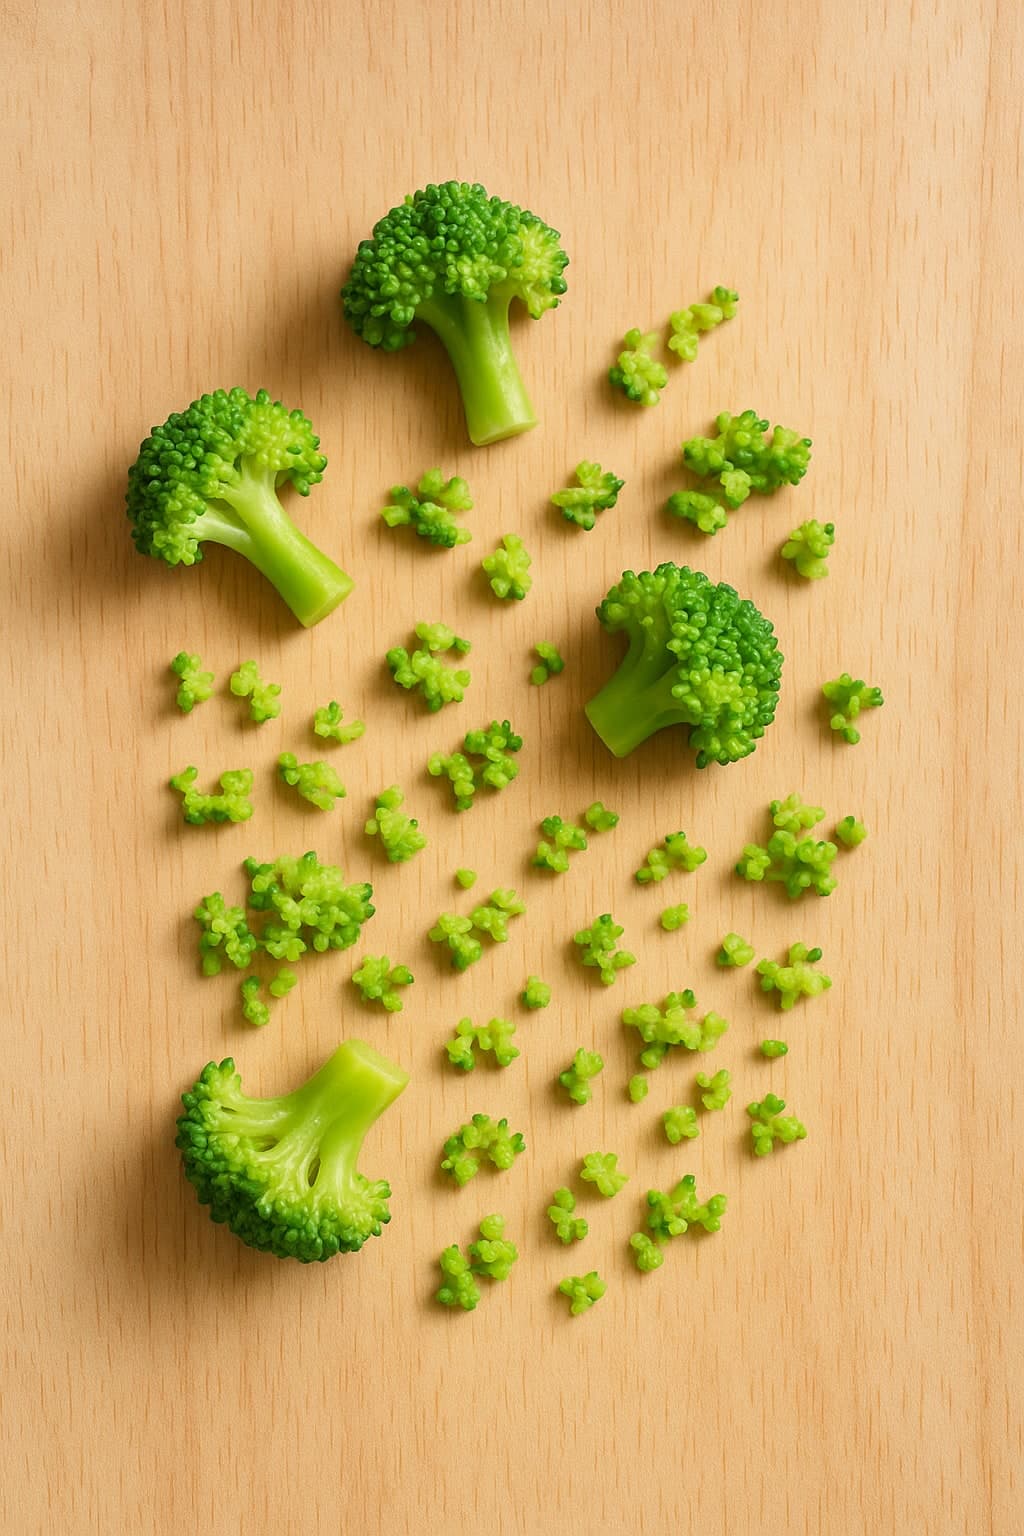
How to cut broccoli for a 9 month old: Offer smaller florets or cut the floret into pieces. Keep the stem for grip if possible. As babies develop pincer grasp, smaller soft pieces work well.
12+ months
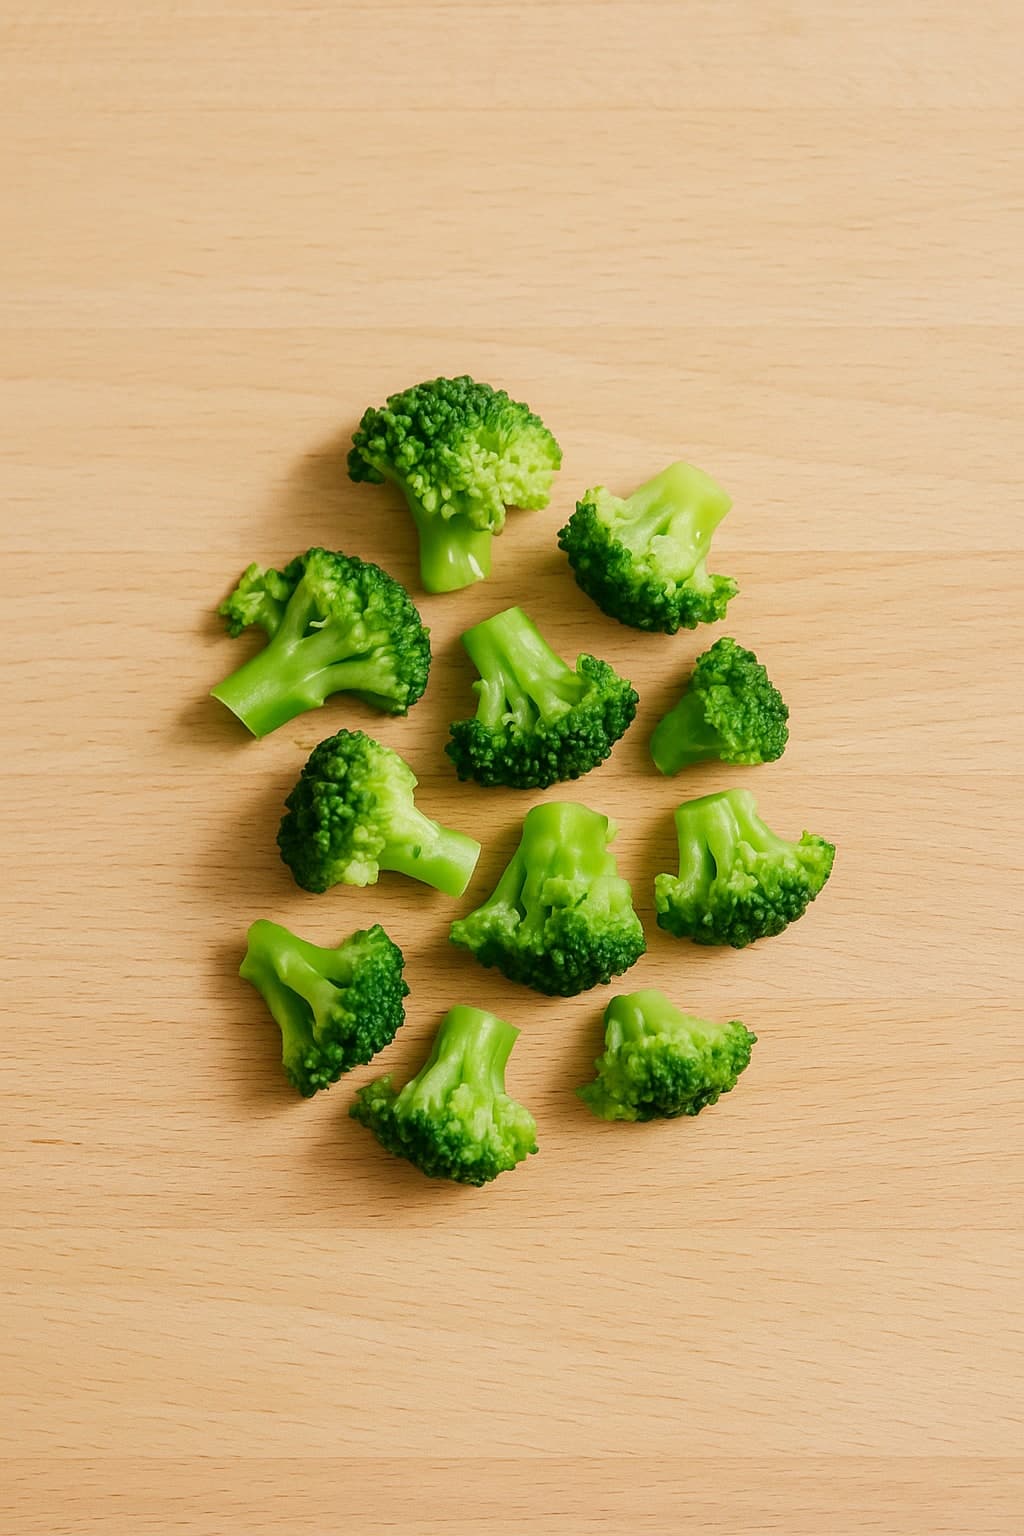
How to cut broccoli for a 12 month old: Toddlers can handle bite-sized broccoli pieces. You can chop the floret into smaller chunks. Broccoli can be part of family meals - just ensure it stays soft.
How to Cut Toast for Baby
Read full cutting guide6–8 months
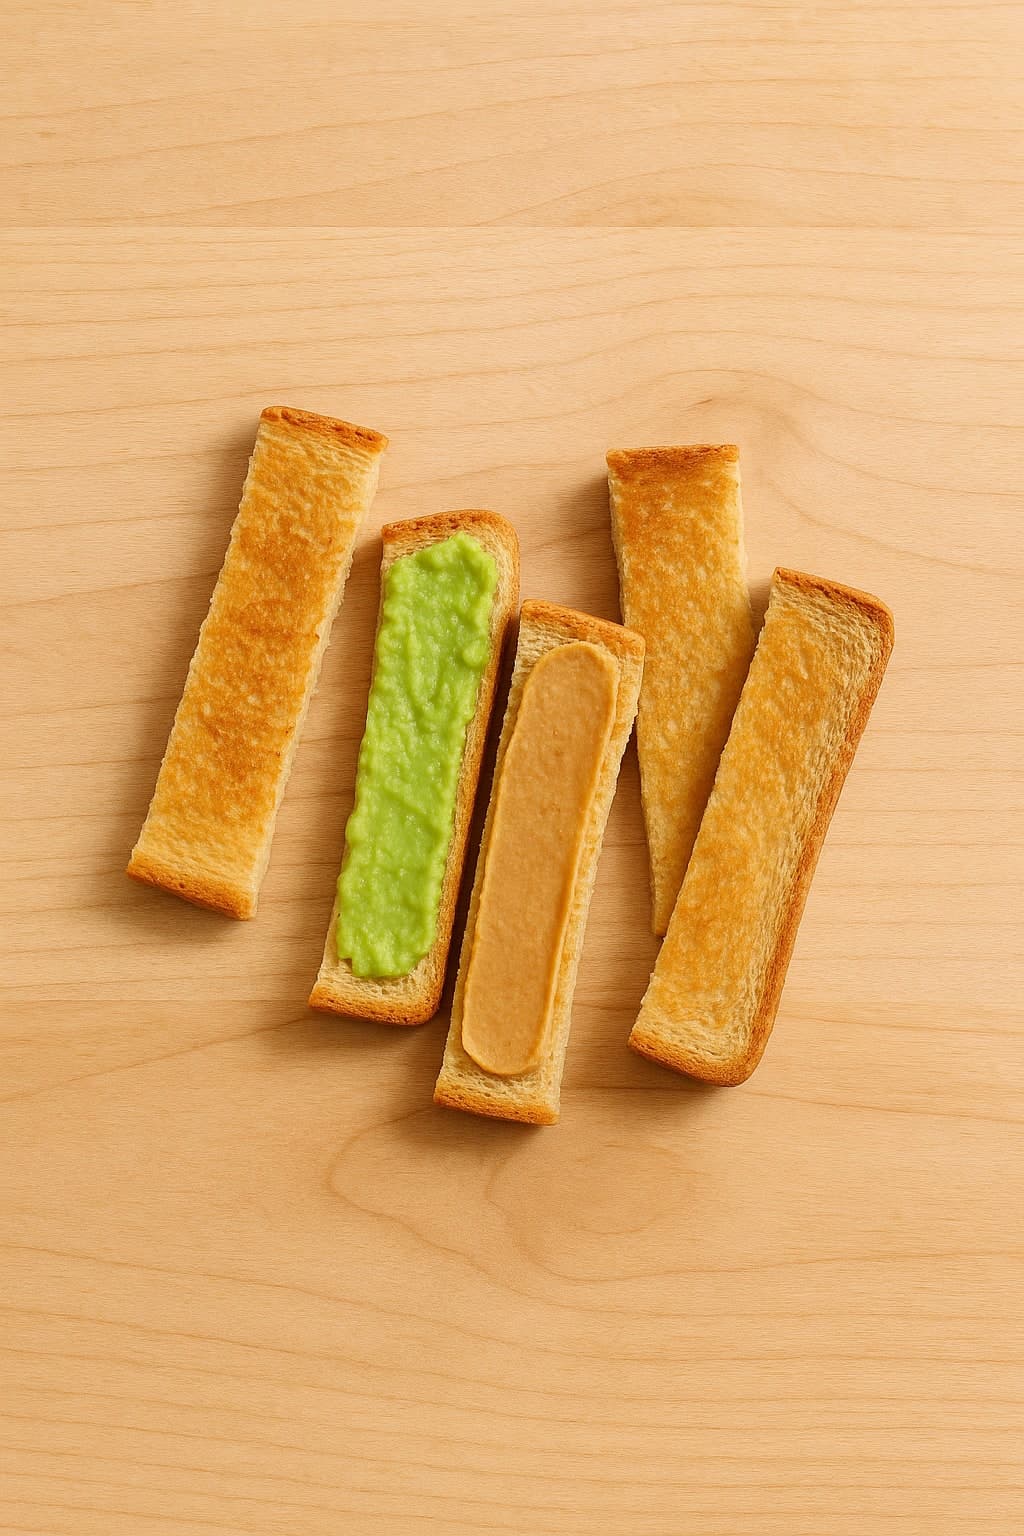
How to cut toast for a 6 month old: Cut toast into finger-sized strips - about 2–3 fingers wide and the length of your palm. Toast should be firm enough to hold but not so hard it becomes a choking risk. Spread with soft foods like avocado or nut butter (thin layer).
9–11 months
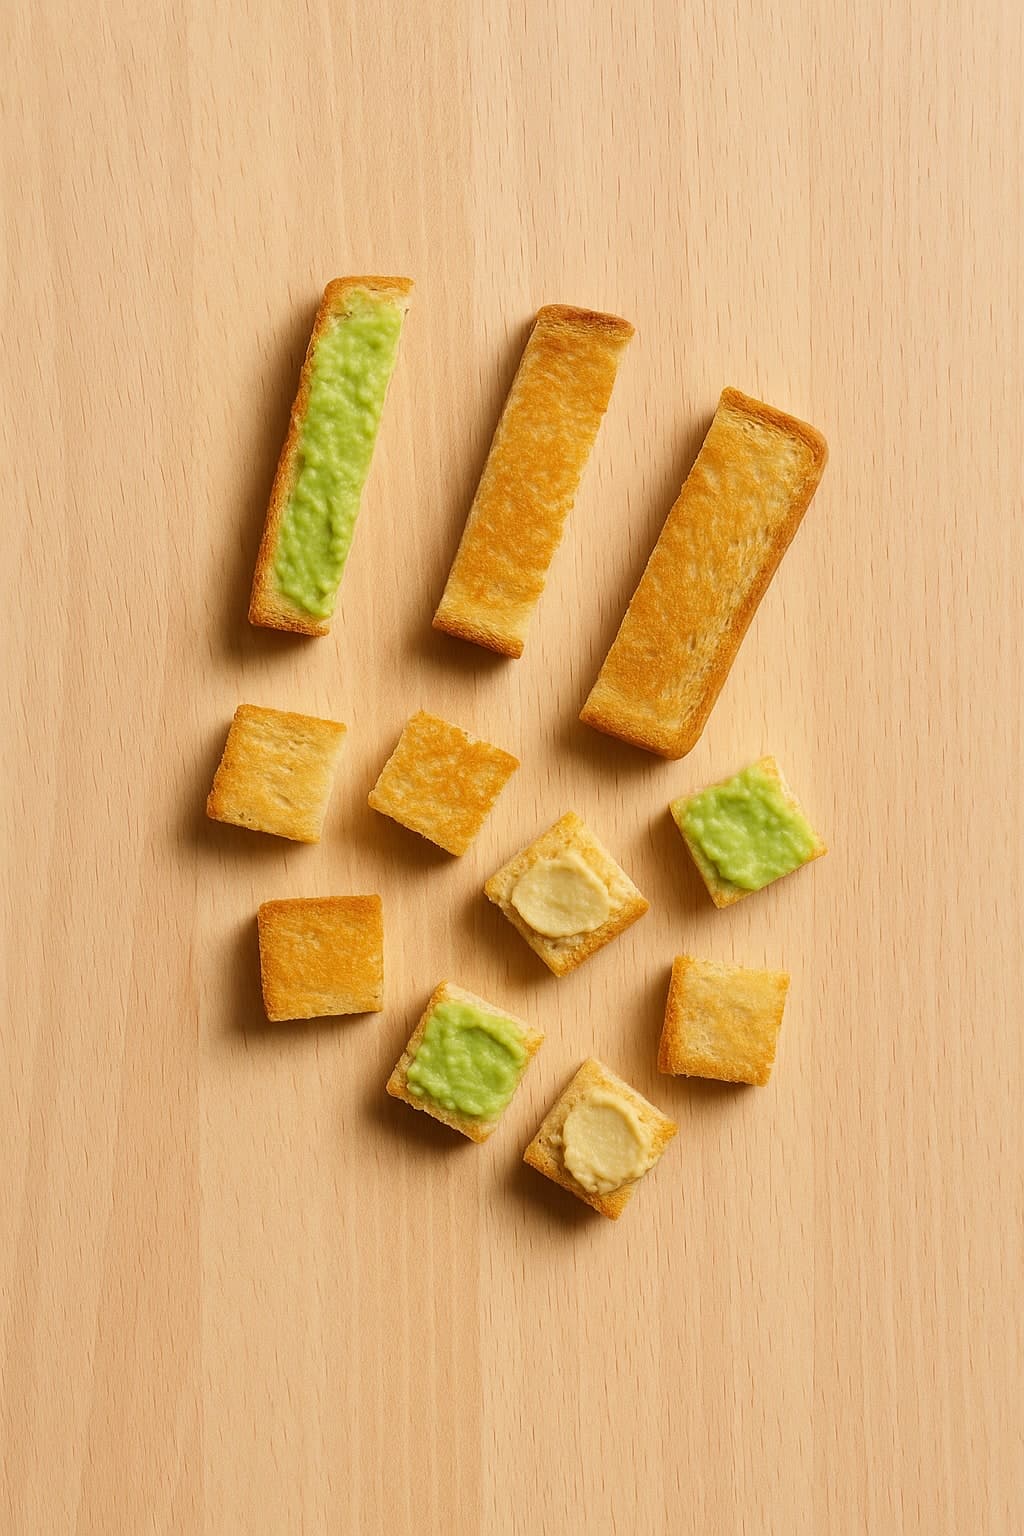
How to cut toast for a 9 month old: Offer smaller strips or bite-sized pieces as pincer grasp develops. Toast can be cut into squares or rectangles. Ensure it is not too crunchy.
12+ months
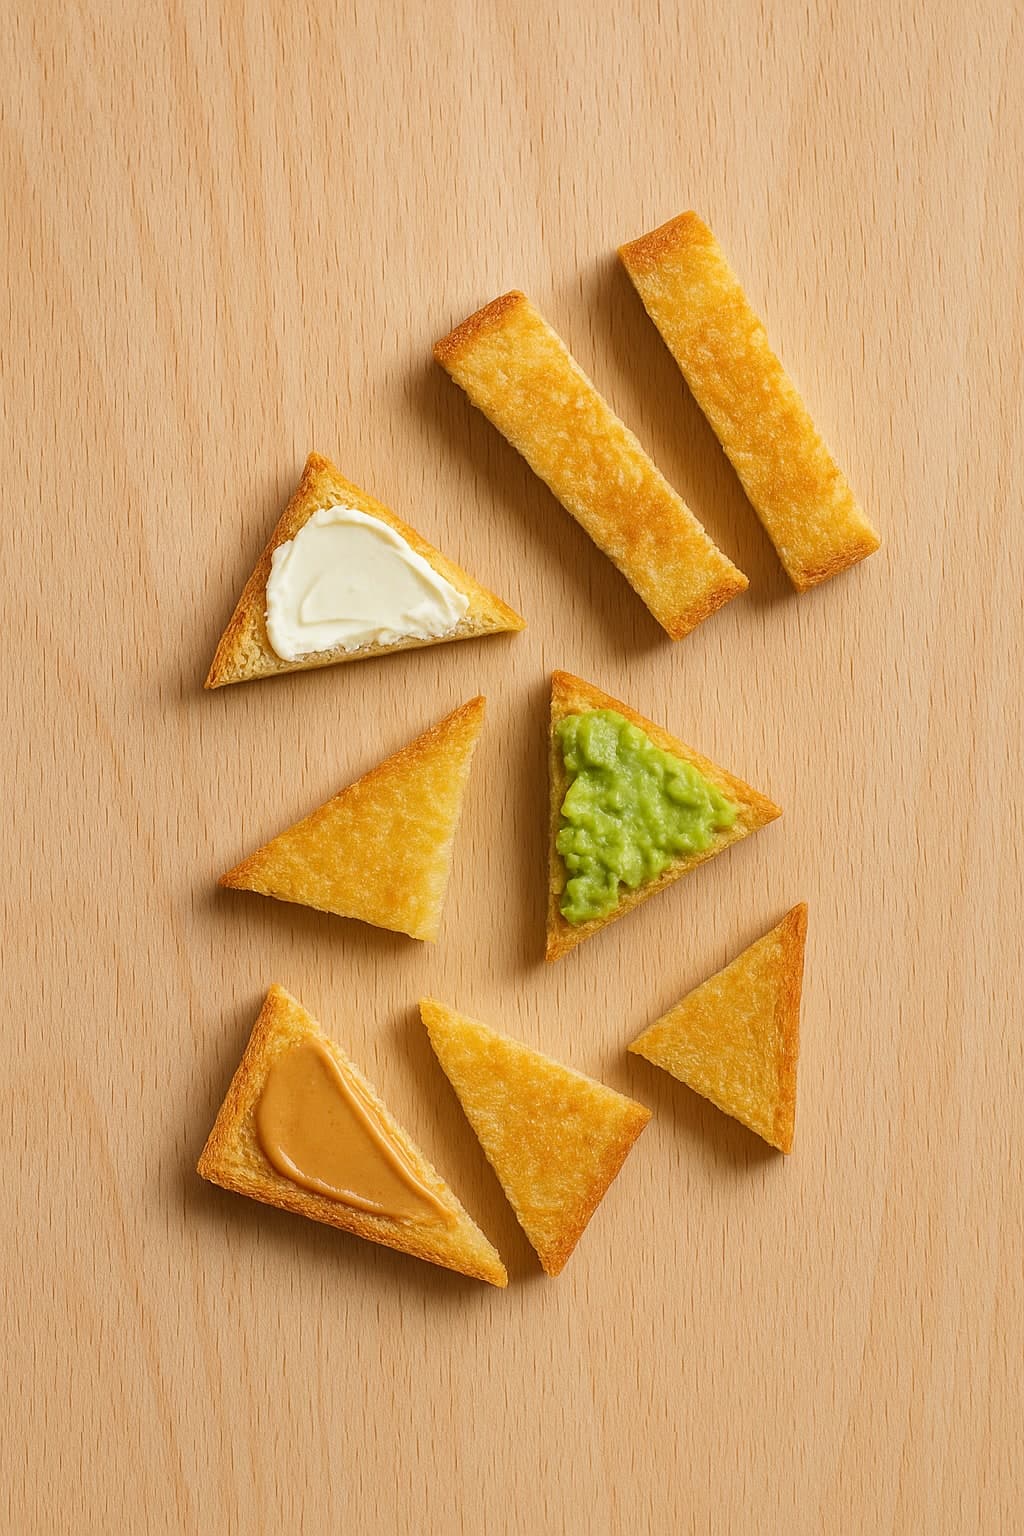
How to cut toast for a 12 month old: Toddlers can handle small toast pieces or strips. Toast can be part of breakfast with various toppings. Keep pieces manageable to reduce choking risk.
How to Cut Eggs for Baby
Read full cutting guide6–8 months
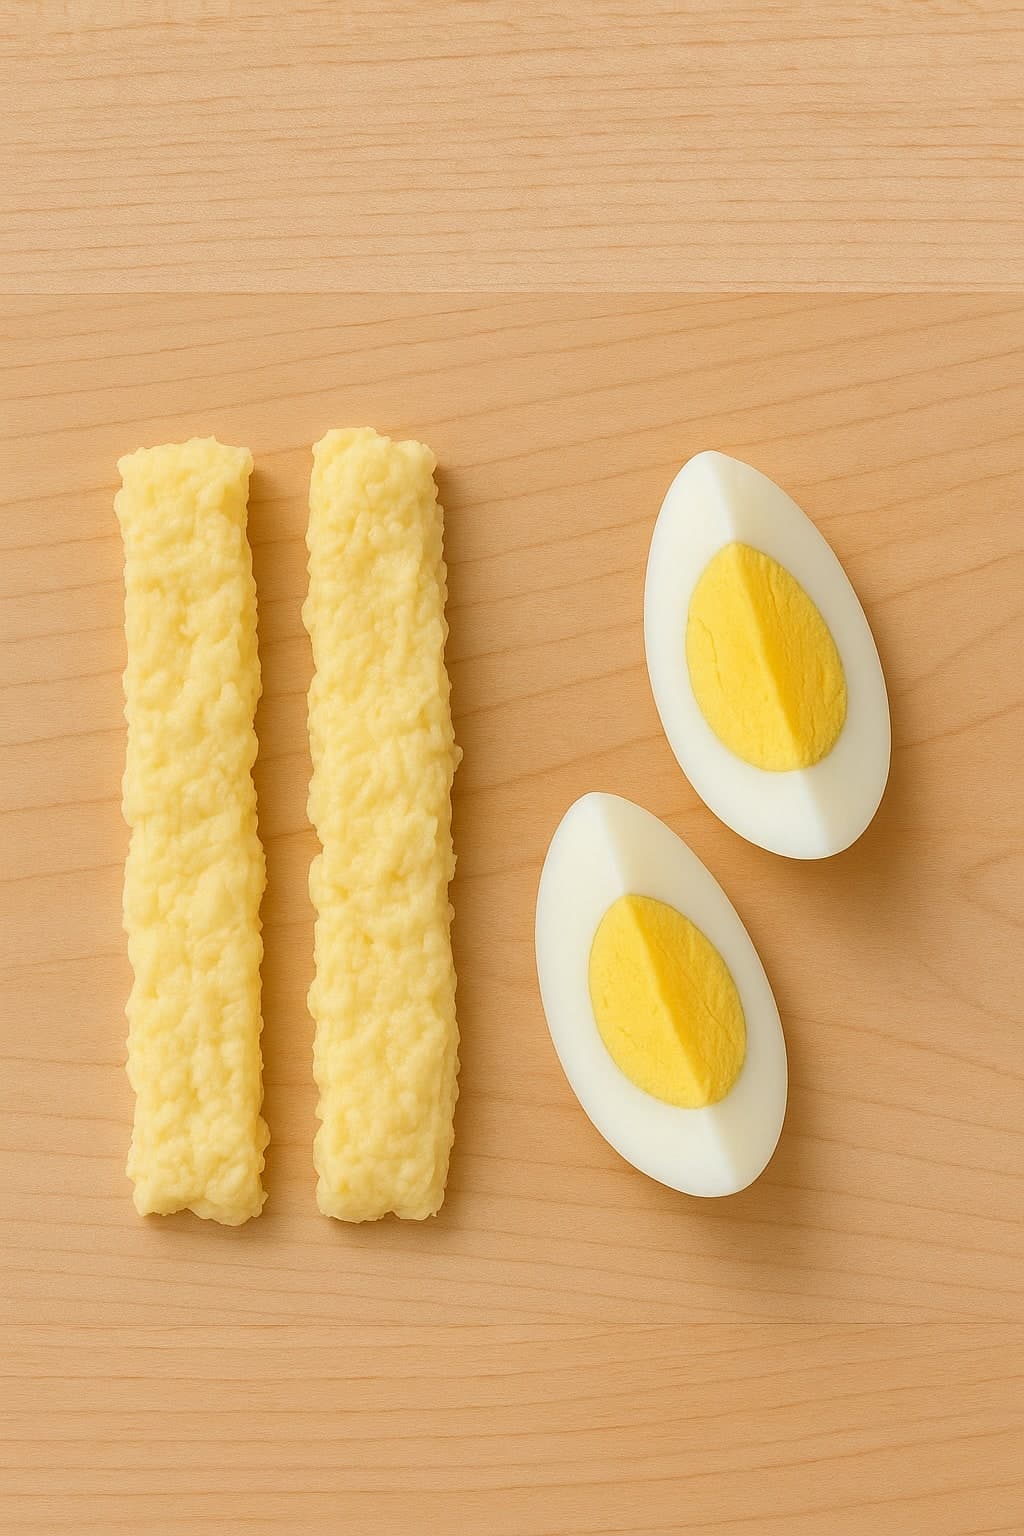
How to cut eggs for a 6 month old: Serve soft scrambled eggs in strips or wedges, or offer a quarter of a hard-boiled egg. Cut hard-boiled eggs into long strips or wedges - not round slices. The egg should be soft and mashable.
9–11 months
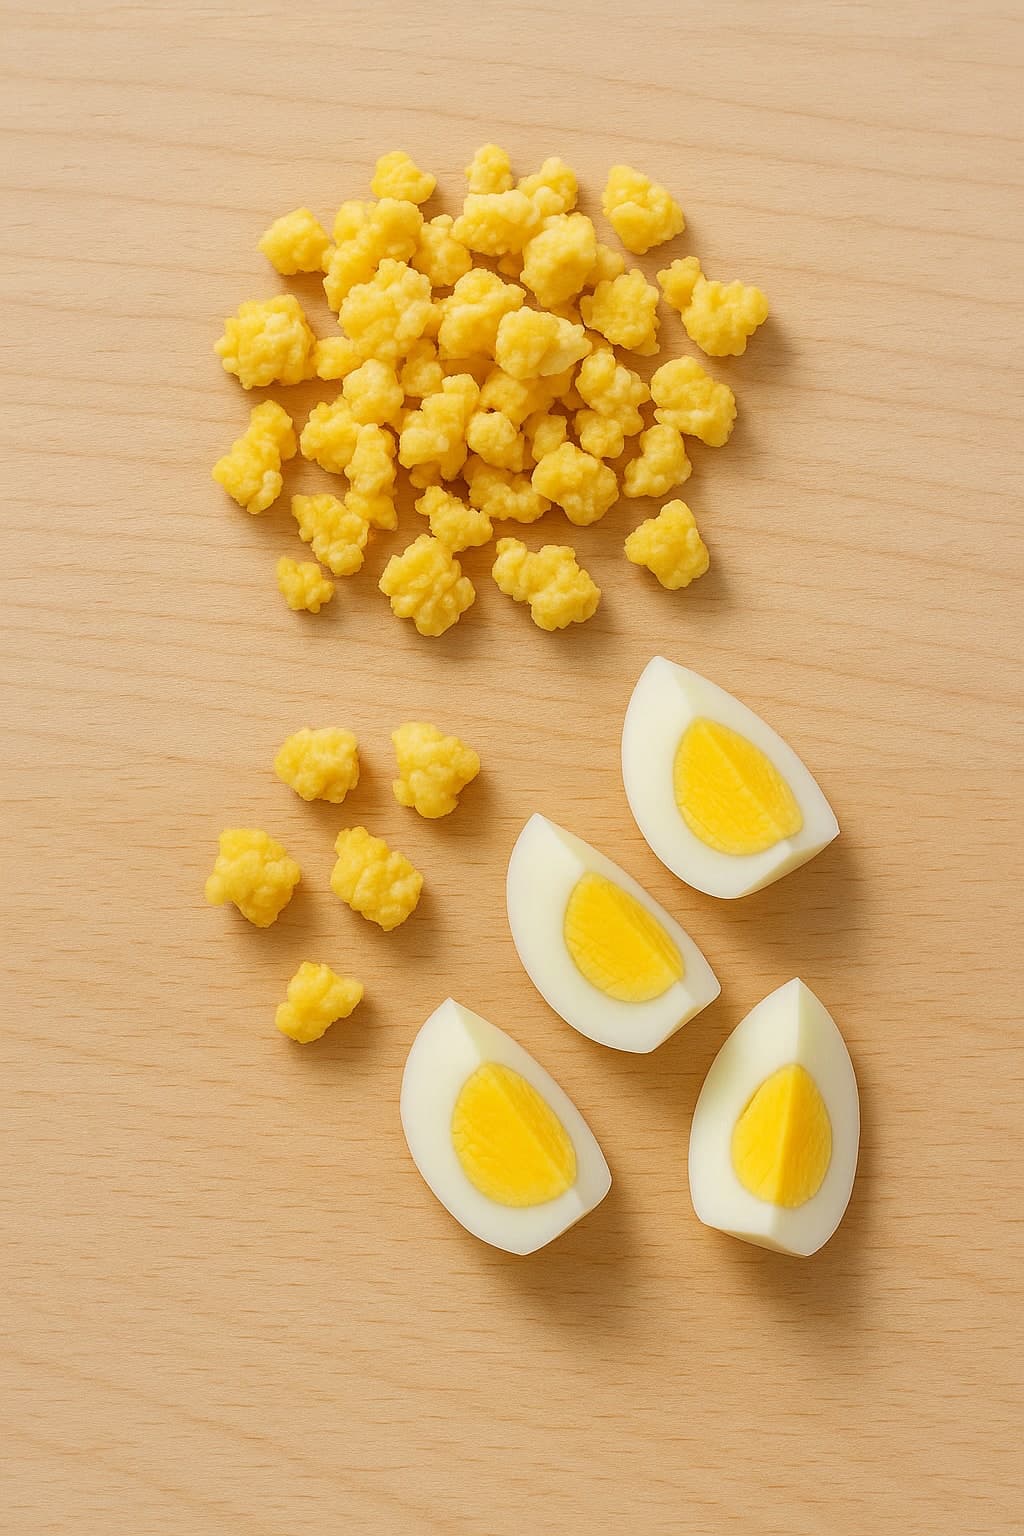
How to cut eggs for a 9 month old: Offer smaller pieces of scrambled egg or quartered hard-boiled egg. As pincer grasp develops, small pieces are easier to pick up. Omelette strips also work well.
12+ months
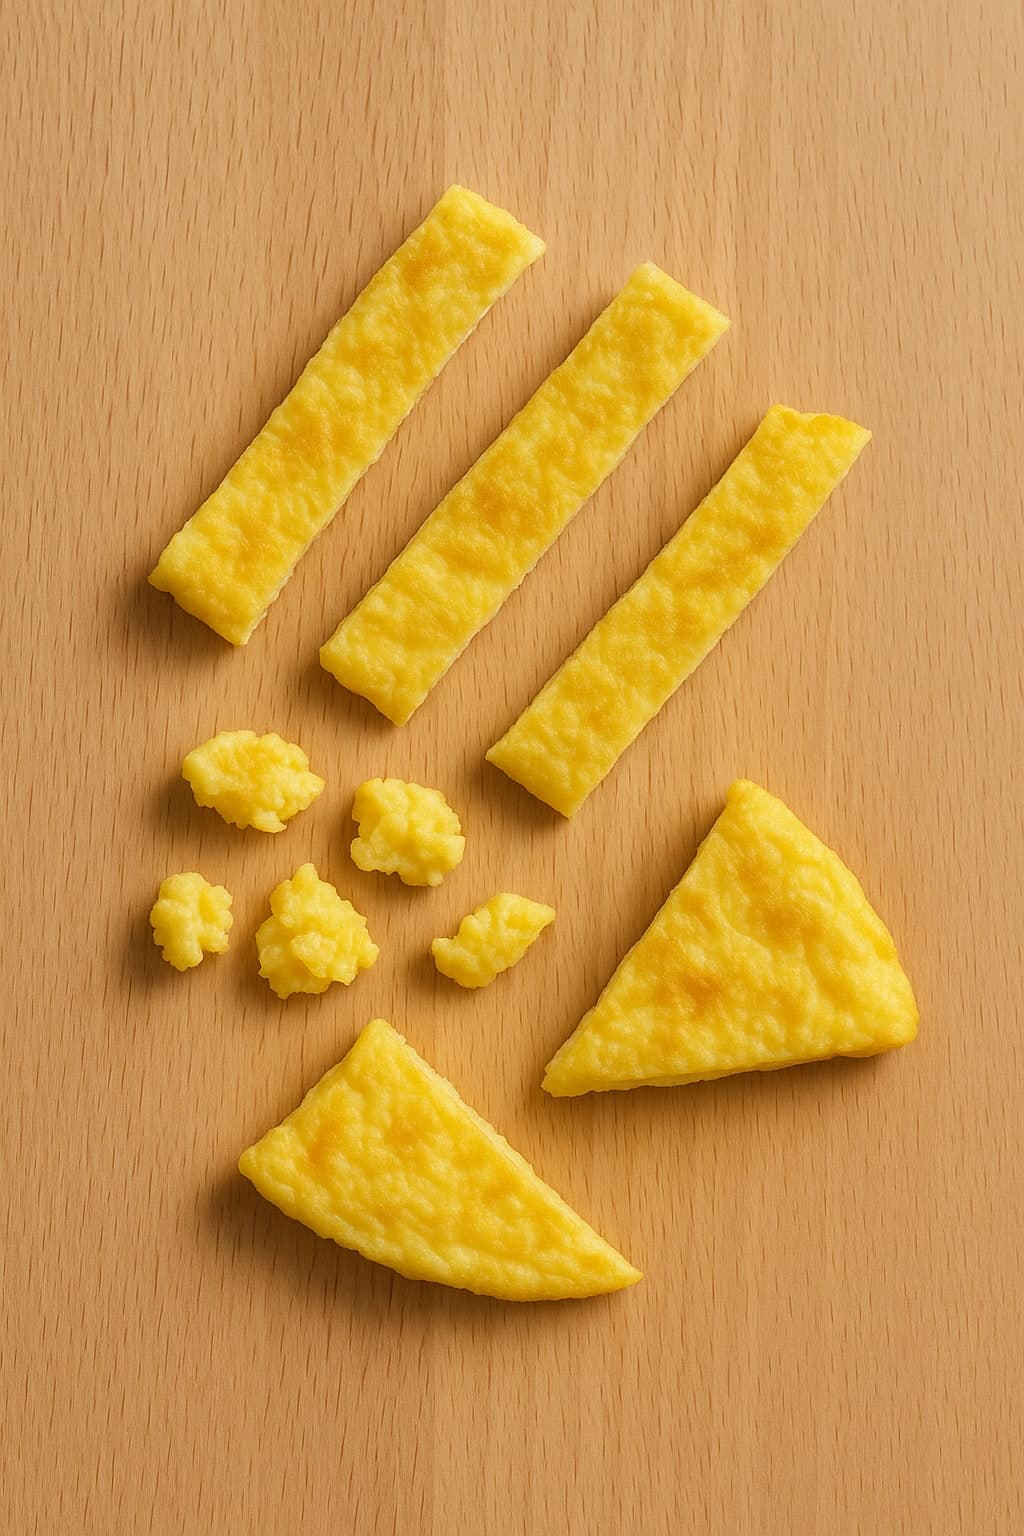
How to cut eggs for a 12 month old: Toddlers can handle bite-sized egg pieces. Hard-boiled egg quarters, scrambled egg chunks, or strips of omelette all work. Eggs can be part of family breakfast.
How to Cut Chicken for Baby
Read full cutting guide6–8 months
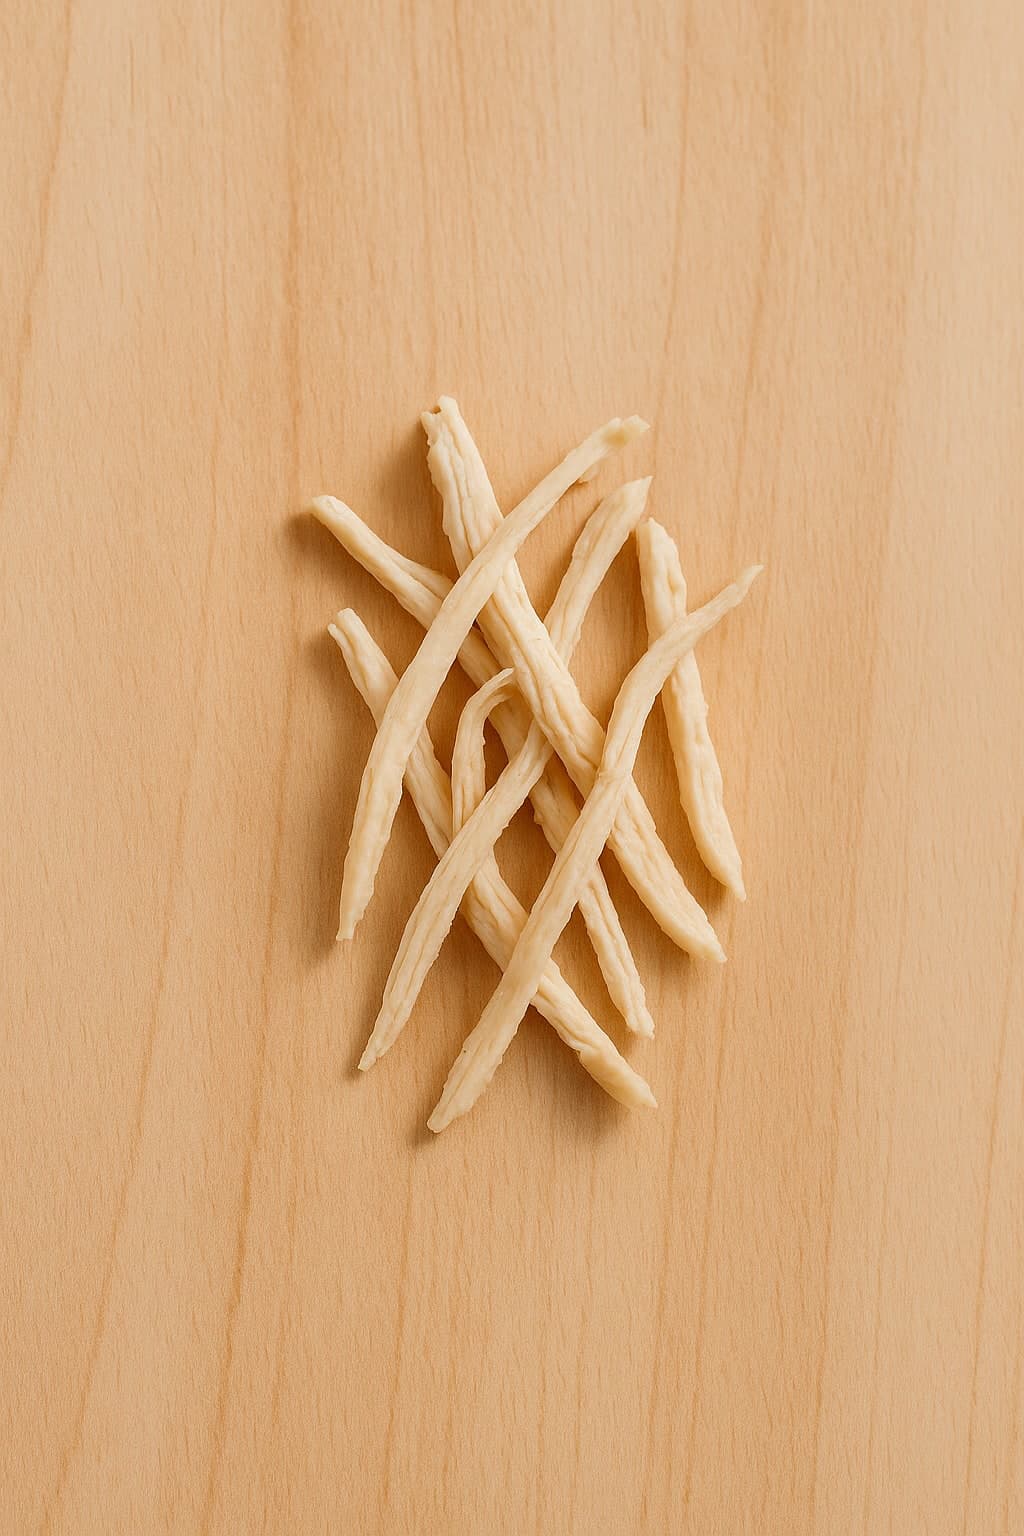
How to cut chicken for a 6 month old: Shred cooked chicken into long, thin strips. The meat should be very tender - easy to shred with a fork. Offer strips that babies can hold and gum. Avoid large chunks.
9–11 months
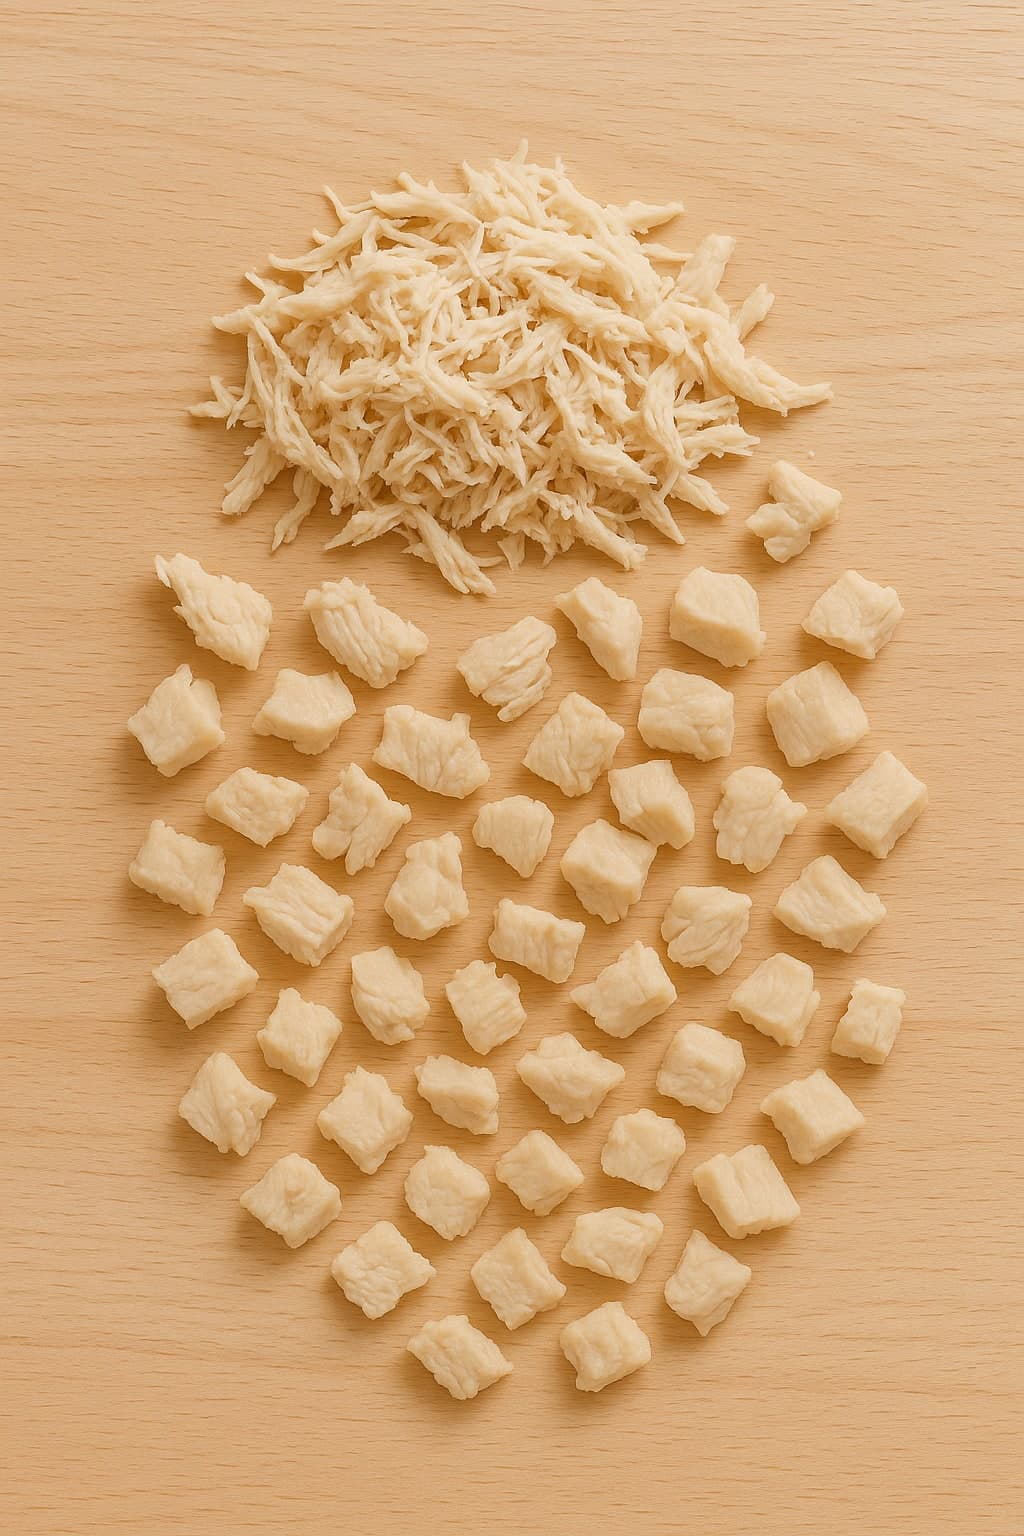
How to cut chicken for a 9 month old: Offer shredded chicken or small, soft pieces. As pincer grasp develops, smaller pieces are easier to pick up. Ensure the chicken is still tender and easy to chew.
12+ months
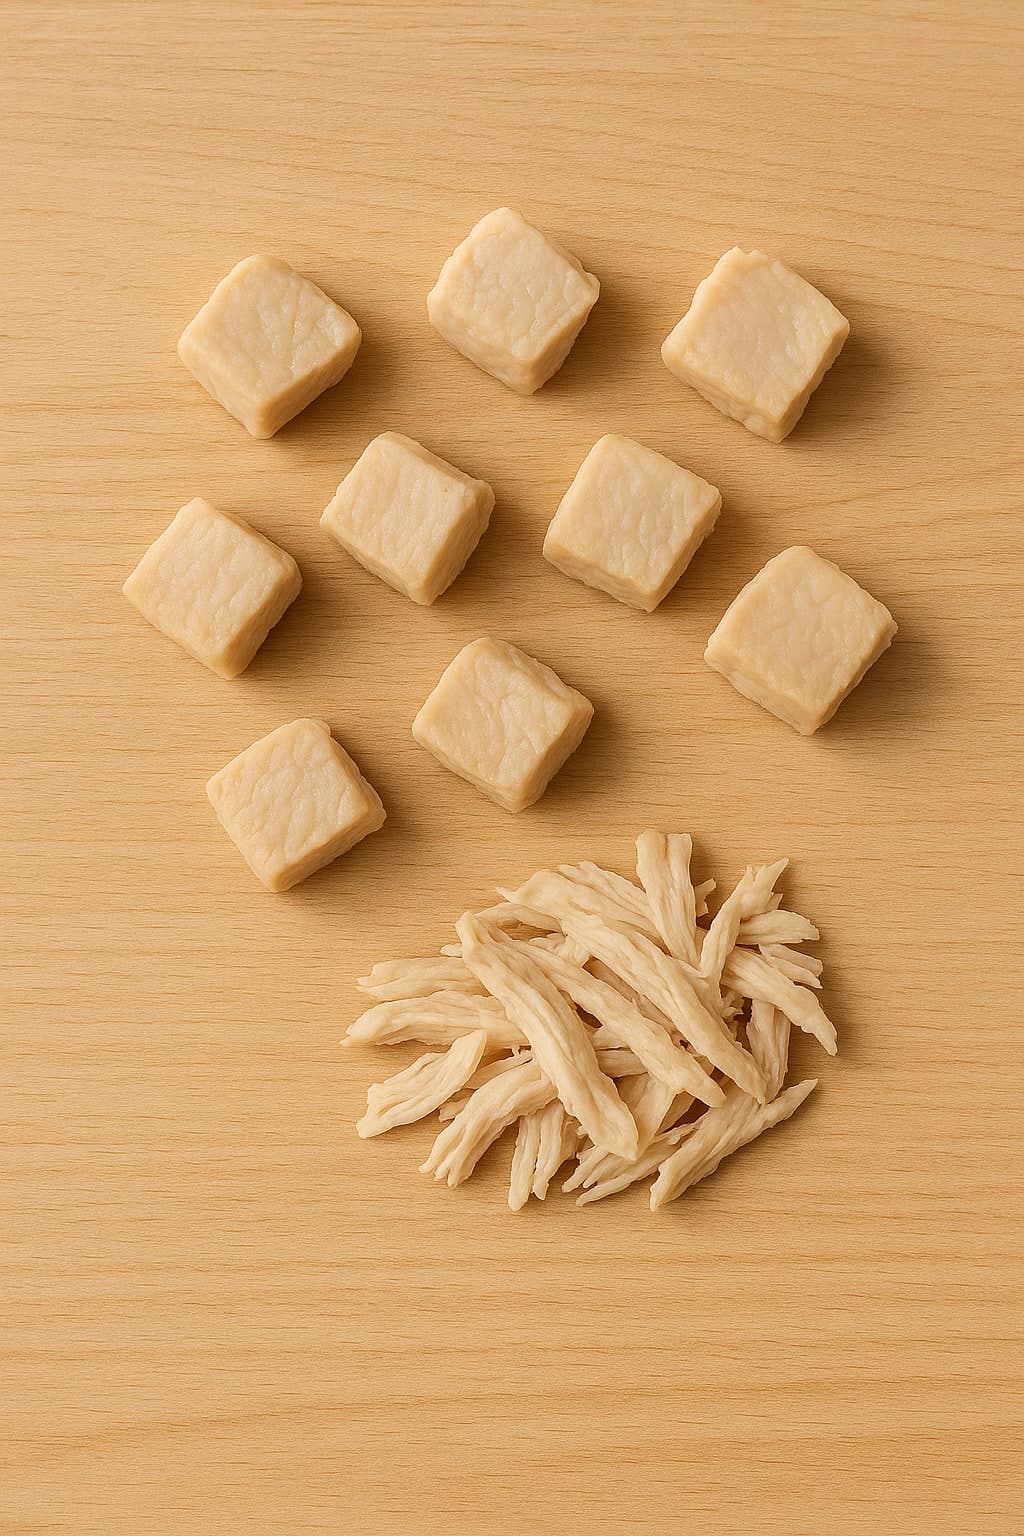
How to cut chicken for a 12 month old: Toddlers can handle bite-sized chicken pieces. Shredded or diced chicken works well. Chicken can be part of family meals - just ensure it is tender and not dry.
How to Cut Sweet Potato for Baby
Read full cutting guide6–8 months
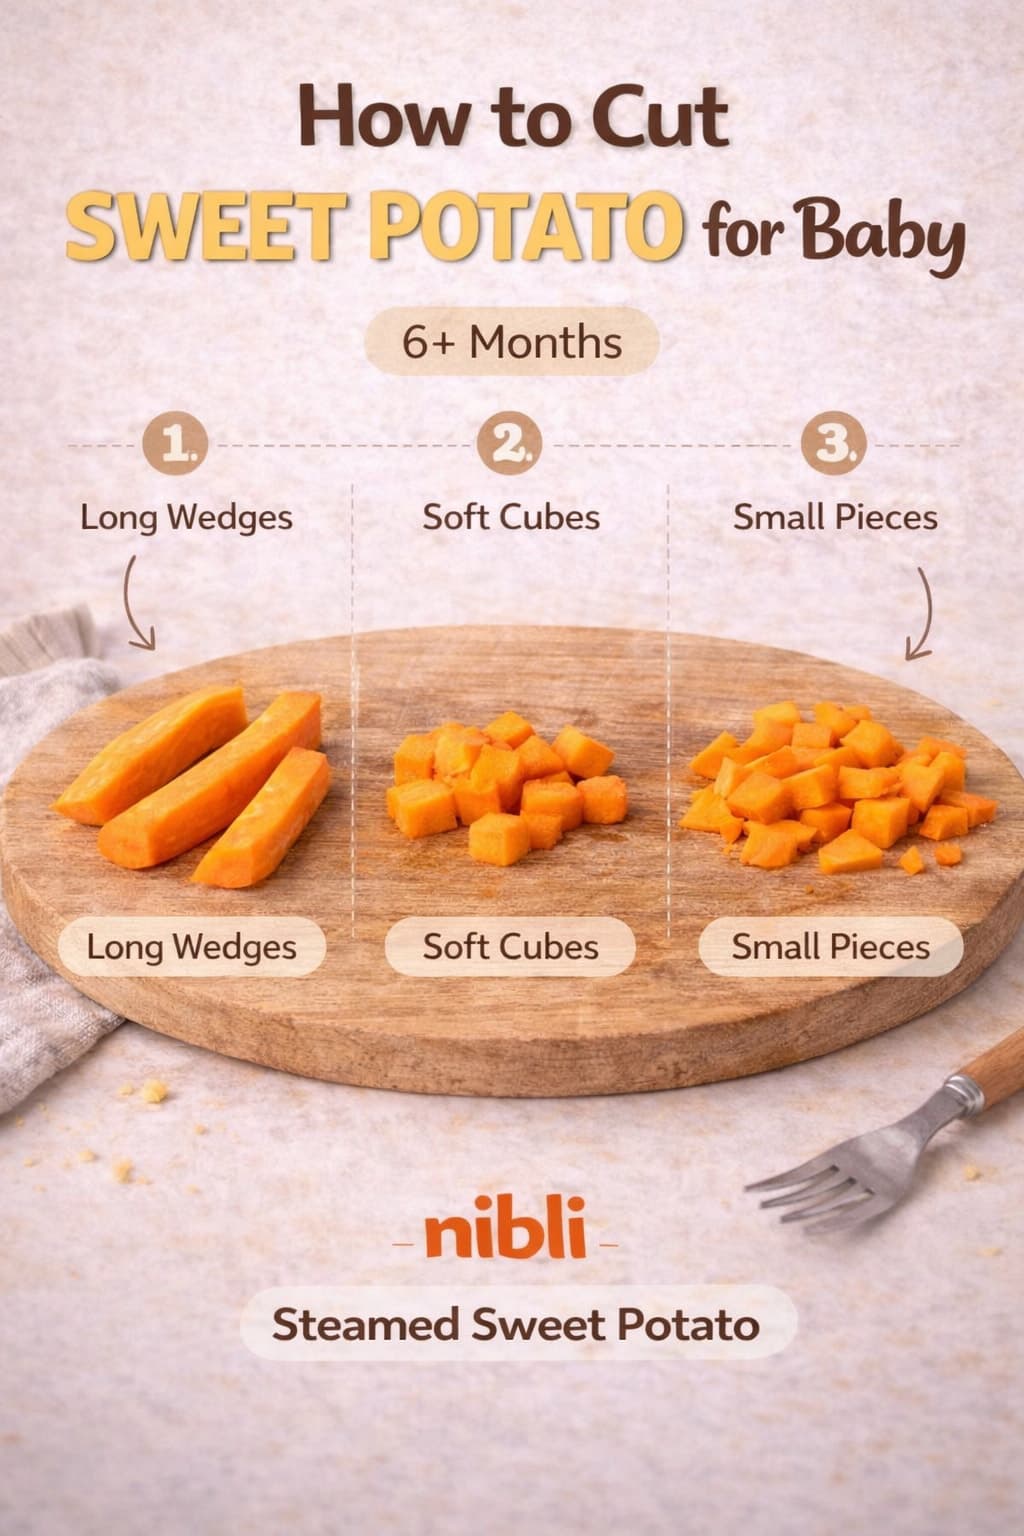
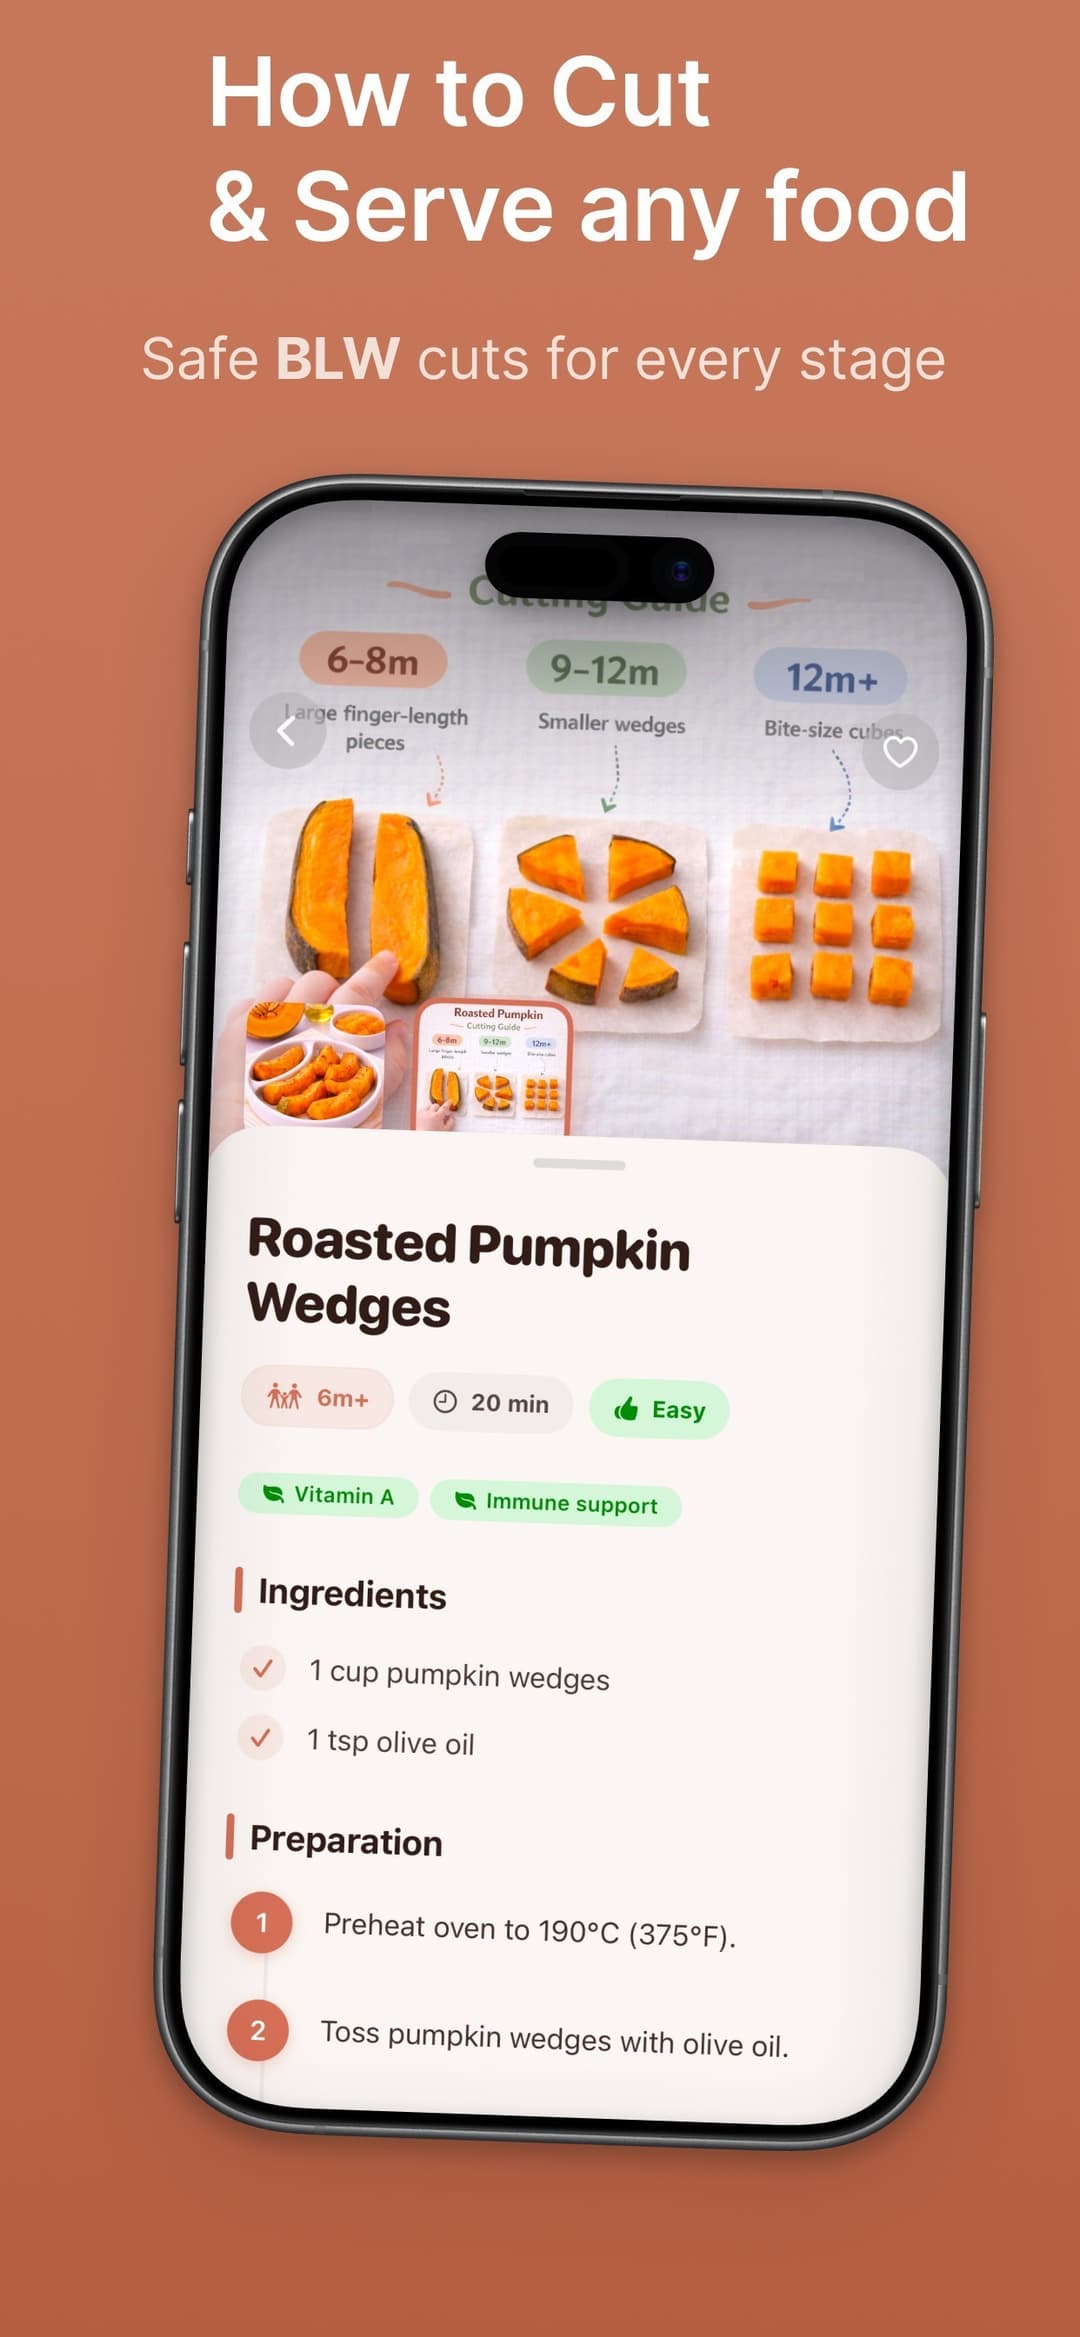
How to cut sweet potato for a 6 month old: Cut cooked sweet potato into long wedges or thick strips. Each piece should be finger-sized so babies can hold it. The sweet potato should be soft enough to squash between your fingers.
9–11 months
How to cut sweet potato for a 9 month old: Offer smaller wedges or cubes. As pincer grasp develops, small soft cubes work well. Sweet potato can be mashed and shaped into fingers or served in chunks.
12+ months
How to cut sweet potato for a 12 month old: Toddlers can handle bite-sized cubes or mash. Sweet potato can be part of family meals - roasted, mashed, or in soups. Ensure it stays soft.
How to Cut Mango for Baby
Read full cutting guide6–8 months
How to cut mango for a 6 month old: Cut mango into long strips or fingers. Remove the skin and slice the flesh into strips that babies can hold. The mango should be ripe and soft - easy to gum. Avoid small slippery cubes.
9–11 months
How to cut mango for a 9 month old: Offer smaller strips or bite-sized pieces. As pincer grasp develops, small chunks work - but ensure they are not too slippery. Slightly firm strips can help with grip.
12+ months
How to cut mango for a 12 month old: Toddlers can handle small mango pieces. Dice or strip - ensure pieces are manageable. Mango can be added to yogurt, oatmeal, or enjoyed on its own.
How to Cut Peach for Baby
Read full cutting guide6–8 months
How to cut peach for a 6 month old: Cut peach into wedges or strips. Remove the pit and slice lengthwise - not into round slices. Each piece should be easy to hold. Ripe peach should be soft enough to mash with your fingers.
9–11 months
How to cut peach for a 9 month old: Offer smaller wedges or chunks. As pincer grasp develops, smaller pieces work well. Ensure the peach is ripe and soft.
12+ months
How to cut peach for a 12 month old: Toddlers can handle bite-sized peach pieces. Wedges or small chunks work well. Peaches can be added to oatmeal, yogurt, or enjoyed as a snack.
How to Cut Grapes for Baby
Read full cutting guide6–8 months
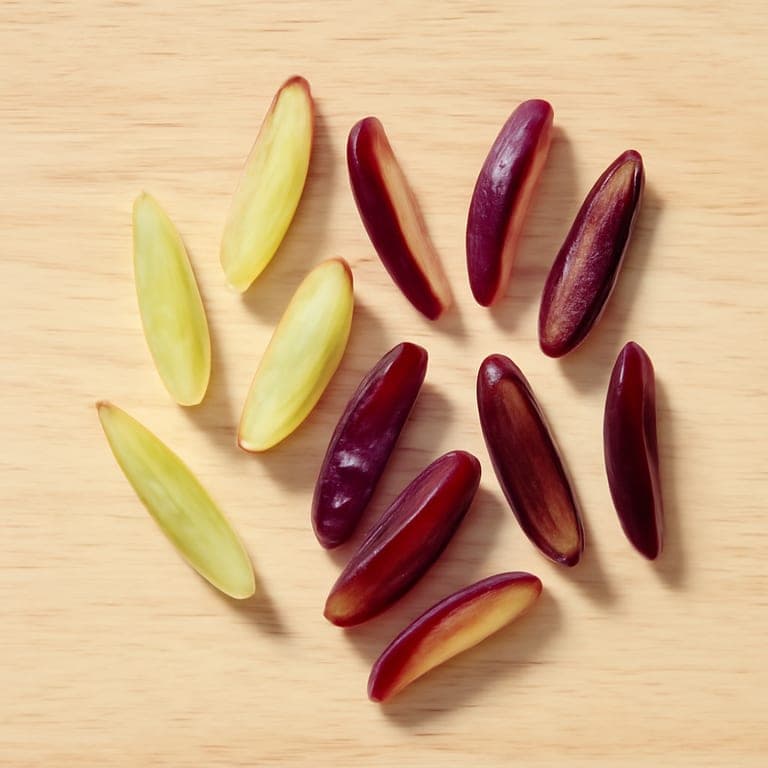
How to cut grapes for a 6 month old: At 6 months, grapes must be quartered lengthwise into four long, thin pieces with the skin ideally removed. Use only soft, ripe, seedless grapes. Never offer whole or round halves, as these pose a serious choking hazard.
9–11 months
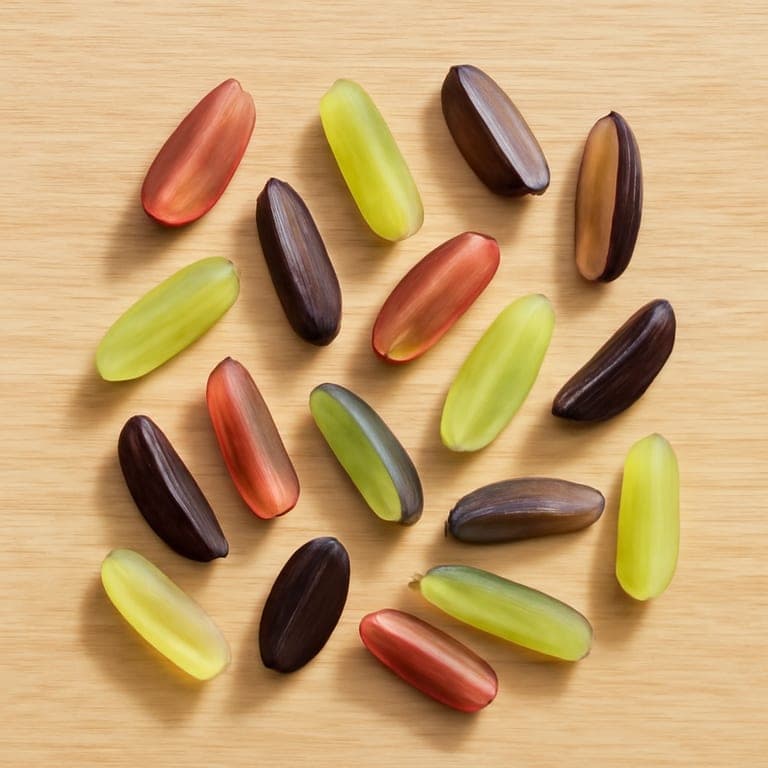
How to cut grapes for a 9 month old: For 9 month olds, continue quartering grapes lengthwise into thin slivers that are easy to grasp with a pincer grip. Pieces should be small enough to prevent any airway blockage. Whole grapes remain unsafe at this age.
12+ months
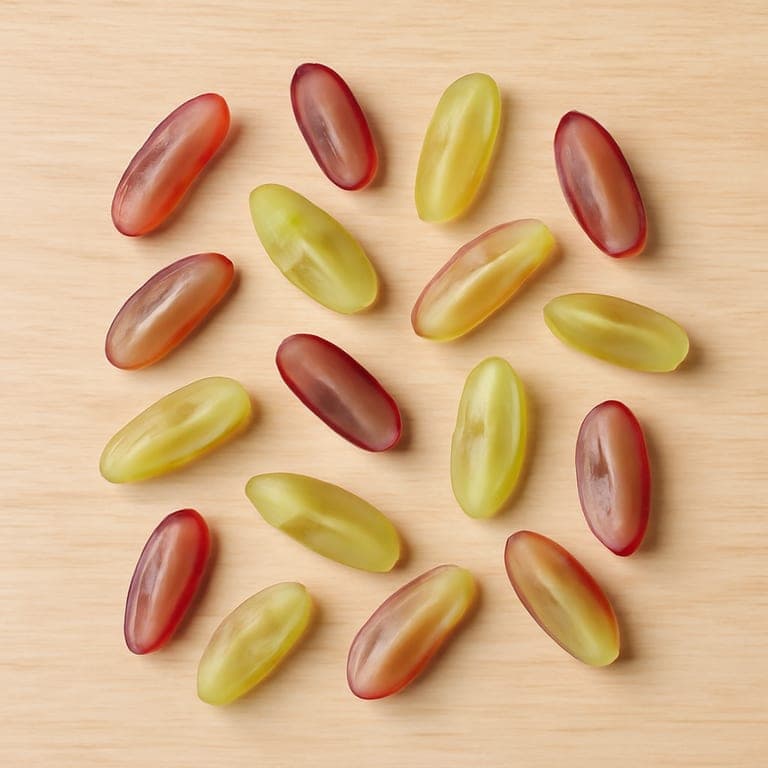
How to cut grapes for a 12 month old: At 12 months, grapes still must be quartered lengthwise to reduce choking risk. The skin can be left on if the grape is soft. Whole grapes should not be given to toddlers under 4 years old.
How to Cut Watermelon for Baby
Read full cutting guide6–8 months
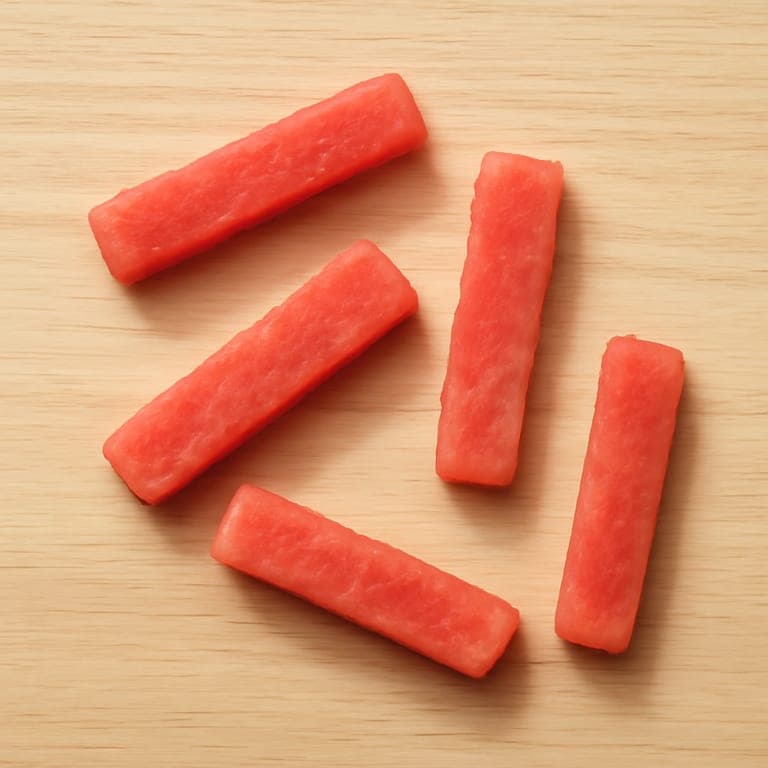
How to cut watermelon for a 6 month old: Cut watermelon into long, fingerlike strips about 1.5 cm thick and palm-length to allow a secure palmar grasp. Remove all visible black seeds and rind completely to ensure safety and ease of handling.
9–11 months
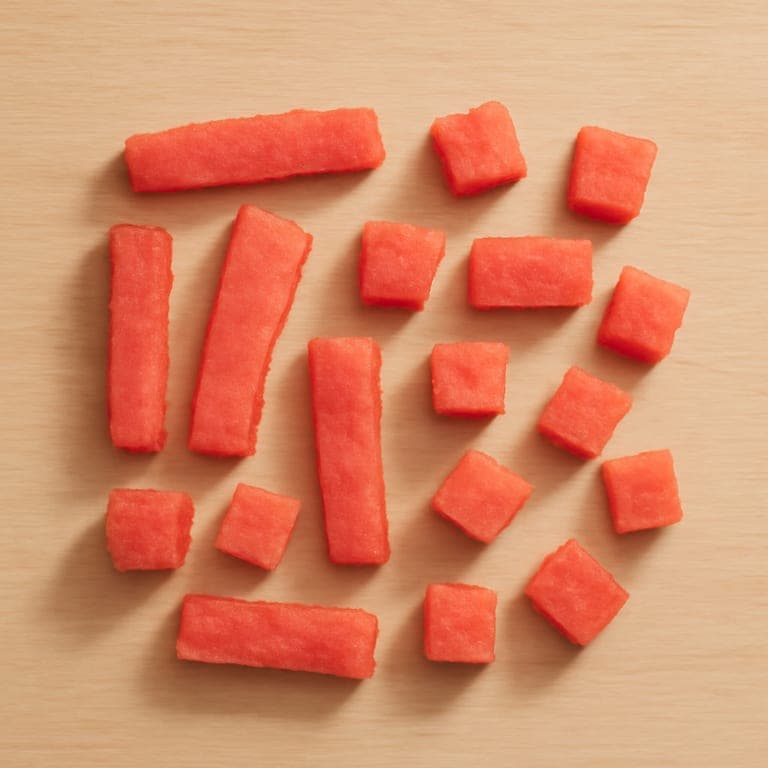
How to cut watermelon for a 9 month old: Offer smaller strips and soft cubes approximately 1.5 cm in size. Make sure all seeds are removed and rind is fully taken off to prevent choking hazards while encouraging more precise picking skills.
12+ months
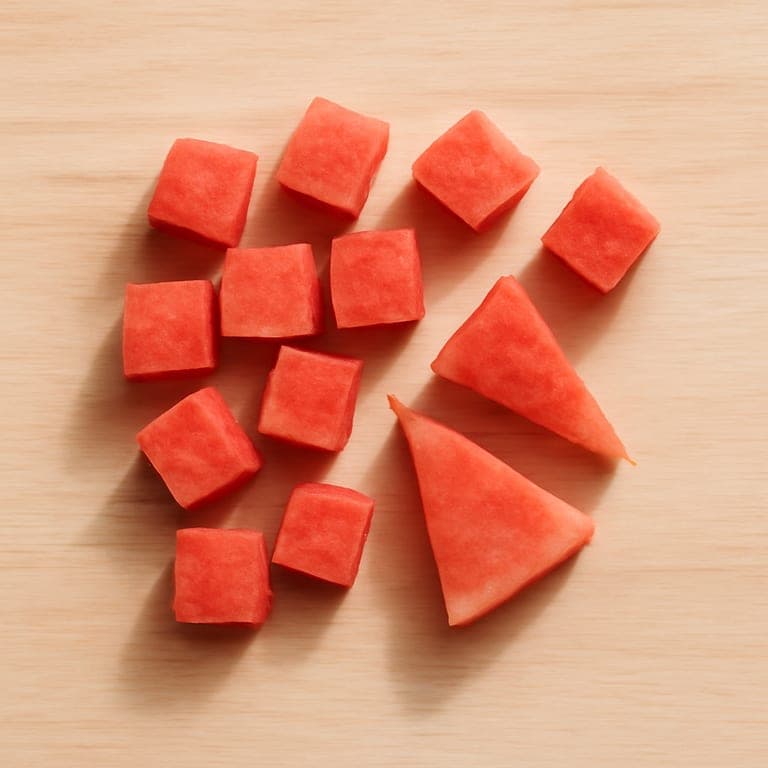
How to cut watermelon for a 12 month old: Provide bite-sized cubes about 2 cm with rind removed. Toddlers can also handle triangular slices without rind as long as the watermelon is seedless, supporting independent eating development.
How to Cut Cucumber for Baby
Read full cutting guide6–8 months
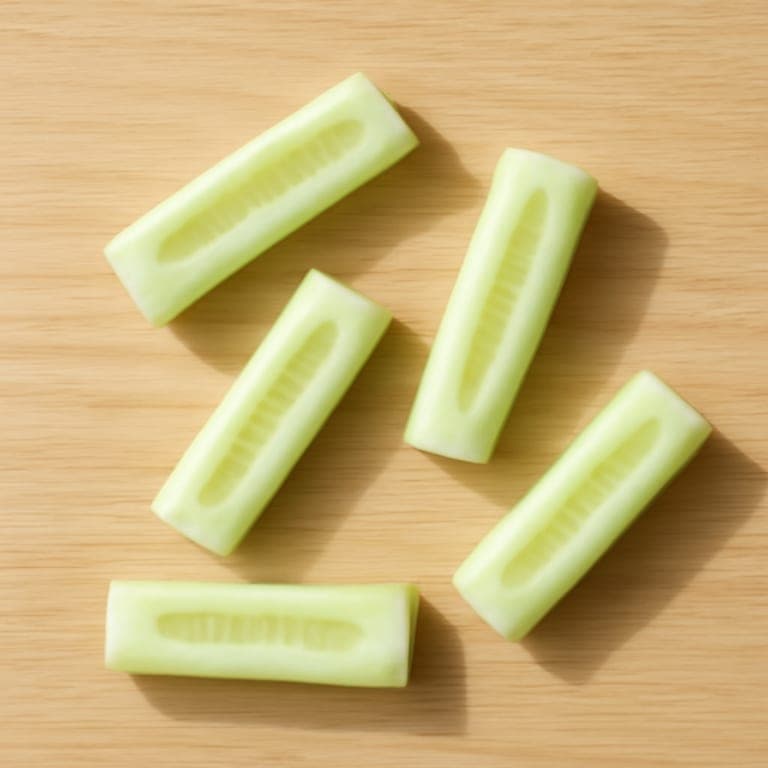
How to cut cucumber for a 6 month old: At 6 months, peel the cucumber and scoop out the seeds from a chunk. Cut it into long, thick wedges or batons about 1.5 cm thick and palm-length. You can also offer thick cold strips from the fridge to soothe teething gums. Avoid thin coin-shaped slices as raw cucumber is firm and could be a choking hazard.
9–11 months
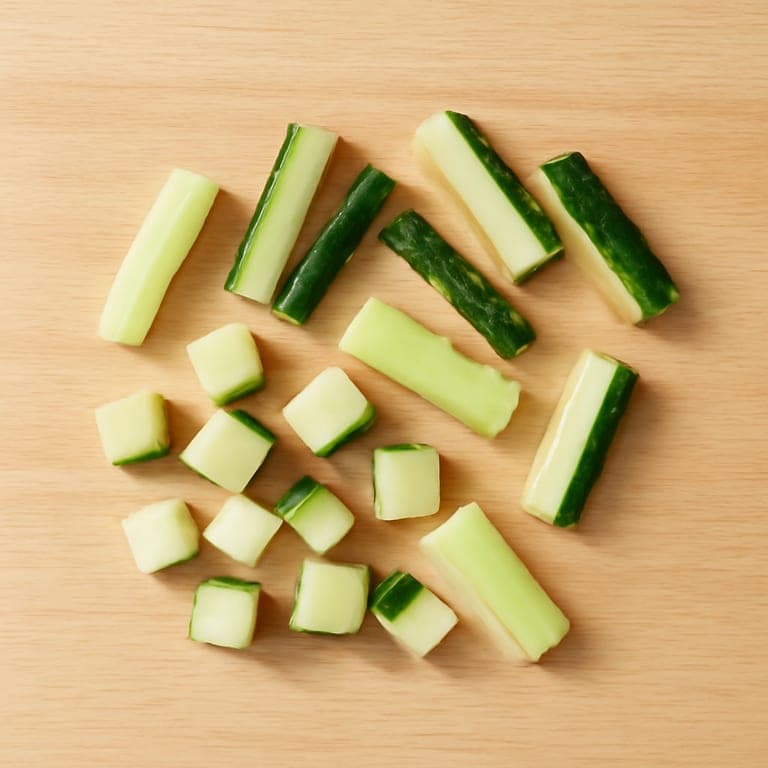
How to cut cucumber for a 9 month old: By 9 months, peel the cucumber and offer small strips and soft chunks about 1.5 cm in size. If your baby chews well, you can leave the skin on, but continue to avoid thin coin-shaped slices to ensure safe eating.
12+ months
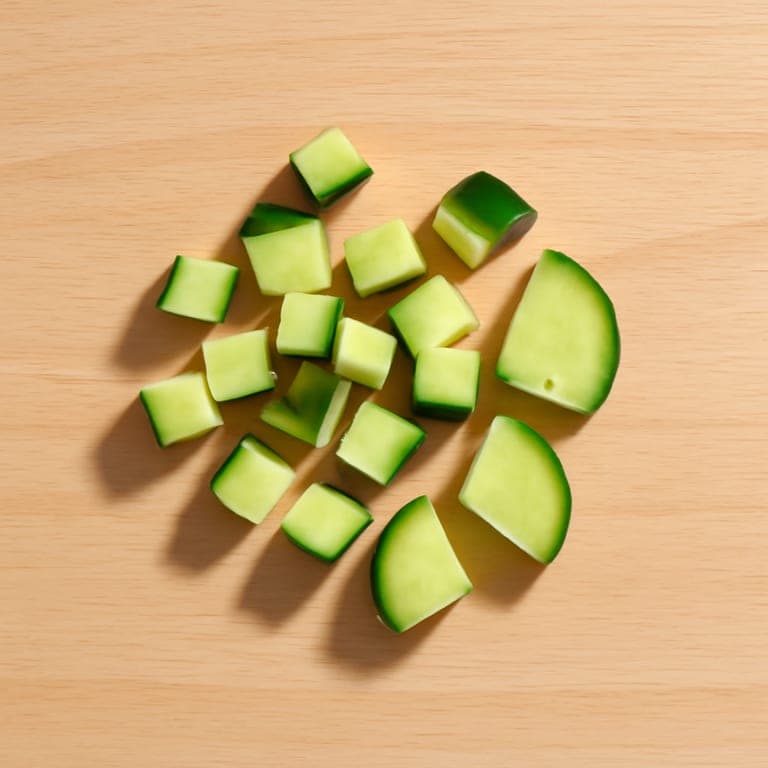
How to cut cucumber for a 12 month old: At 12 months, you can offer bite-sized cubes or short batons. The skin can remain on if it is soft. Thicker half-moon shapes are also suitable, but thin coin slices should still be avoided to reduce choking risk.
How to Cut Carrot for Baby
Read full cutting guide6–8 months
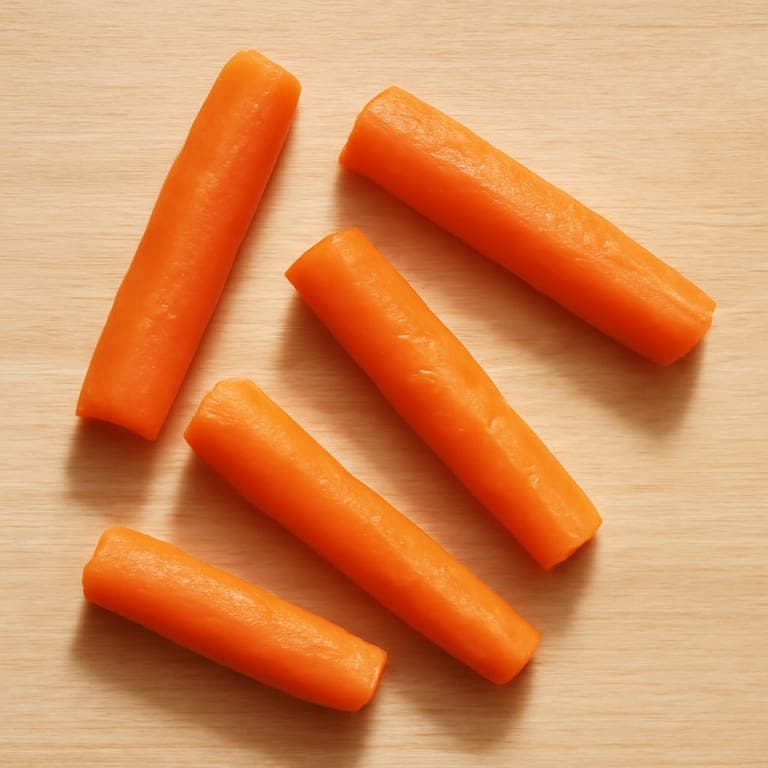
How to cut carrot for a 6 month old: Always steam or roast carrots until very soft and fork-mashable. Offer carrot in thick batons or wedges about 1.5 cm thick and palm-length to support safe grasping and chewing. Never give raw carrot at this age.
9–11 months
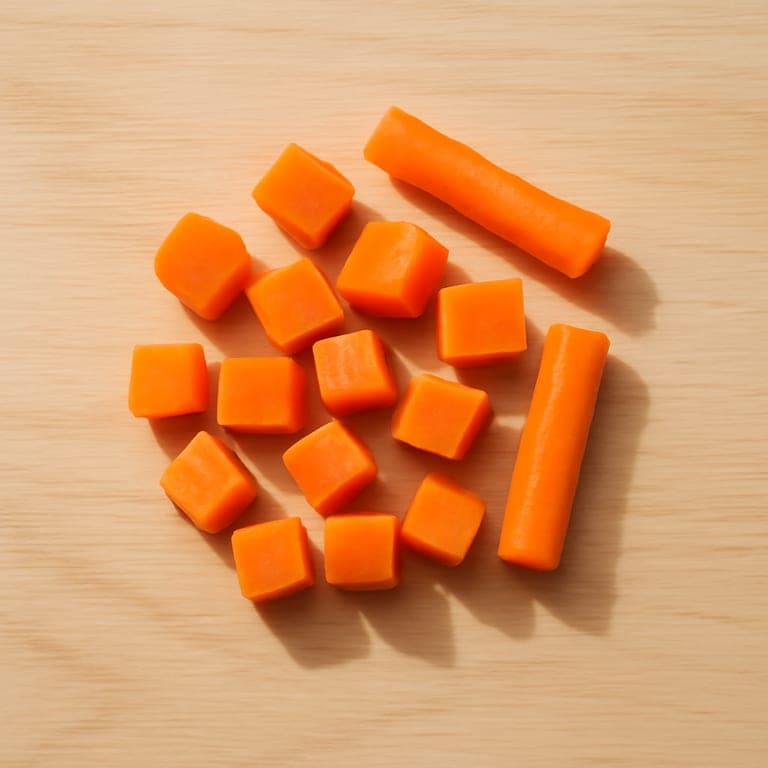
How to cut carrot for a 9 month old: Serve smaller cooked carrot pieces such as 1 to 1.5 cm cubes or short tender strips. Always ensure the carrot is cooked very soft to reduce choking risk and support easy chewing and swallowing.
12+ months
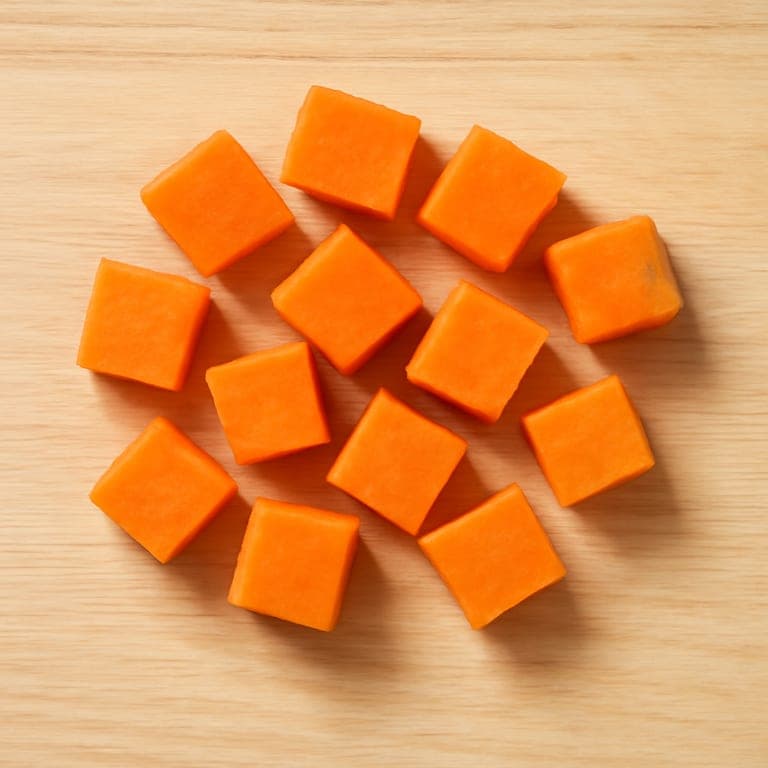
How to cut carrot for a 12 month old: Offer bite-sized soft cooked carrot cubes that your toddler can easily manage. Raw carrot remains unsafe and should not be introduced at this stage to prevent choking hazards.
How to Cut Pasta for Baby
Read full cutting guide6–8 months
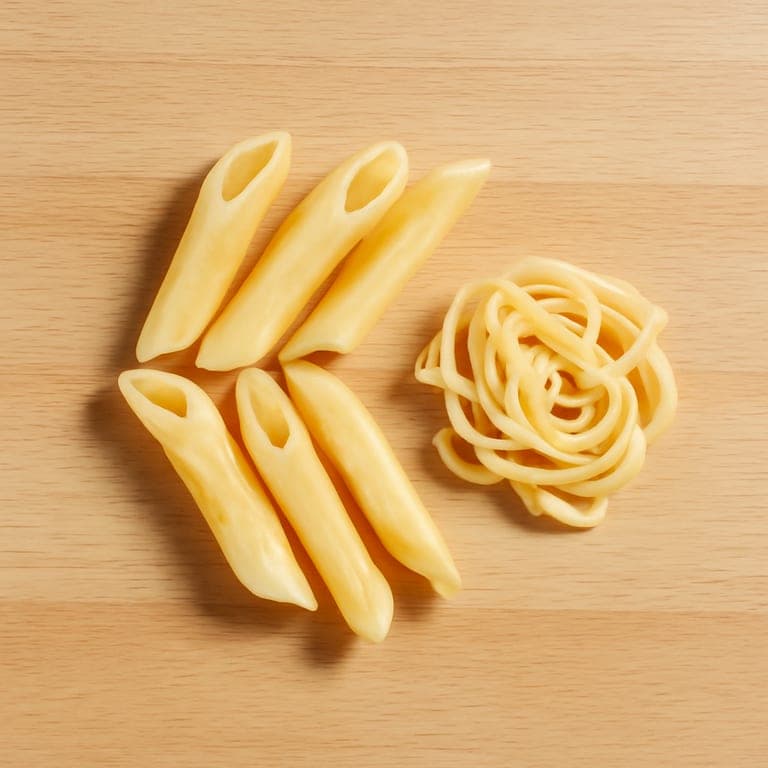
How to cut pasta for a 6 month old: Choose soft, well-cooked pasta like penne or fusilli cut in half lengthwise, or short overcooked spaghetti or fettuccine strands. Avoid round whole-shape pasta such as rotini to reduce choking risk. Always ensure the pasta is very soft to support safe self-feeding.
9–11 months
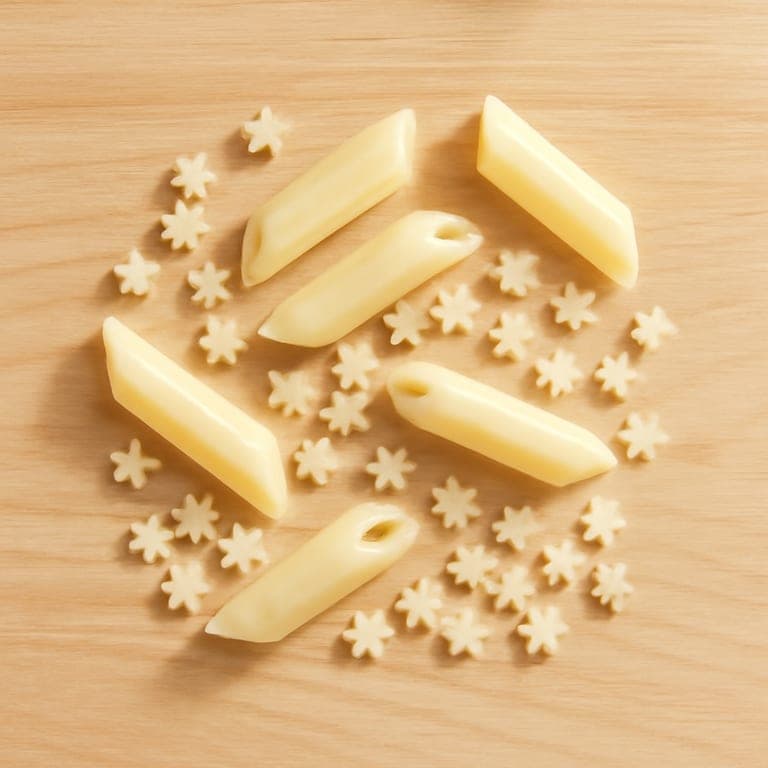
How to cut pasta for a 9 month old: At 9 months, babies can handle small whole soft pasta shapes like mini stars or orzo cooked very soft, as well as halved small penne and short pieces of overcooked spaghetti. Continue to prioritize softness and manageable sizes to encourage independent eating.
12+ months
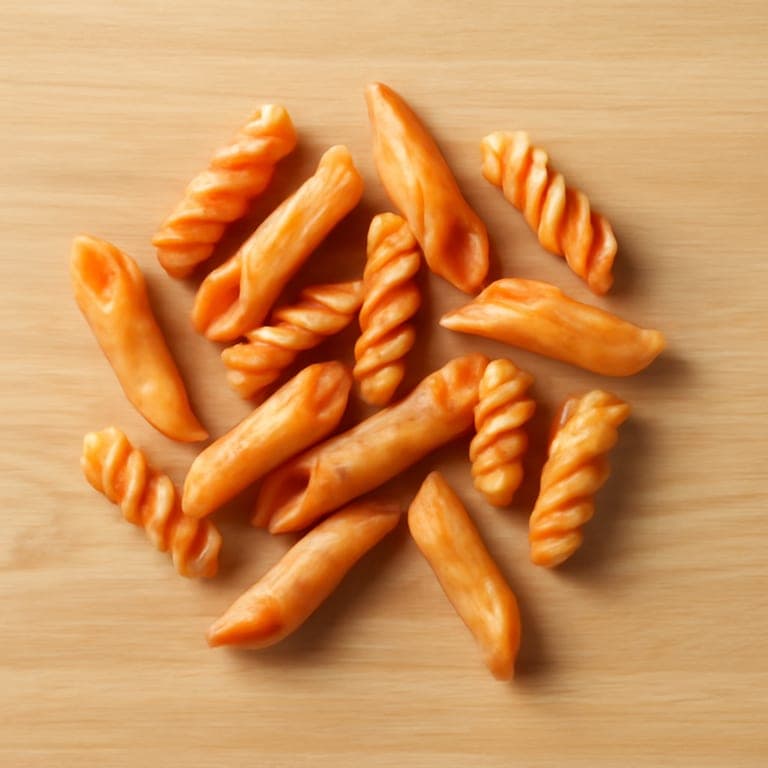
How to cut pasta for a 12 month old: By 12 months, most regular pasta shapes are suitable if very well-cooked. Toddlers can manage standard penne, fusilli, ditalini, and similar shapes, allowing for more variety while maintaining softness for safe chewing.
How to Cut Meatballs for Baby
Read full cutting guide6–8 months
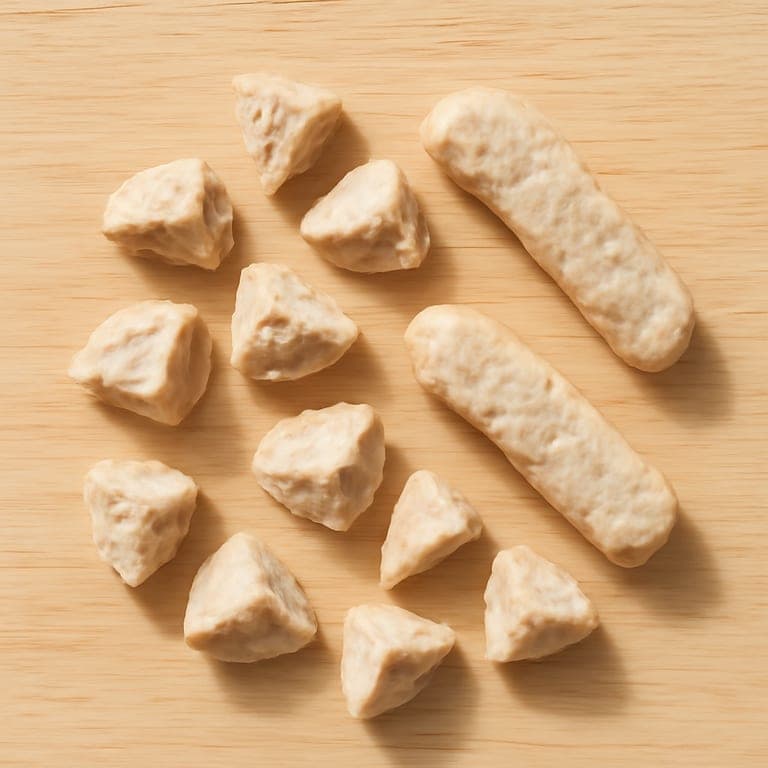
How to cut meatball for a 6 month old: At 6 months, serve soft mini meatballs that are quartered or smashed flat into finger-shaped patties. Never offer whole meatballs as they pose a significant choking hazard at this age.
9–11 months
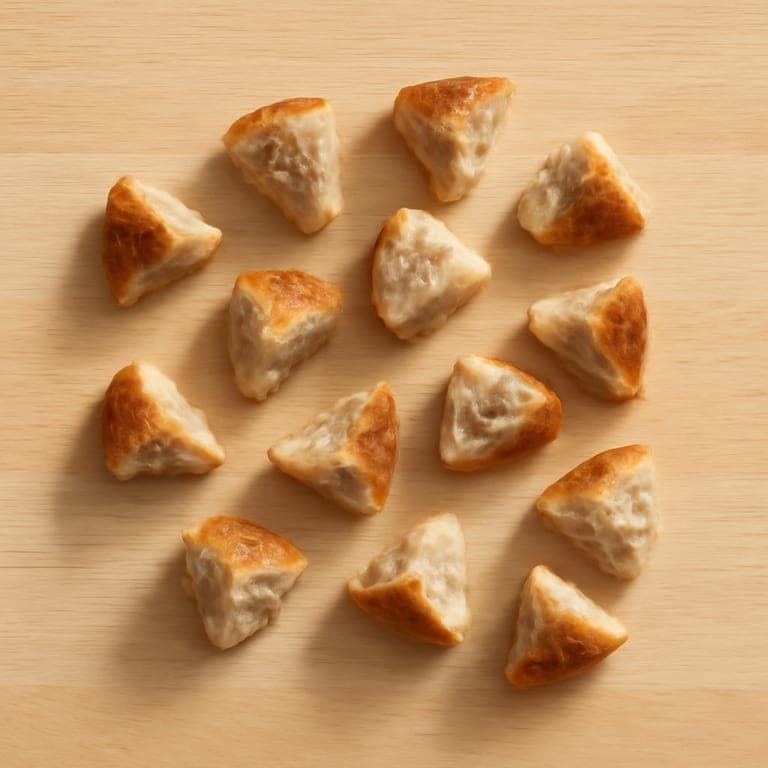
How to cut meatball for a 9 month old: For 9 month olds, cut soft meatballs into small pieces about 1 to 1.5 cm in size, either quartered or thinly sliced. This size helps babies grasp and chew safely while encouraging independence.
12+ months
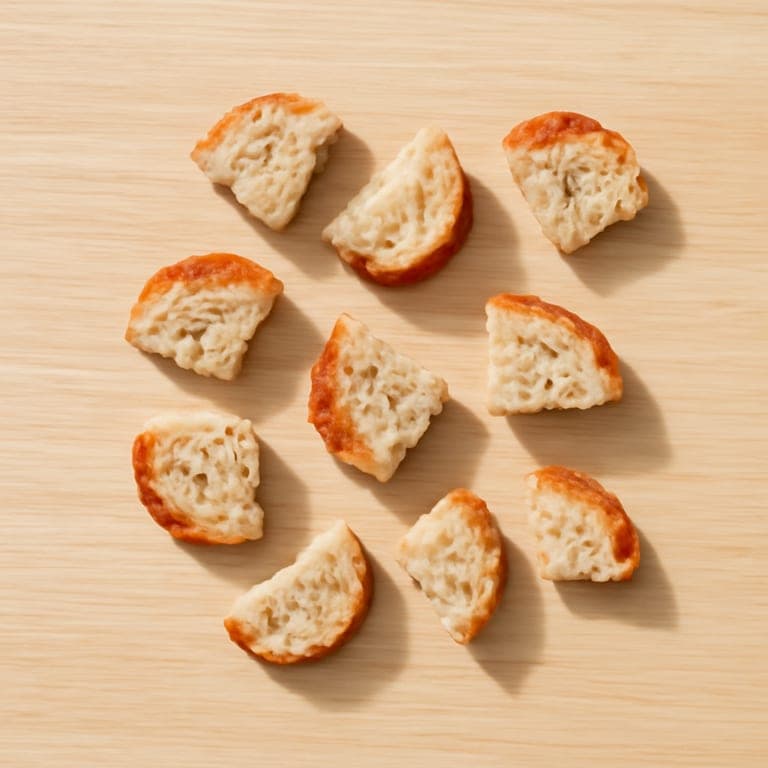
How to cut meatball for a 12 month old: At 12 months, slice meatballs into bite-sized pieces suitable for your toddler’s improved chewing skills. Whole meatballs should still be avoided until age 4 to prevent choking risks.
How to Cut Fish for Baby
Read full cutting guide6–8 months
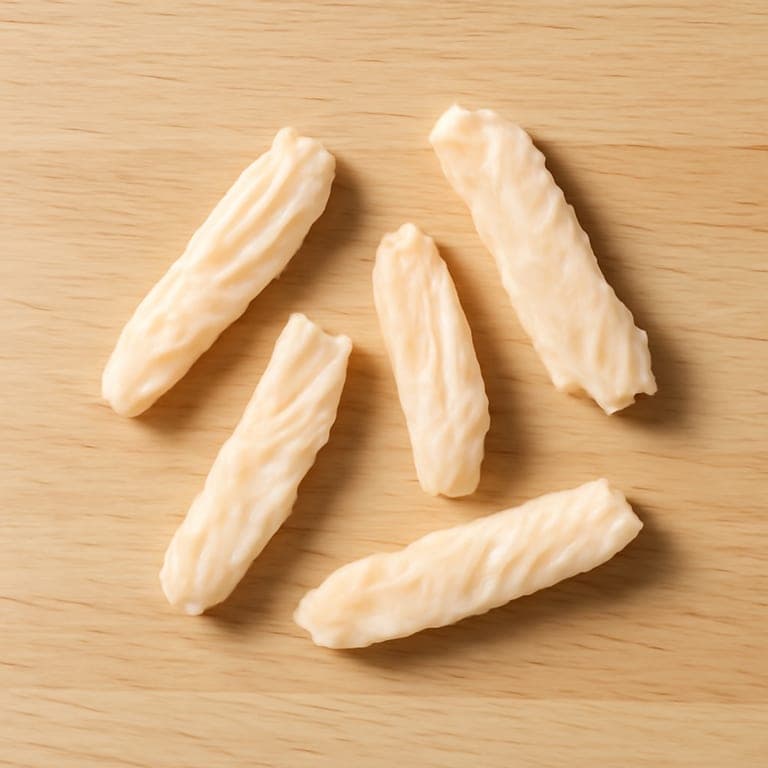
How to cut fish for a 6 month old: Serve long flakes or strips of fully cooked, boneless soft fish about 1 cm by 5 cm. Carefully check for bones by running your fingers over the fillet to ensure no small bones remain, as even one bone poses a choking risk.
9–11 months
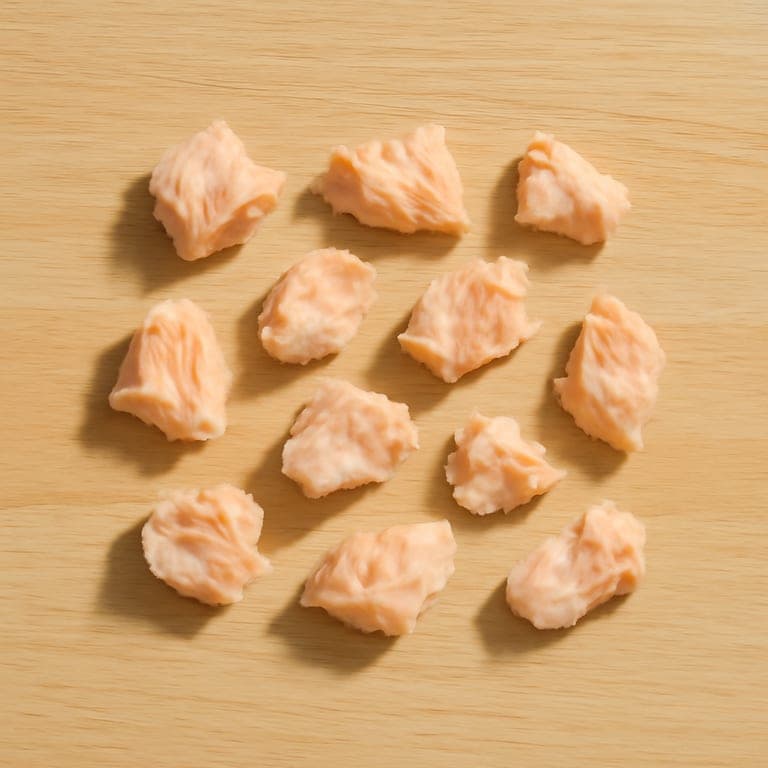
How to cut fish for a 9 month old: Offer smaller flakes of boneless cooked fish, approximately 1 cm in size. Continue to ensure the fish is fully cooked and completely free of bones to keep mealtimes safe and enjoyable.
12+ months
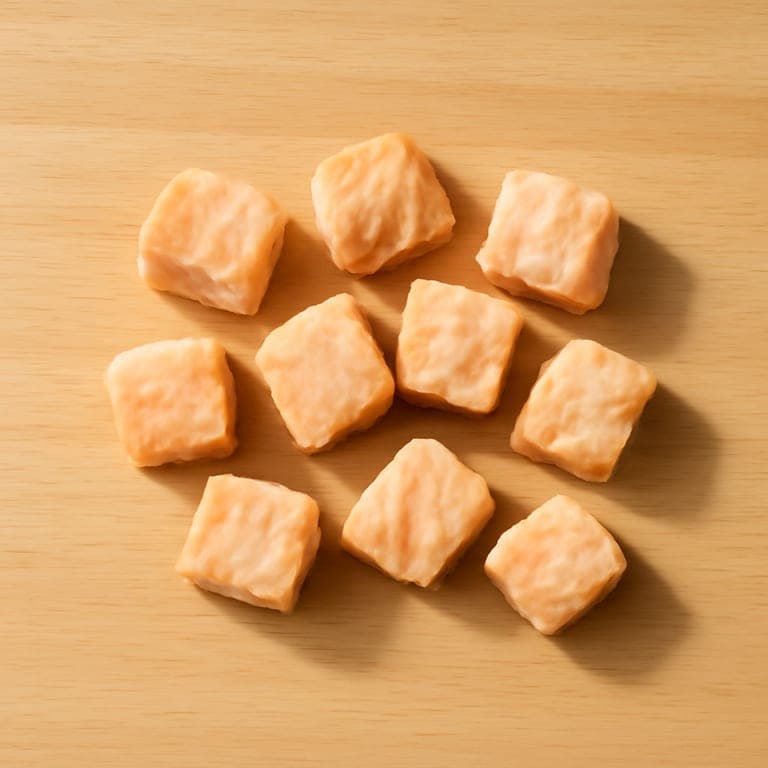
How to cut fish for a 12 month old: Provide bite-sized pieces of well-cooked, boneless fish measuring about 1.5 to 2 cm. This size supports your toddler’s developing chewing skills while maintaining safety by avoiding any bones.
How to Cut Cheese for Baby
Read full cutting guide6–8 months
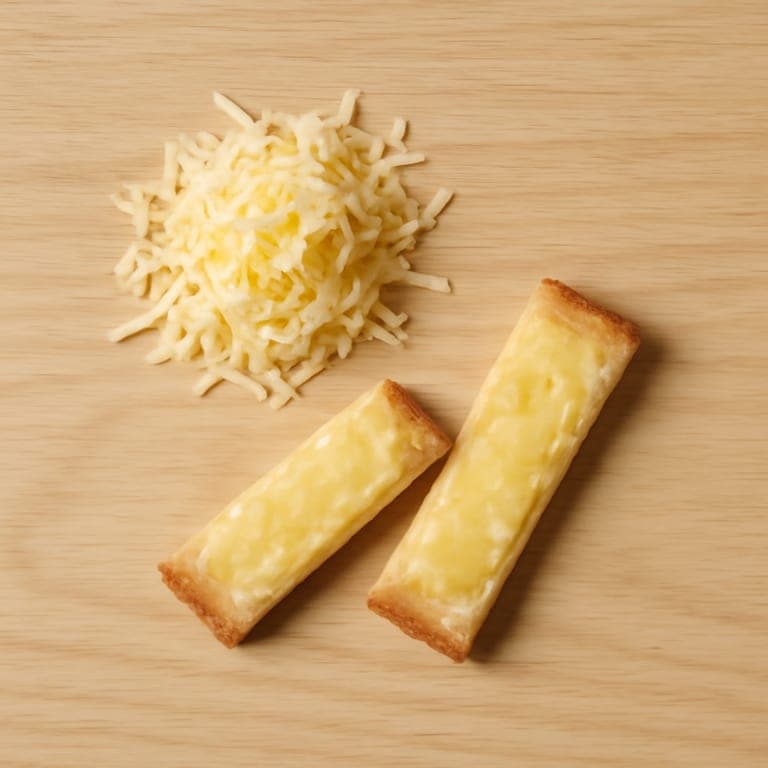
How to cut cheese for a 6 month old: At 6 months, offer cheese as thin grated sprinkles mixed into other foods or as soft melted cheese spread on toast strips. Avoid blocks or cubes since cheese can compress in the airway and pose a choking risk at this age.
9–11 months
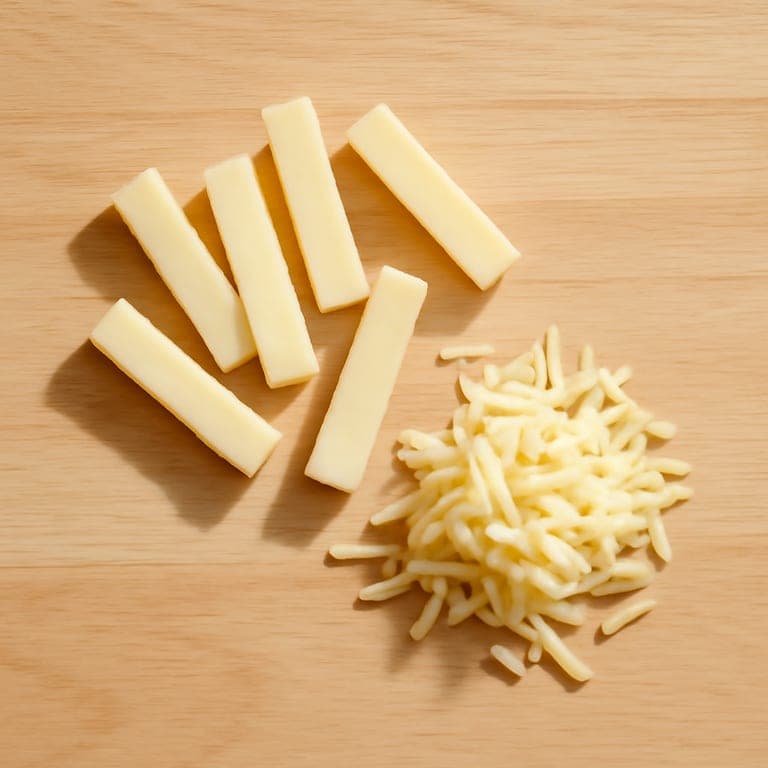
How to cut cheese for a 9 month old: For 9 month olds, cut soft cheese like mozzarella or mild cheddar into thin small strips about 1 cm by 4 cm. Grated cheese can also be sprinkled on pasta or other finger foods to encourage self-feeding.
12+ months
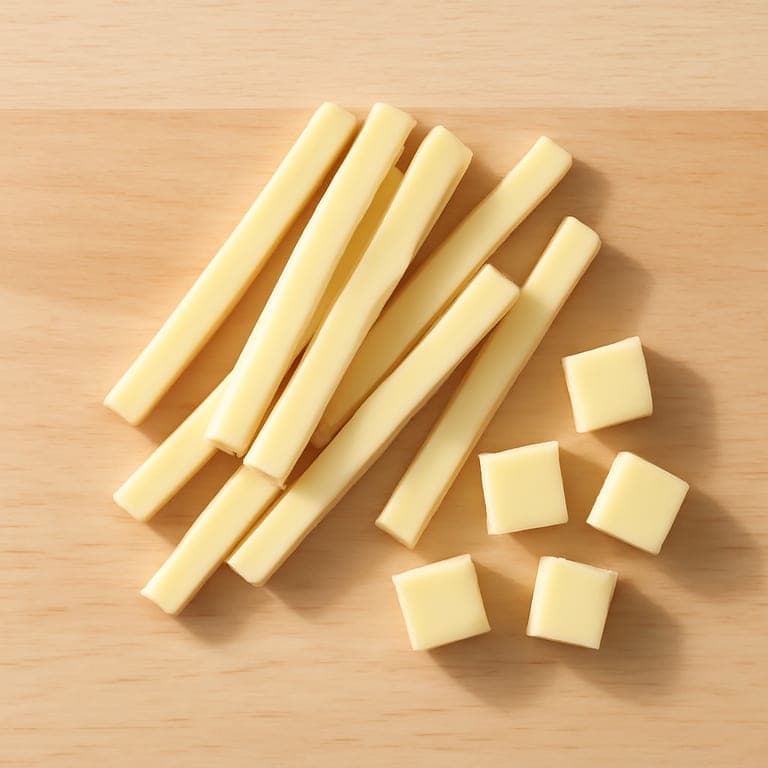
How to cut cheese for a 12 month old: At 12 months, toddlers can manage small thin strips or shredded cheese. Soft cheese cubes about 1 cm in size are also appropriate, allowing your toddler to explore different textures safely.
How to Cut Bread for Baby
Read full cutting guide6–8 months
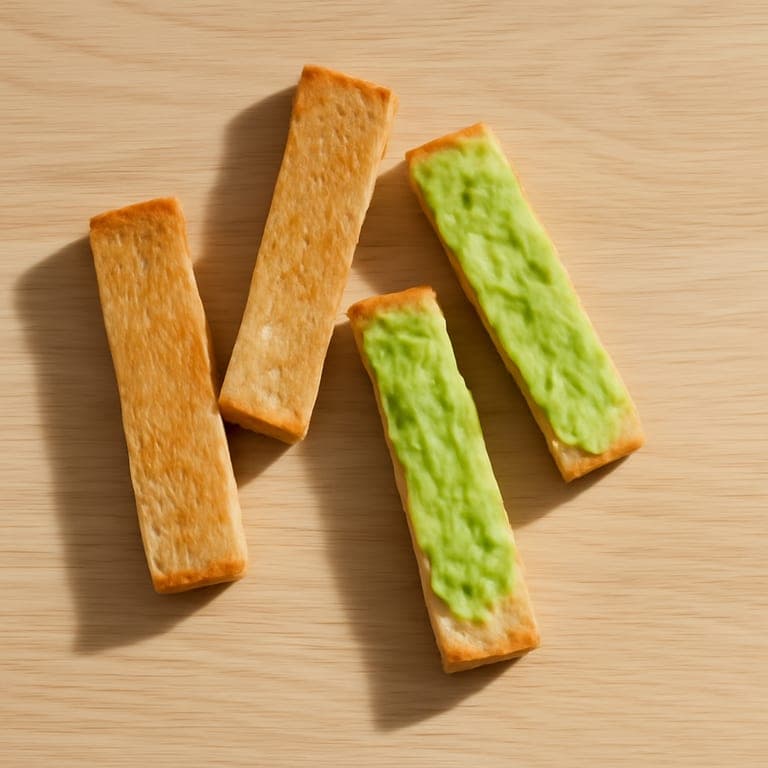
How to cut bread for a 6 month old: At 6 months, offer lightly toasted bread cut into long finger strips about 2.5 cm wide and palm-length. Avoid soft fresh bread alone as it can ball up and stick to the roof of the mouth, posing a choking hazard.
9–11 months
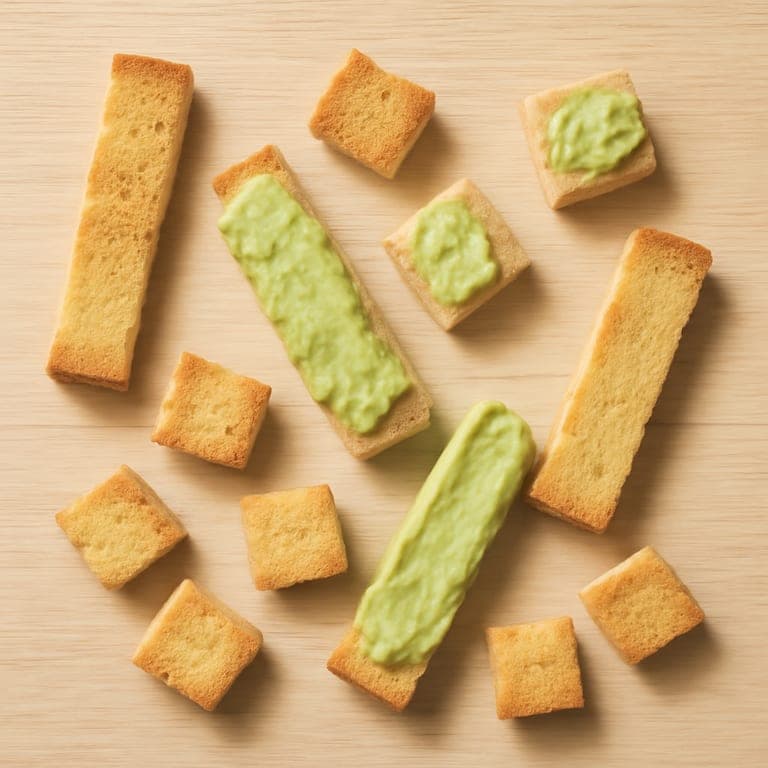
How to cut bread for a 9 month old: For 9 month olds, serve lightly toasted bread in small squares about 1.5 cm wide and short toast fingers. Thin spreads are safe and can add flavor and moisture to the bread pieces.
12+ months
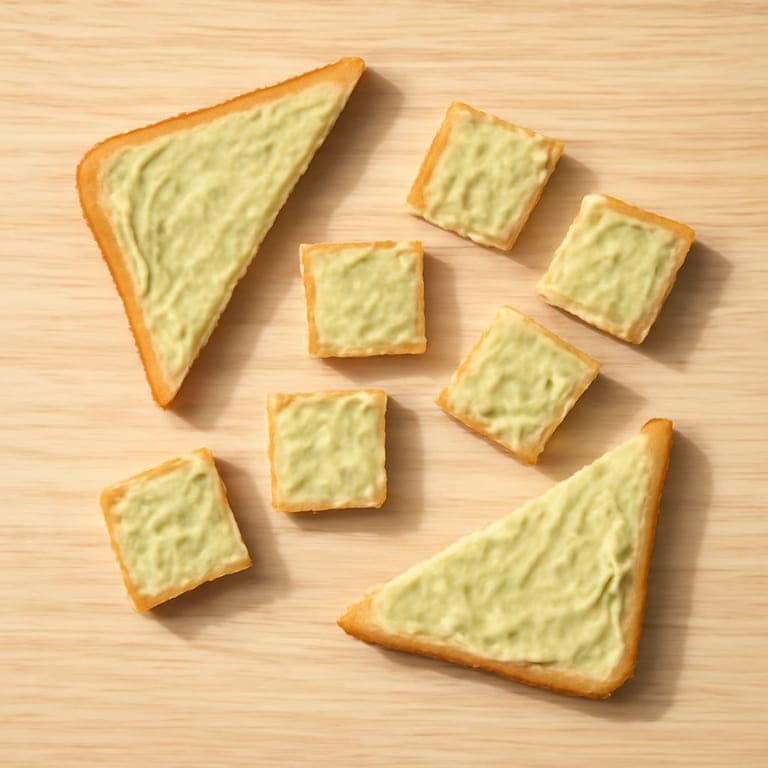
How to cut bread for a 12 month old: At 12 months, you can offer triangles or small squares of lightly toasted bread. Small amounts of soft fresh bread are also safe if served with moist toppings to prevent gummy balls.
How to Cut Kiwi for Baby
Read full cutting guide6–8 months
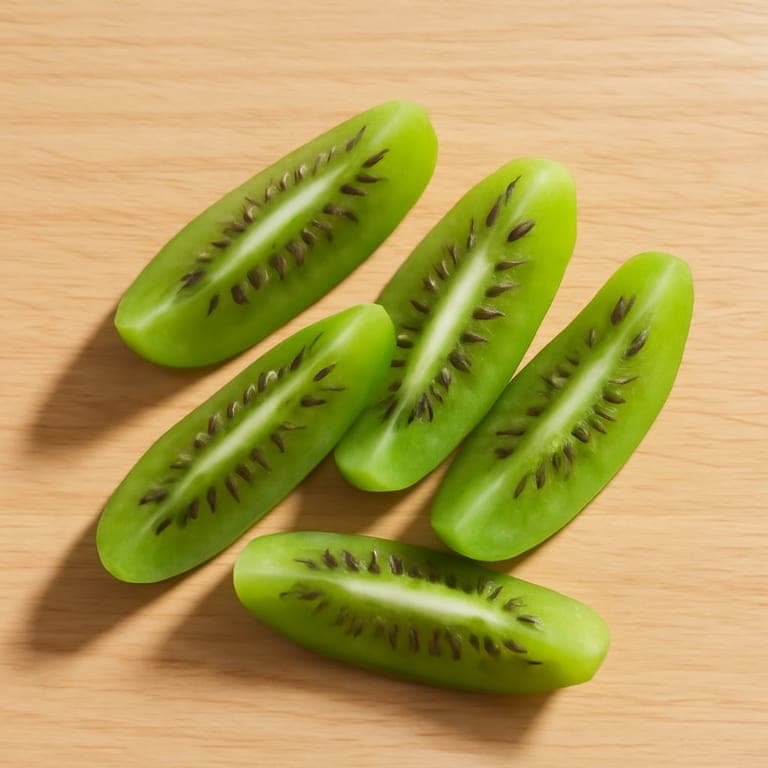
How to cut kiwi for a 6 month old: Select a fully ripe kiwi that yields slightly to gentle pressure. Peel the fuzzy skin completely and cut into long wedges about 1.5 cm thick and palm-length. The flesh should be soft enough to dent with a fingertip to reduce choking risk.
9–11 months
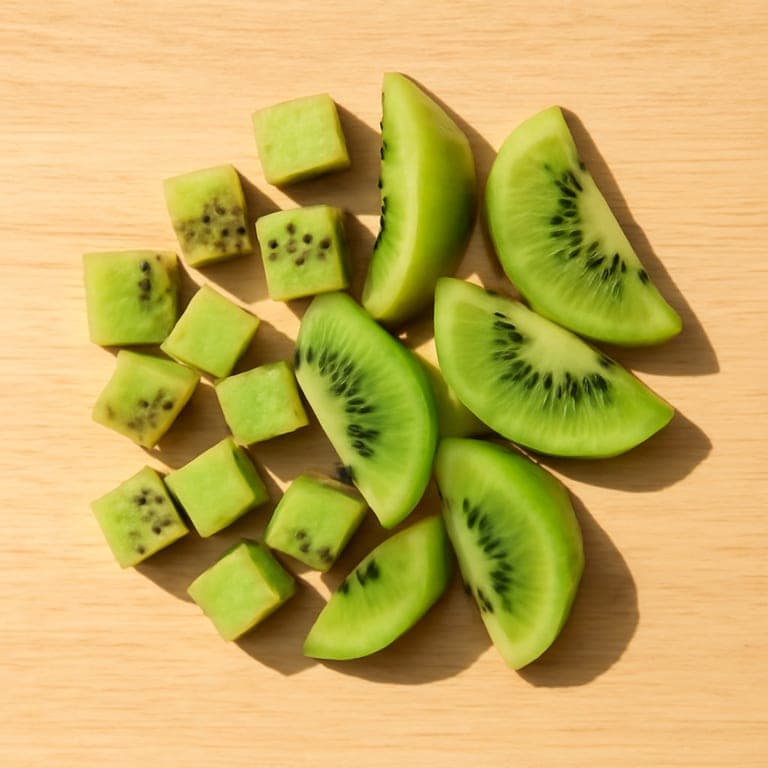
How to cut kiwi for a 9 month old: Use smaller peeled wedges and soft cubes about 1.5 cm in size. The kiwi should still be ripe and soft to chew easily. Continue to remove the skin to avoid any irritation or choking hazards.
12+ months
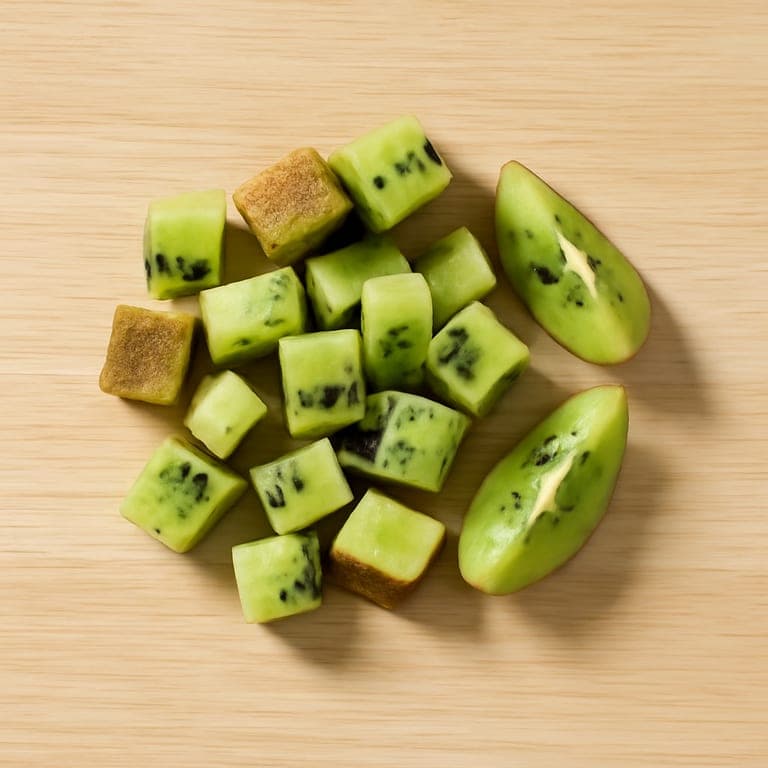
How to cut kiwi for a 12 month old: Cut kiwi into small cubes or wedges. At this age, the skin can remain on if washed thoroughly and your toddler chews well, but many parents still prefer to peel it. Ensure the pieces are manageable for your toddler to handle safely.
How to Cut Cherry Tomato for Baby
Read full cutting guide6–8 months
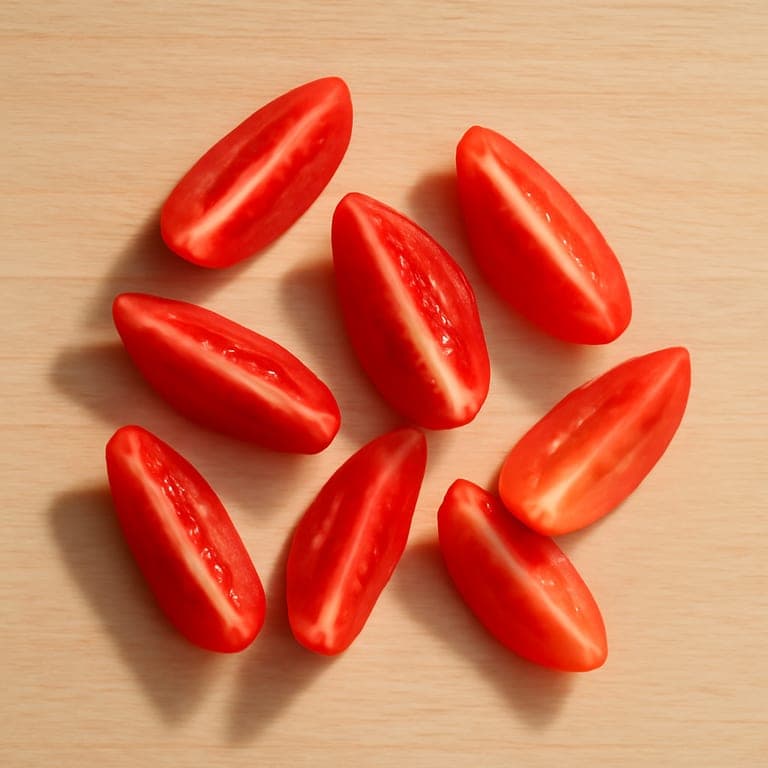
How to cut cherry tomato for a 6 month old: At 6 months, cherry tomatoes must be quartered lengthwise into four long, thin pieces. Removing the skin can help younger babies manage the texture. Never offer whole or round halves to prevent choking.
9–11 months
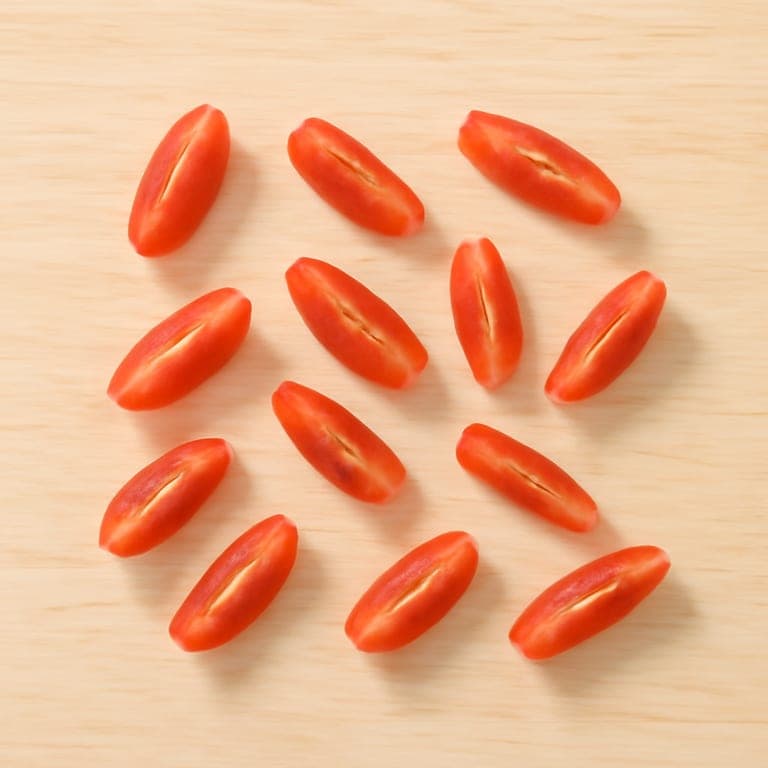
How to cut cherry tomato for a 9 month old: For 9 month olds, continue quartering cherry tomatoes lengthwise into thin slivers that are easy to grasp with a pincer grip. Whole or round halves remain unsafe due to choking risk.
12+ months
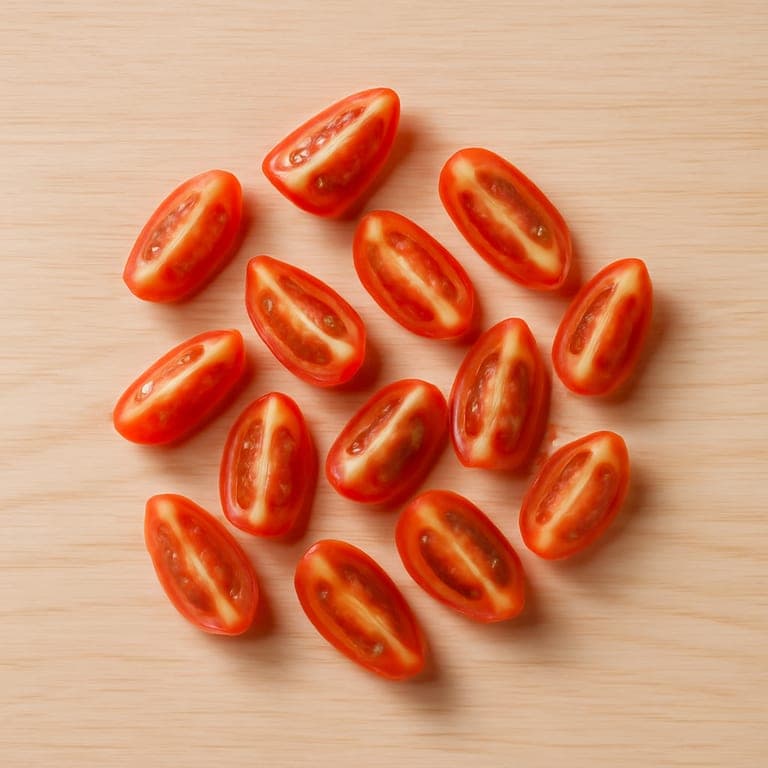
How to cut cherry tomato for a 12 month old: Even at 12 months, cherry tomatoes should be quartered lengthwise to reduce choking hazards. The risk persists until age 4, so avoid offering whole or round halves.
How to Cut Hot Dog for Baby
Read full cutting guide6–8 months
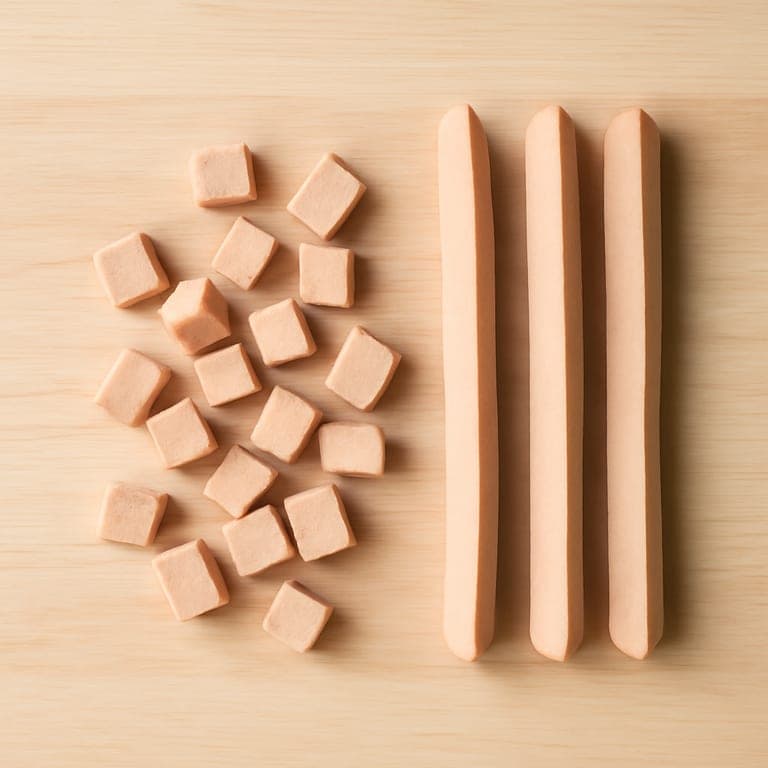
How to cut hot dog for a 6 month old: At 6 months, it is best to avoid hot dogs. If served, select a low-sodium, nitrate-free hot dog, quarter it lengthwise, then chop into very small pieces to minimize choking risk. Never serve coin-shaped slices.
9–11 months
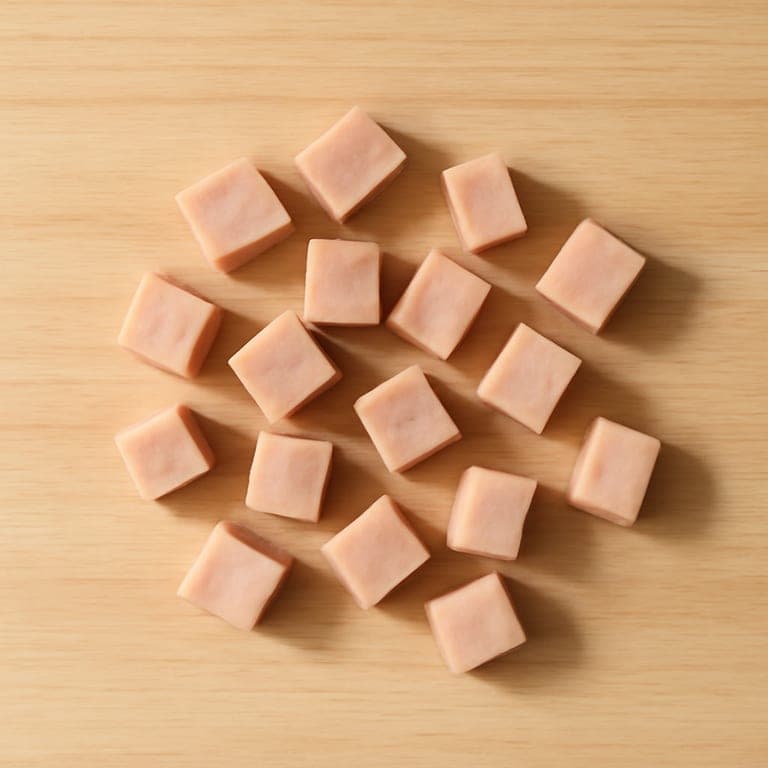
How to cut hot dog for a 9 month old: For 9 month olds, it is safer to wait before introducing hot dogs. If you do serve them, quarter the hot dog lengthwise and dice into small pieces. Avoid coin-shaped slices to reduce choking hazards.
12+ months
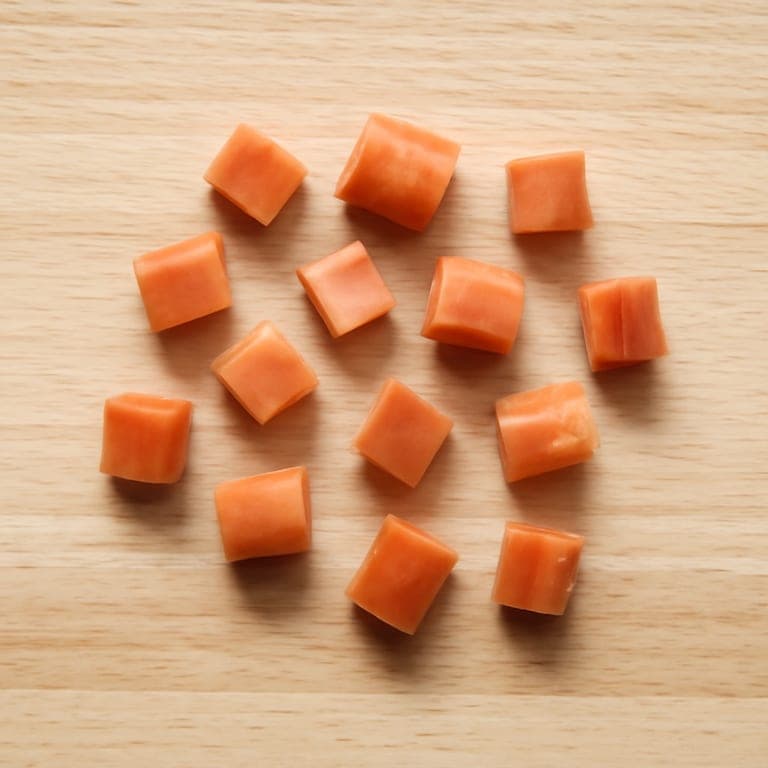
How to cut hot dog for a 12 month old: From 12 months, hot dogs can be served with caution. Always quarter lengthwise and chop into small pieces under 1 cm. Never serve round coin slices to keep mealtimes safe.
How to Cut Nut for Baby
Read full cutting guide6–8 months
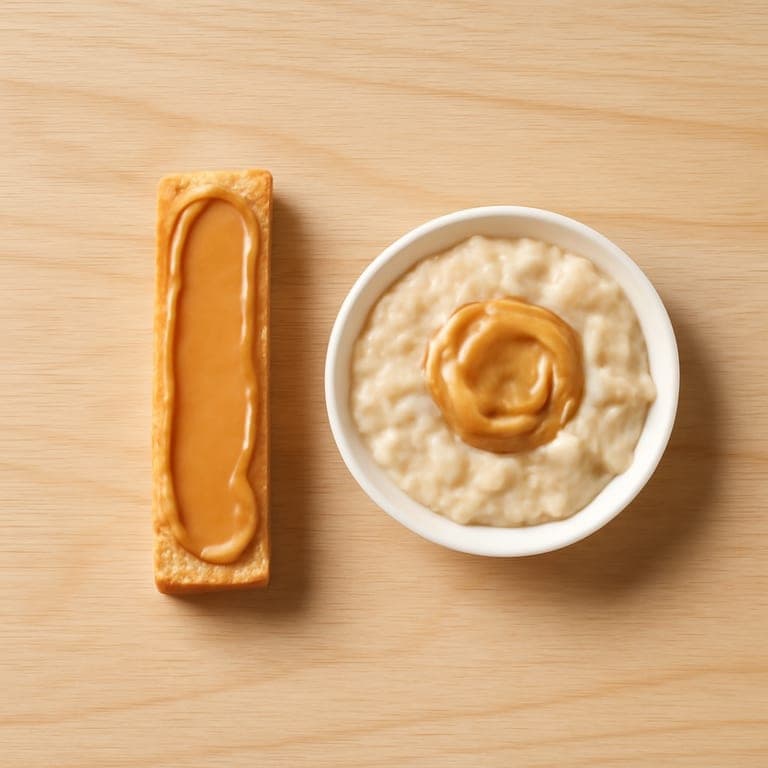
How to cut nut for a 6 month old: At 6 months, serve nuts only as smooth nut butter thinly spread on toast strips or thinned into oatmeal or yogurt. Avoid any whole or chopped nuts to prevent choking.
9–11 months
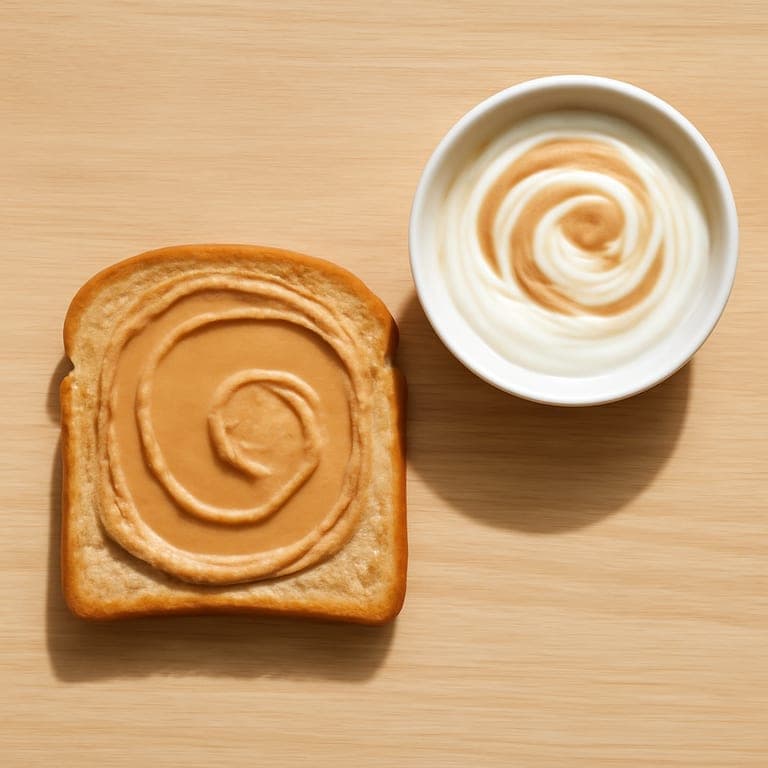
How to cut nut for a 9 month old: Continue offering smooth nut butter thinly spread or finely ground nut flour mixed into foods. Whole or chopped nuts remain unsafe at this age.
12+ months
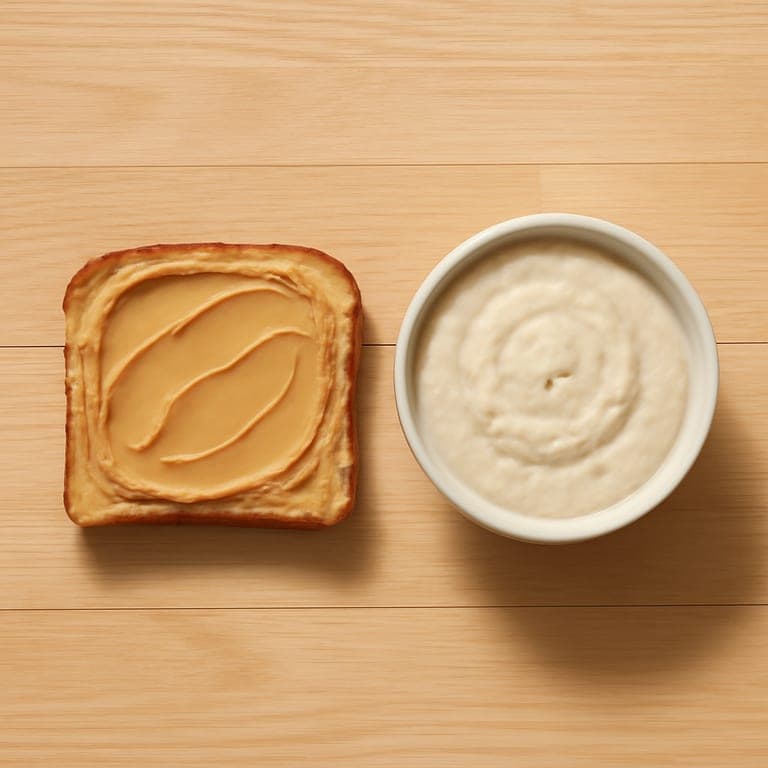
How to cut nut for a 12 month old: At 12 months, maintain the same safe approach: smooth nut butter thinly spread or ground nut flour blended into meals. Avoid whole or chopped nuts until age 4.
How to Cut Popcorn for Baby
Read full cutting guide6–8 months
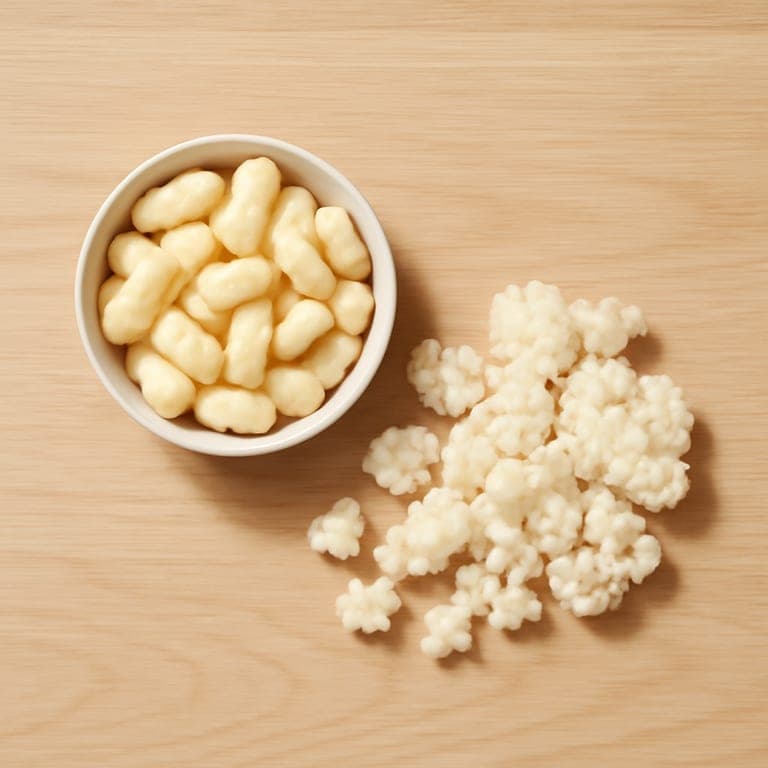
How to cut popcorn for a 6 month old: Popcorn should not be served to babies at 6 months. Instead, offer soft, melt-in-mouth snacks like baby-safe puffed corn or other gentle textures suitable for early solids.
9–11 months
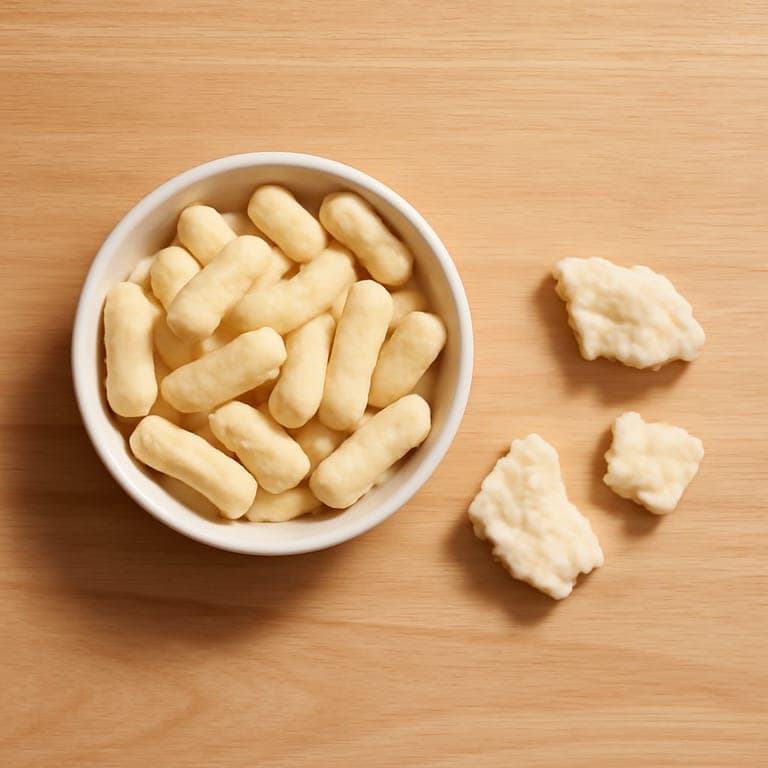
How to cut popcorn for a 9 month old: Popcorn remains unsafe at 9 months. Continue to avoid popcorn and provide baby-friendly puffs or soft finger foods that dissolve easily to support safe chewing and swallowing.
12+ months
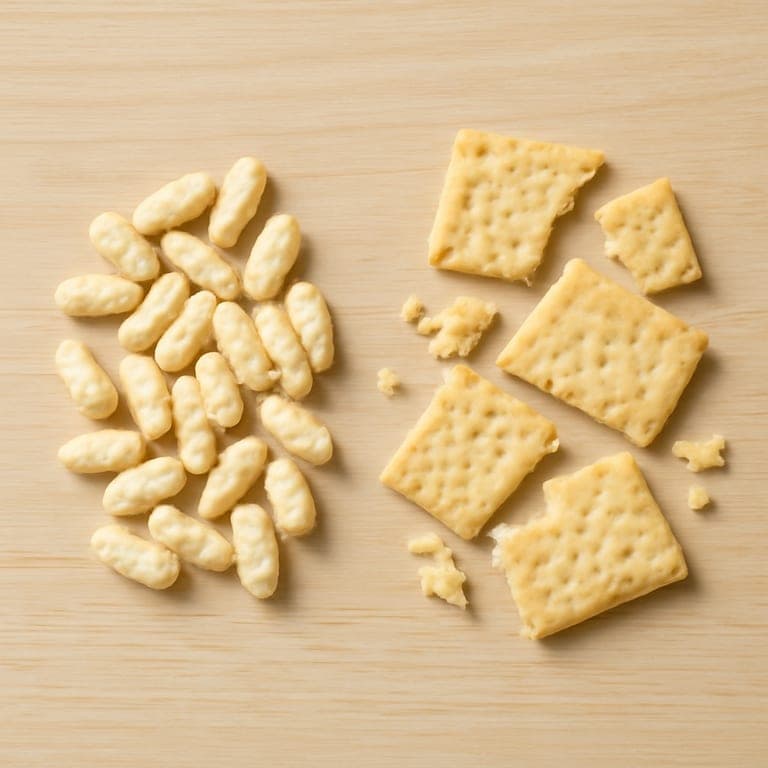
How to cut popcorn for a 12 month old: At 12 months, popcorn is still not recommended. Keep offering safe alternatives like melt-in-mouth puffs and soft finger foods until your child is at least 4 years old.
How to Cut Sausage for Baby
Read full cutting guide6–8 months
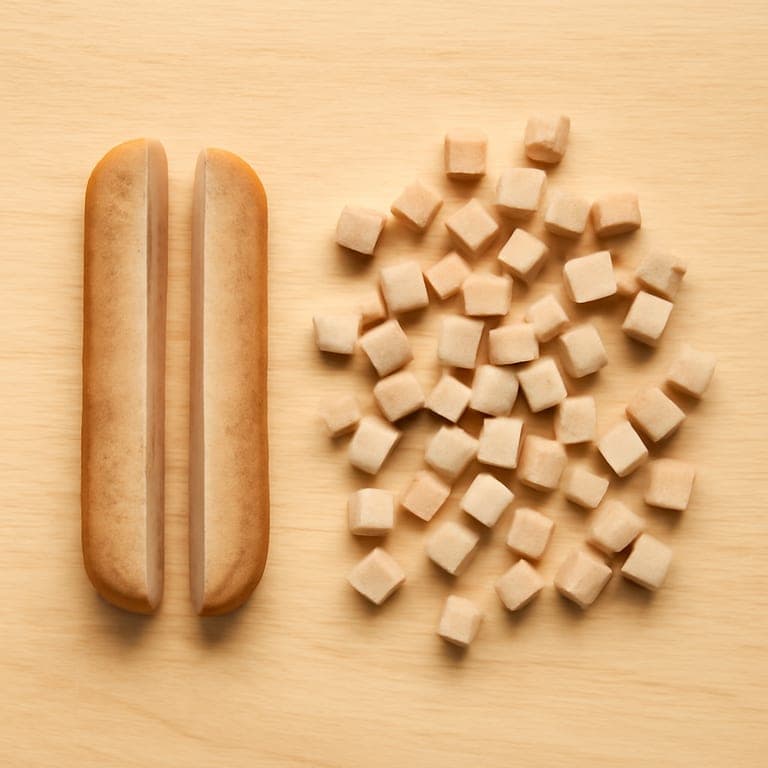
How to cut sausage for a 6 month old: It’s best to skip sausages at 6 months due to their high salt content and choking risk. If using a low-sodium homemade sausage, always quarter it lengthwise and then chop into very small pieces to minimize choking hazards.
9–11 months
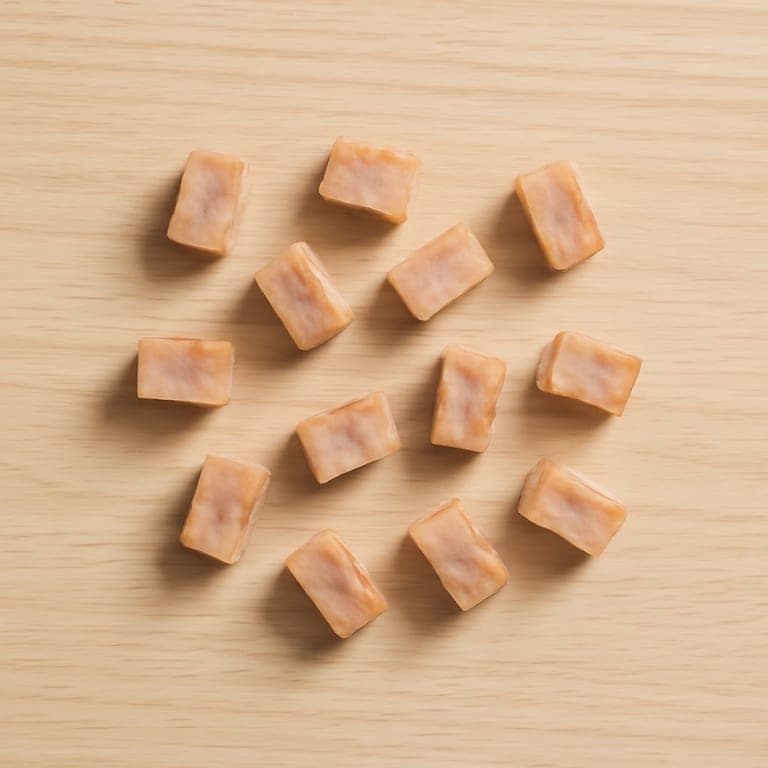
How to cut sausage for a 9 month old: At 9 months, continue to avoid round coin-shaped slices. Quarter the sausage lengthwise and dice into small pieces to reduce choking risk. Choose low-sodium options and avoid commercial sausages high in salt.
12+ months
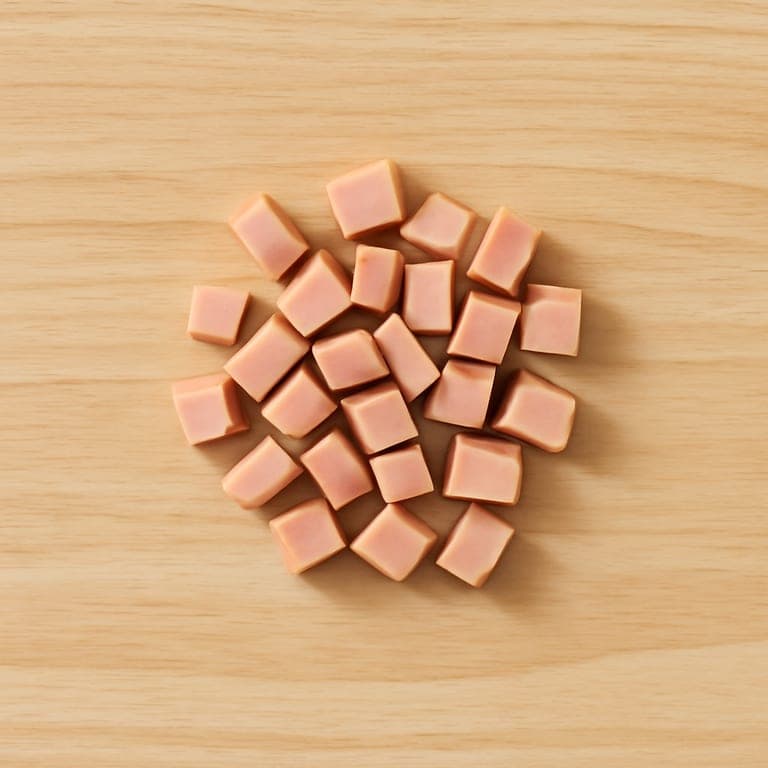
How to cut sausage for a 12 month old: From 12 months, low-sodium sausages can be offered safely. Always quarter the sausage lengthwise and chop into small, bite-size pieces to ensure easy chewing and reduce choking hazards.
How to Cut Pear for Baby
Read full cutting guide6–8 months
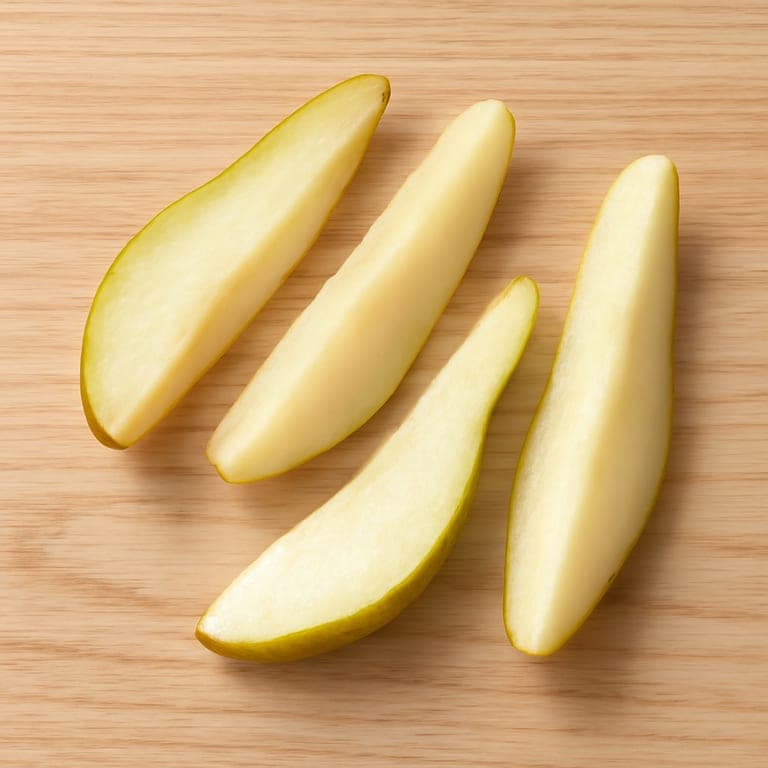
How to cut pear for a 6 month old: Offer long wedges of ripe, soft pear about finger-thick and palm-length. The skin can be left on or peeled. Pears should be soft enough to dent with a fingertip. Cooked soft pear strips are also suitable.
9–11 months
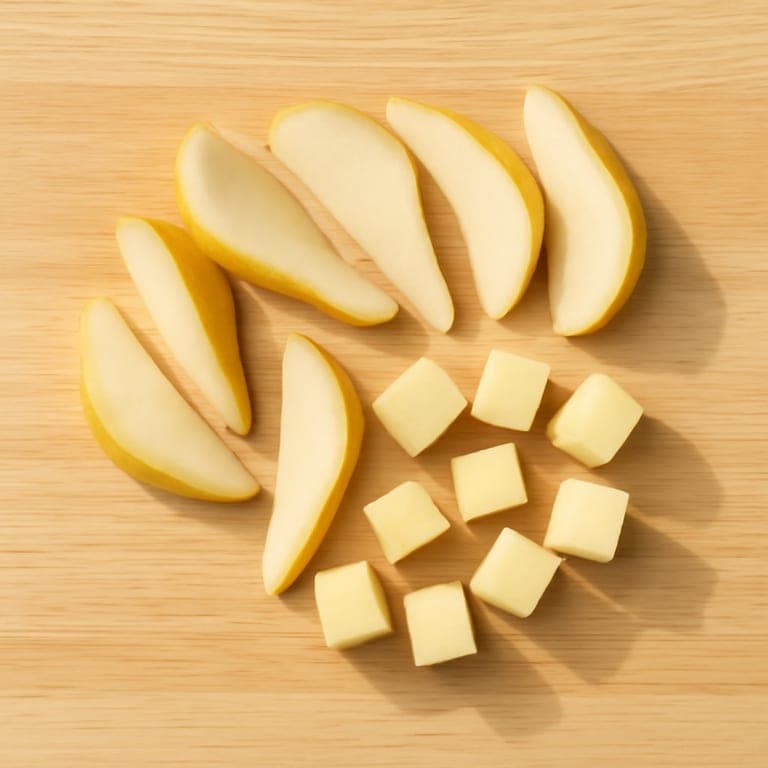
How to cut pear for a 9 month old: Cut ripe pears into smaller wedges and soft cubes about 1.5 cm in size. The pieces should be easy for your baby to grasp and chew safely.
12+ months
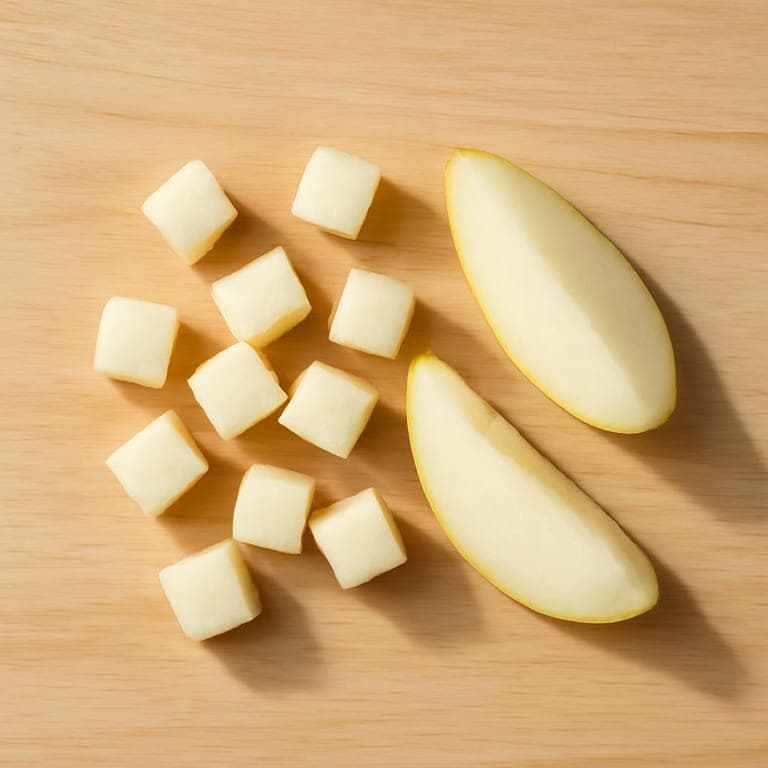
How to cut pear for a 12 month old: By 12 months, offer bite-sized cubes or thin slices of ripe, soft pear. These sizes support developing chewing skills and independence.
How to Cut Plum for Baby
Read full cutting guide6–8 months
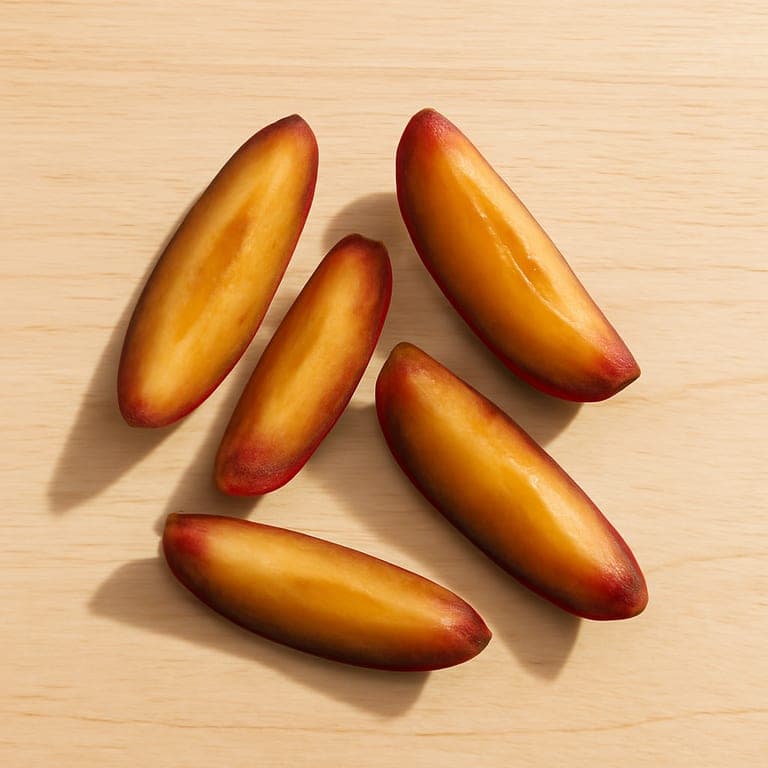
How to cut plum for a 6 month old: Use ripe, soft plums with the stone completely removed. Cut into long wedges about a quarter of the plum, with skin on or off. Cooking the plum until soft is also a safe option.
9–11 months
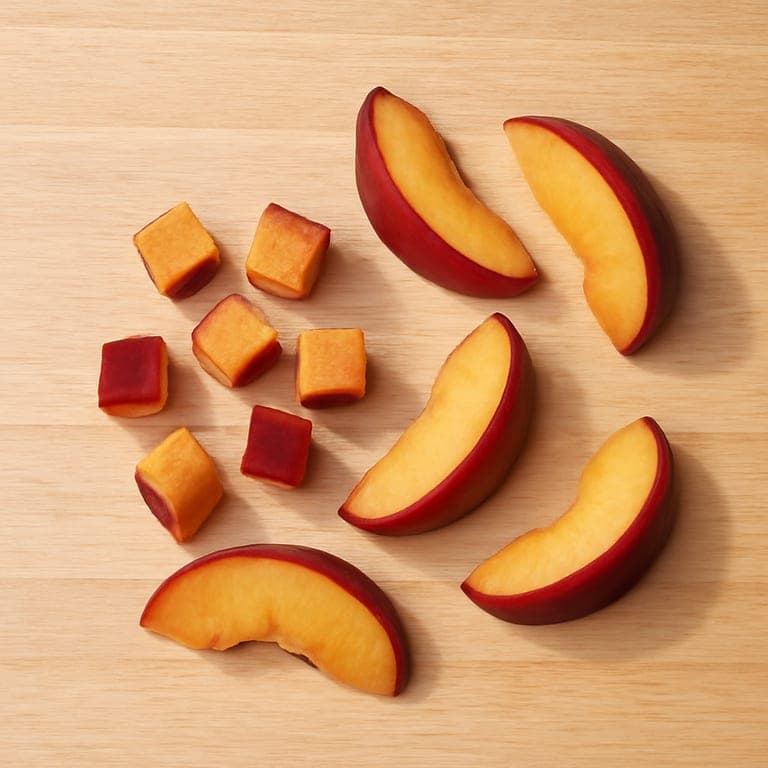
How to cut plum for a 9 month old: Offer smaller plum wedges or small cubes about 1.5 cm in size. Always remove the stone and use ripe, soft plums to ensure easy chewing and swallowing.
12+ months
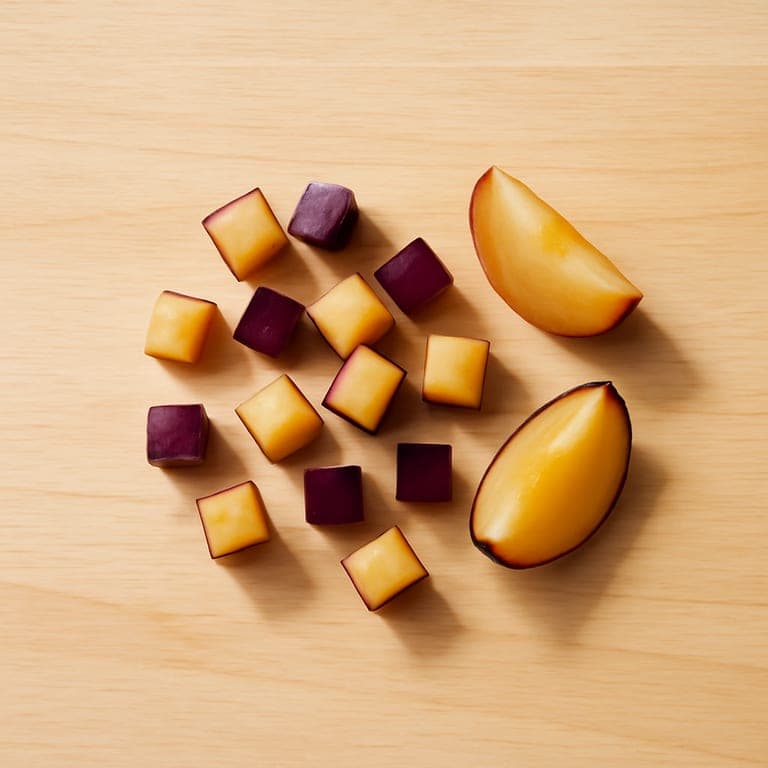
How to cut plum for a 12 month old: Serve bite-sized plum cubes or thin wedges with the stone fully removed. At this age, babies can handle smaller pieces but safety remains a priority.
How to Cut Raspberry for Baby
Read full cutting guide6–8 months
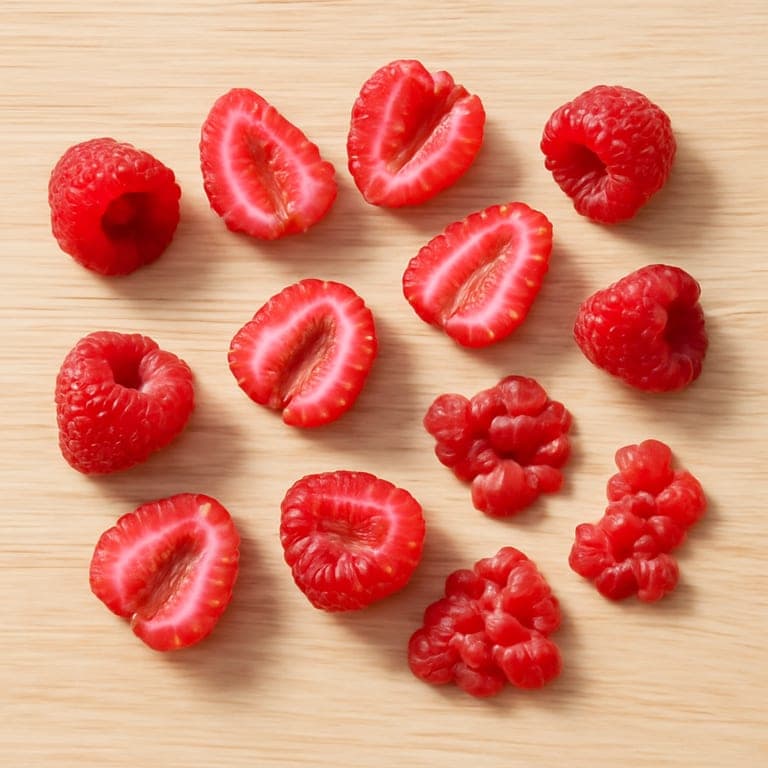
How to cut raspberry for a 6 month old: At 6 months, offer ripe raspberries that are lightly mashed with a fork or halved to make them easier to manage. Whole ripe raspberries are very soft but halving or mashing is safer for early stages of baby-led weaning.
9–11 months
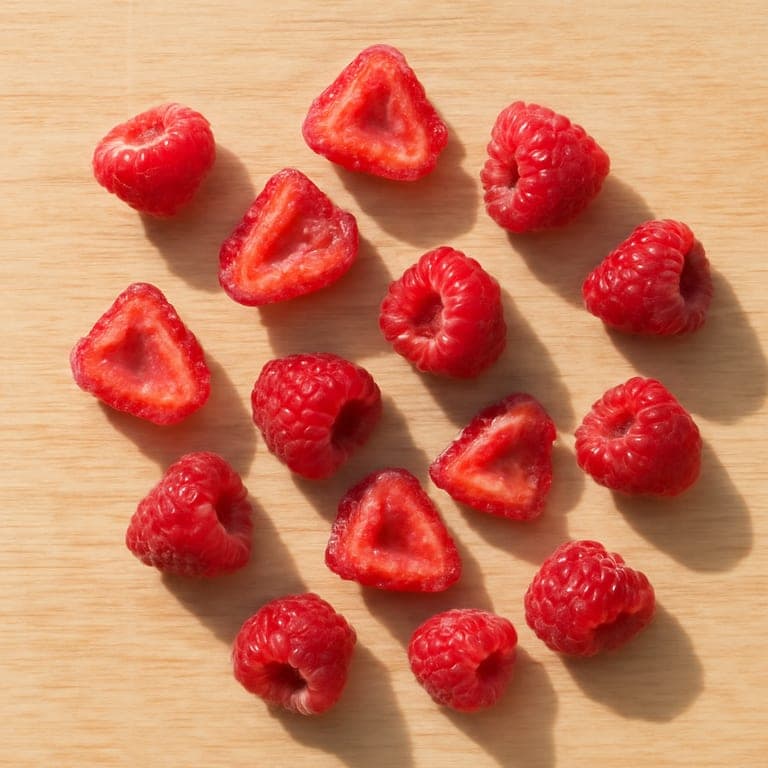
How to cut raspberry for a 9 month old: By 9 months, babies can handle halved raspberries or whole very ripe raspberries if they chew well. Continue to observe your baby’s comfort and chewing skills when offering whole raspberries.
12+ months
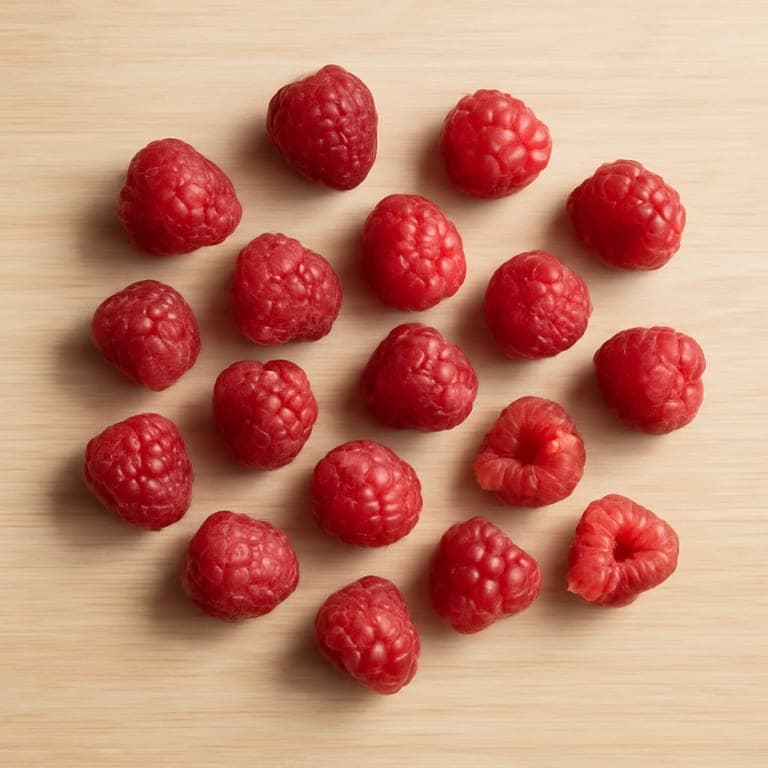
How to cut raspberry for a 12 month old: At 12 months, whole ripe raspberries are generally fine to offer. You can also continue to halve them if your toddler tends to ram food into their mouth without chewing thoroughly.
How to Cut Ham for Baby
Read full cutting guide6–8 months
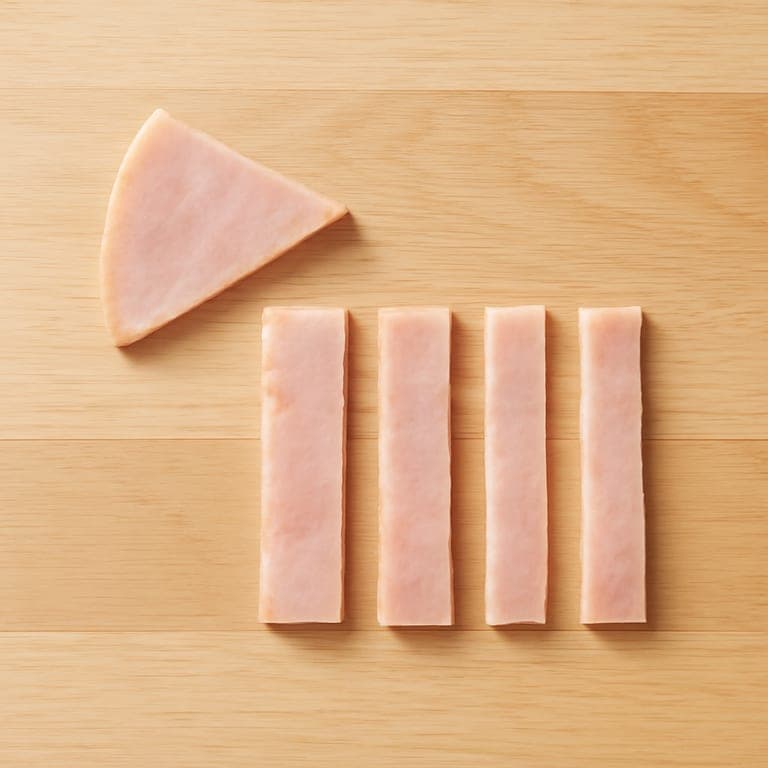
How to cut ham for a 6 month old: At 6 months, ham is best avoided because of its high salt content. Focus on offering other suitable first foods that are naturally low in salt and easy to handle for baby-led weaning.
9–11 months
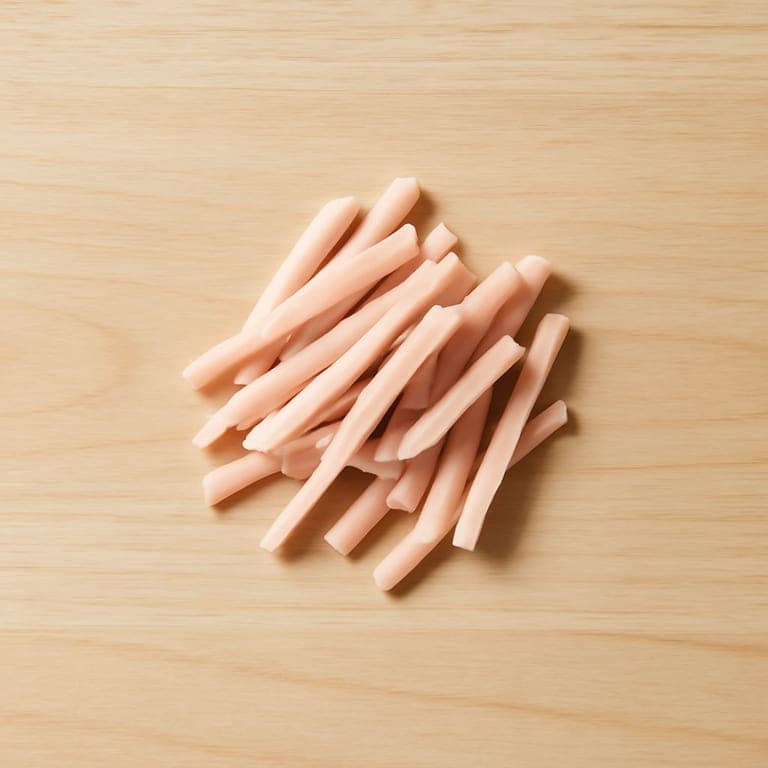
How to cut ham for a 9 month old: At 9 months, ham remains too salty for babies and is best avoided. Continue offering a variety of low-salt, soft foods cut into manageable shapes to support safe self-feeding.
12+ months
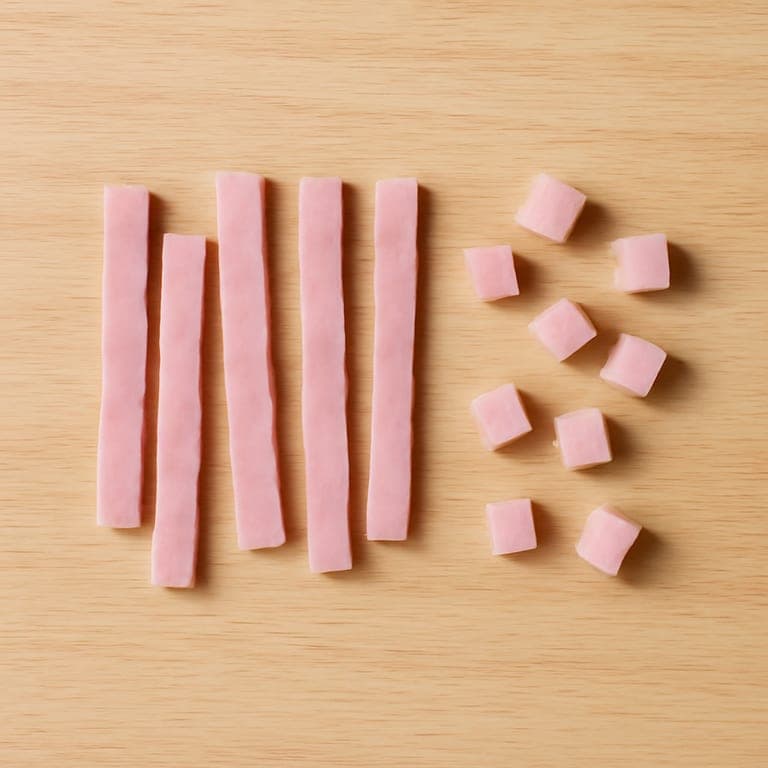
How to cut ham for a 12 month old: From 12 months, low-sodium ham can be introduced sparingly. Cut the ham into thin strips approximately 1 cm by 4 cm or into small cubes to reduce choking risk and support safe self-feeding.
How to Cut Turkey for Baby
Read full cutting guide6–8 months
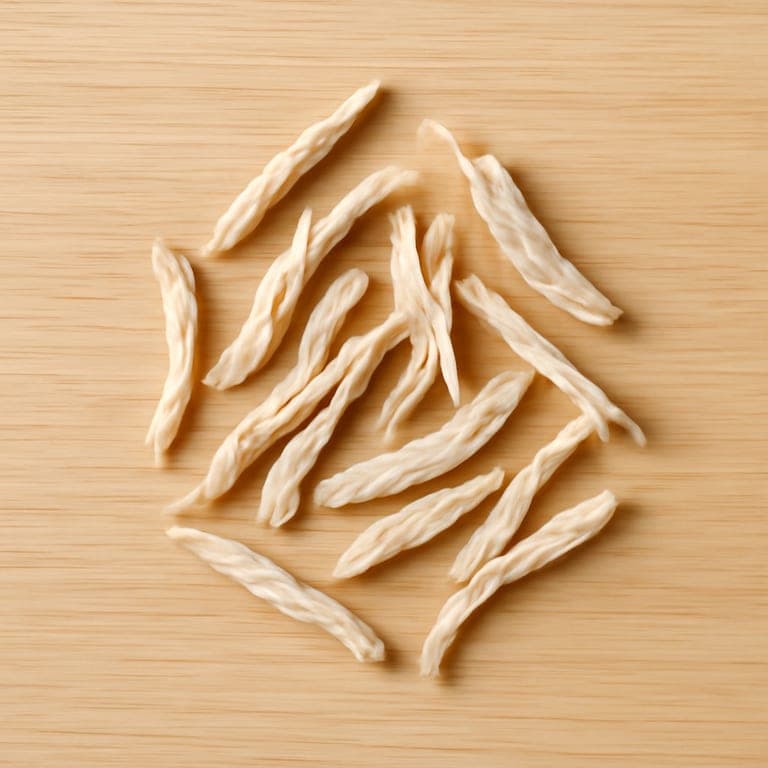
How to cut turkey for a 6 month old: Use long, thin strips of very tender, cooked white turkey meat, shredded finely to a texture similar to shredded chicken. This helps your baby grasp and gum the meat safely.
9–11 months
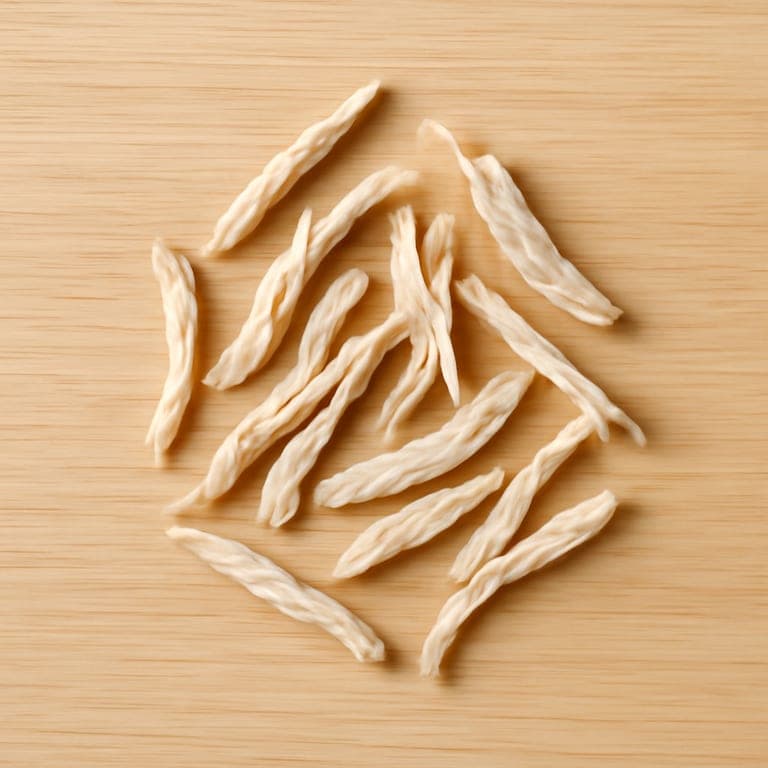
How to cut turkey for a 9 month old: Offer a mix of finely shredded turkey and small cooked turkey cubes about 1 cm in size. This combination encourages chewing skills while remaining safe and manageable.
12+ months
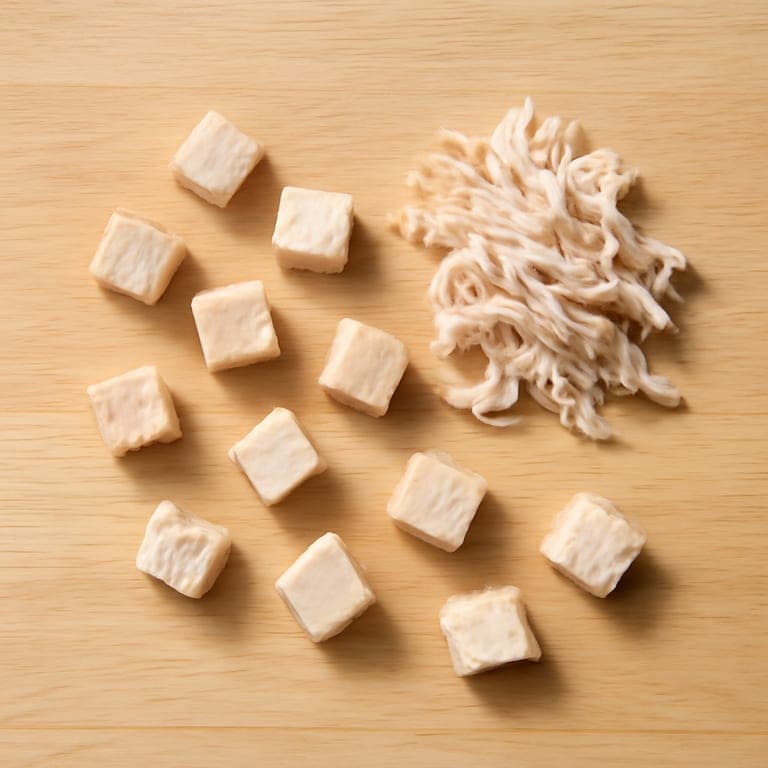
How to cut turkey for a 12 month old: Provide bite-sized cubes of well-cooked turkey breast or thigh, approximately 1.5 to 2 cm in size. These pieces support developing chewing and self-feeding abilities.
How to Cut Corn for Baby
Read full cutting guide6–8 months
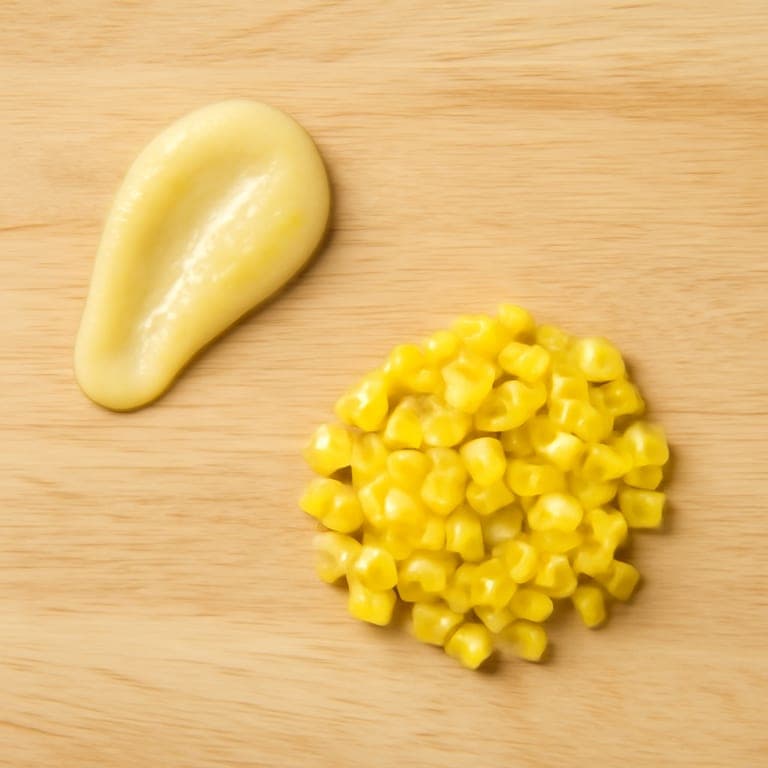
How to cut corn for a 6 month old: At 6 months, serve corn as creamed or blended purée to minimize choking risk. Alternatively, whole kernels can be lightly mashed or halved to make them easier to gum and swallow safely.
9–11 months
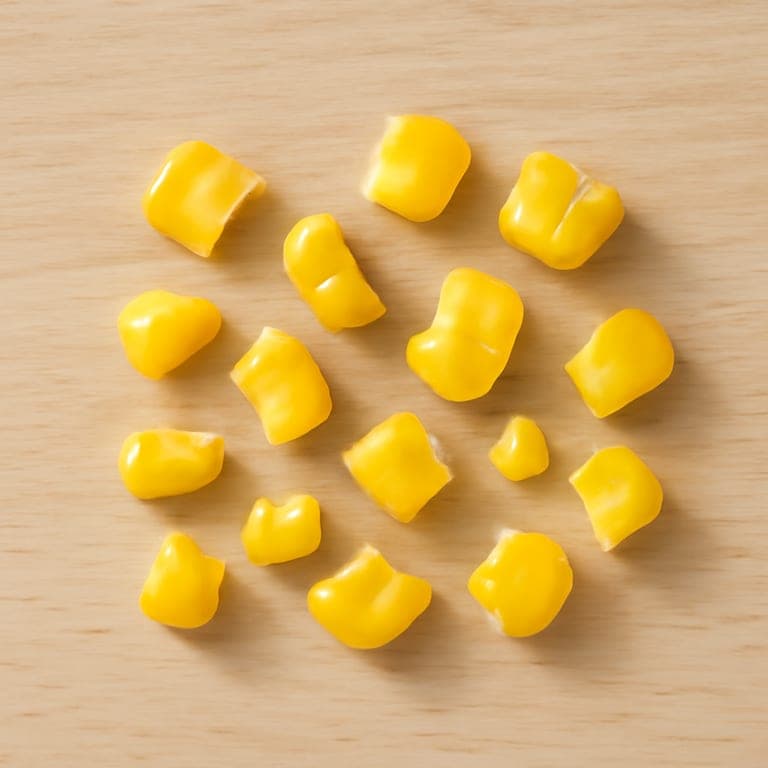
How to cut corn for a 9 month old: By 9 months, soft cooked corn kernels can be offered, but most should be halved or lightly smashed to reduce choking risk. Mini corn-on-the-cob pieces are not recommended at this stage.
12+ months
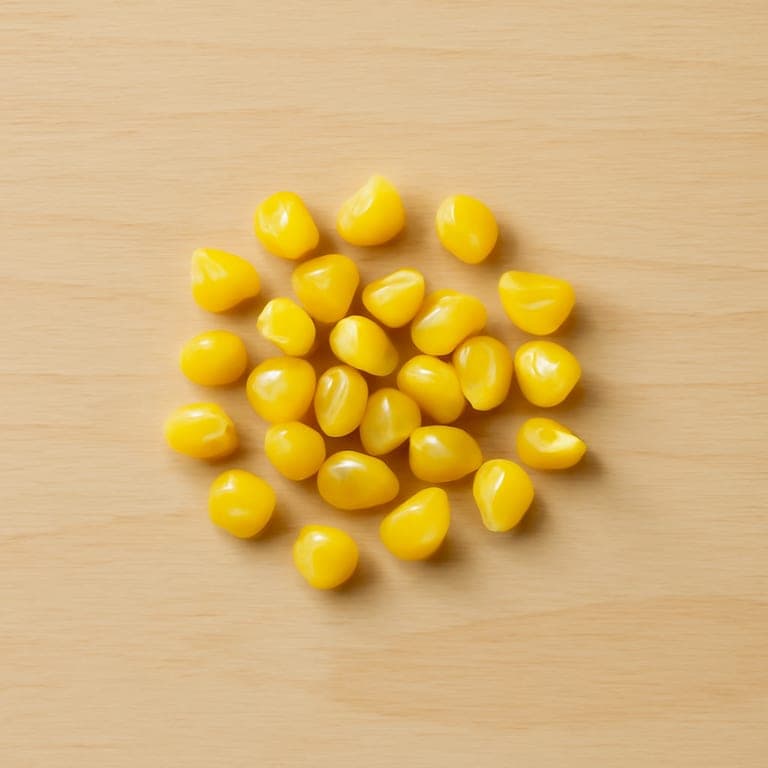
How to cut corn for a 12 month old: At 12 months, whole soft cooked corn kernels are generally safe as toddlers have better chewing skills. If your toddler struggles, continue halving kernels to keep mealtimes safe.
How to Cut Pork for Baby
Read full cutting guide6–8 months
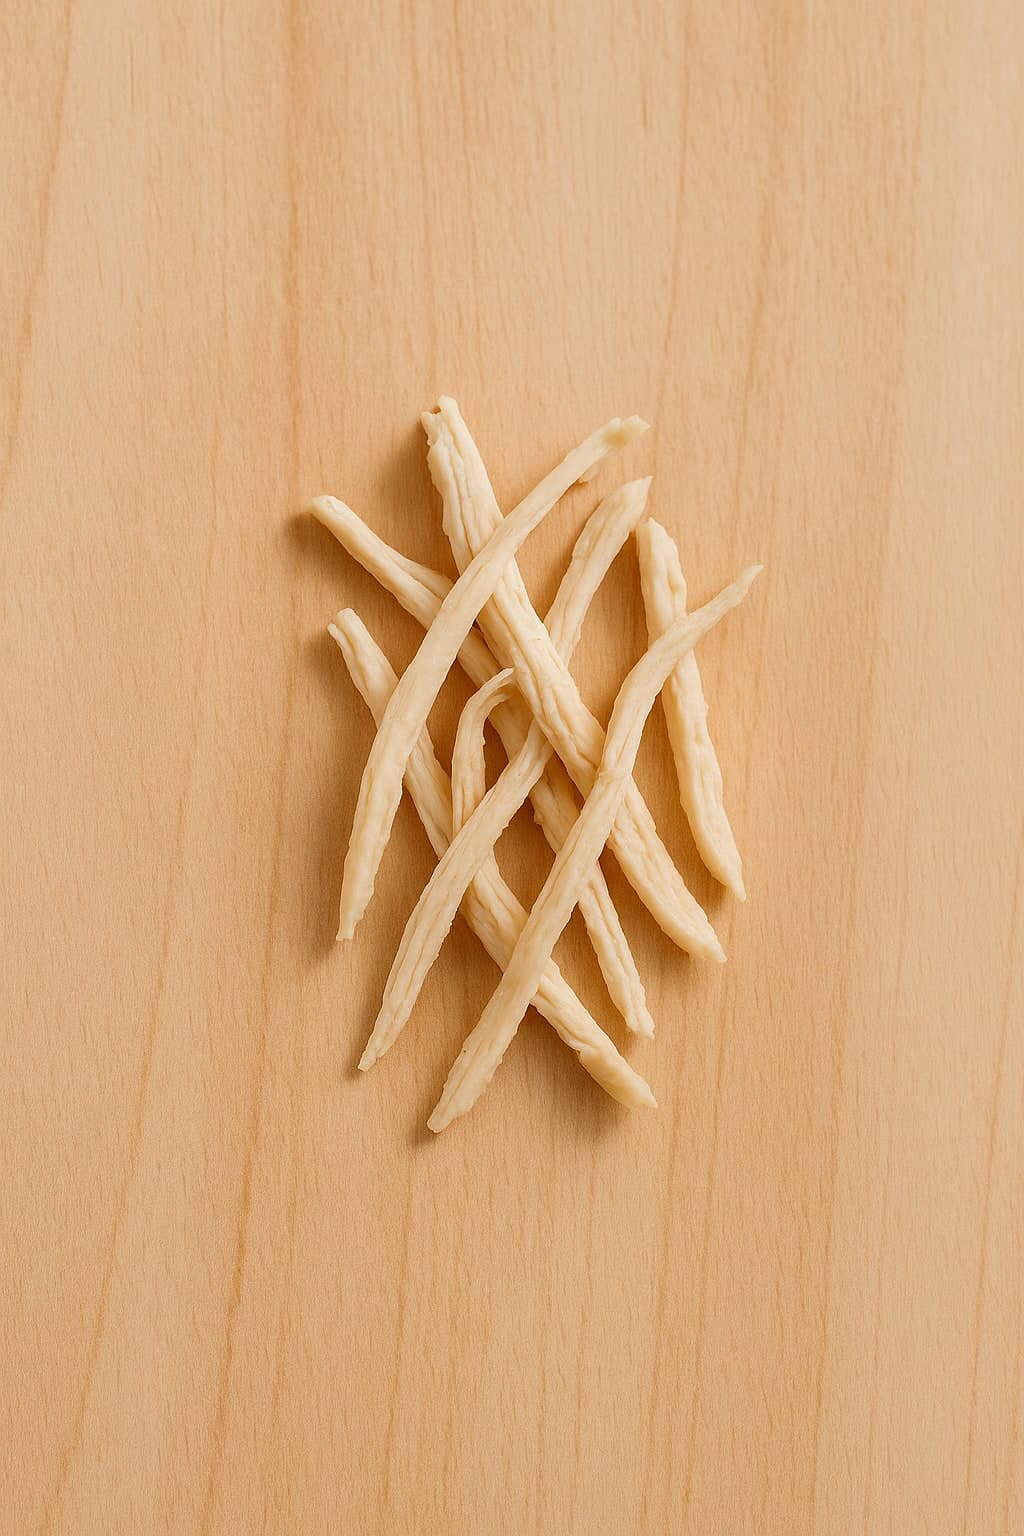
How to cut pork for a 6 month old: At 6 months, offer shredded tender, lean pork that has been slow-cooked until very soft. Ensure all pieces are small and easy to gum to reduce choking risk.
9–11 months
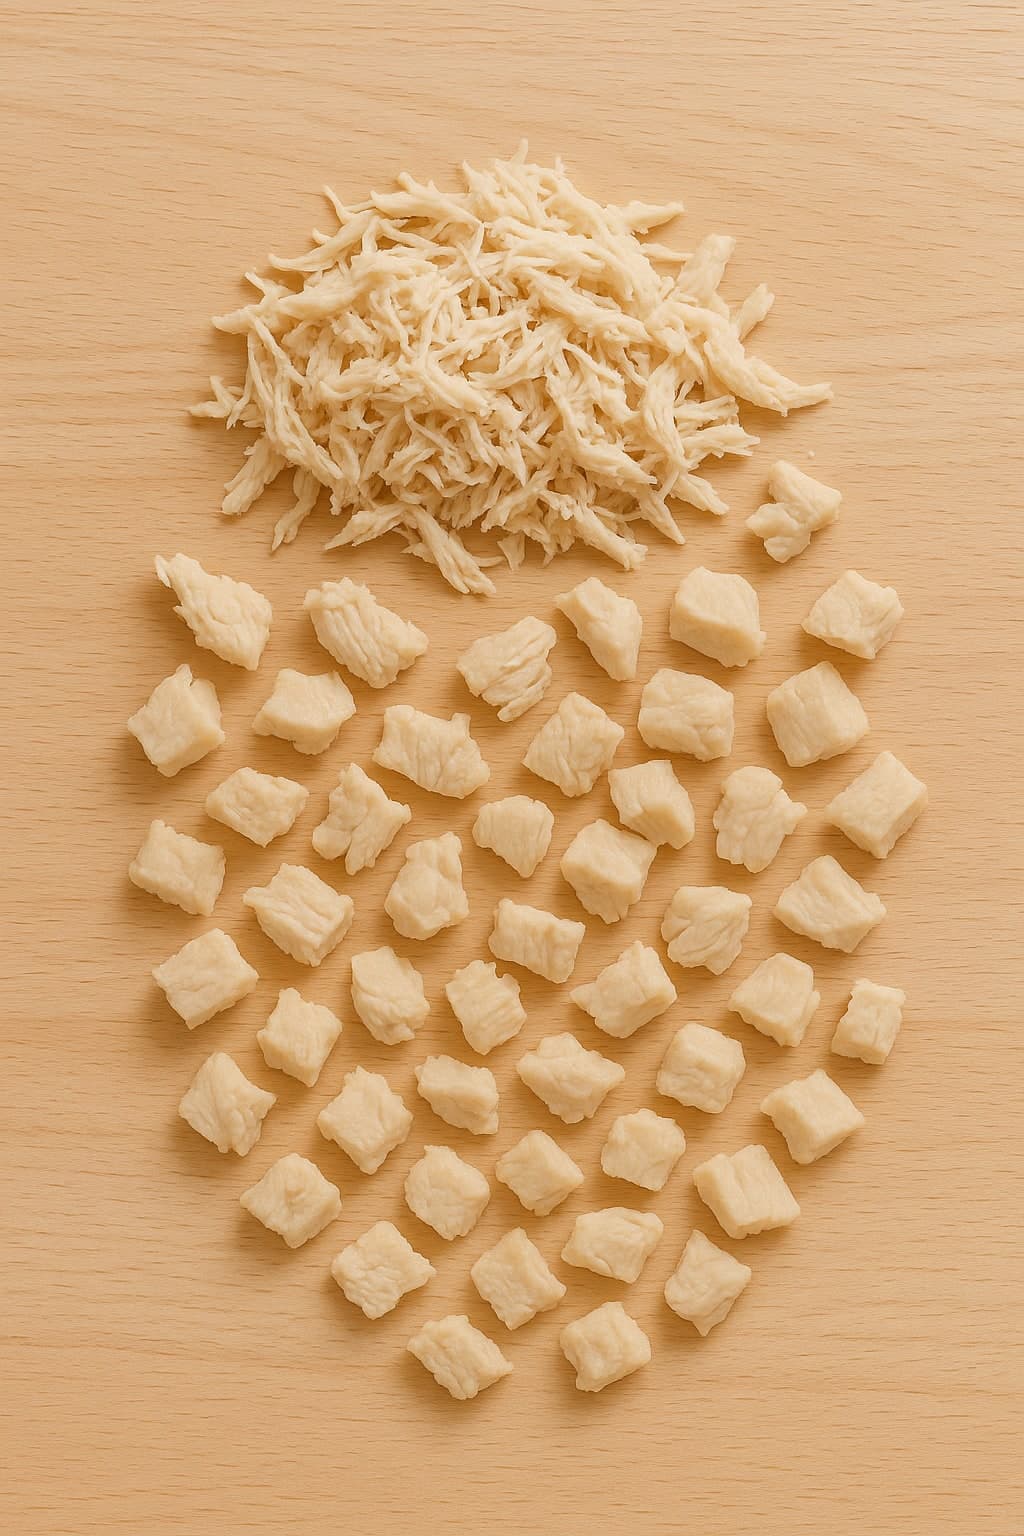
How to cut pork for a 9 month old: For 9 month olds, provide a mix of shredded pork and small soft pieces about 1 cm in size. Pork should remain well-cooked and tender to support safe chewing.
12+ months
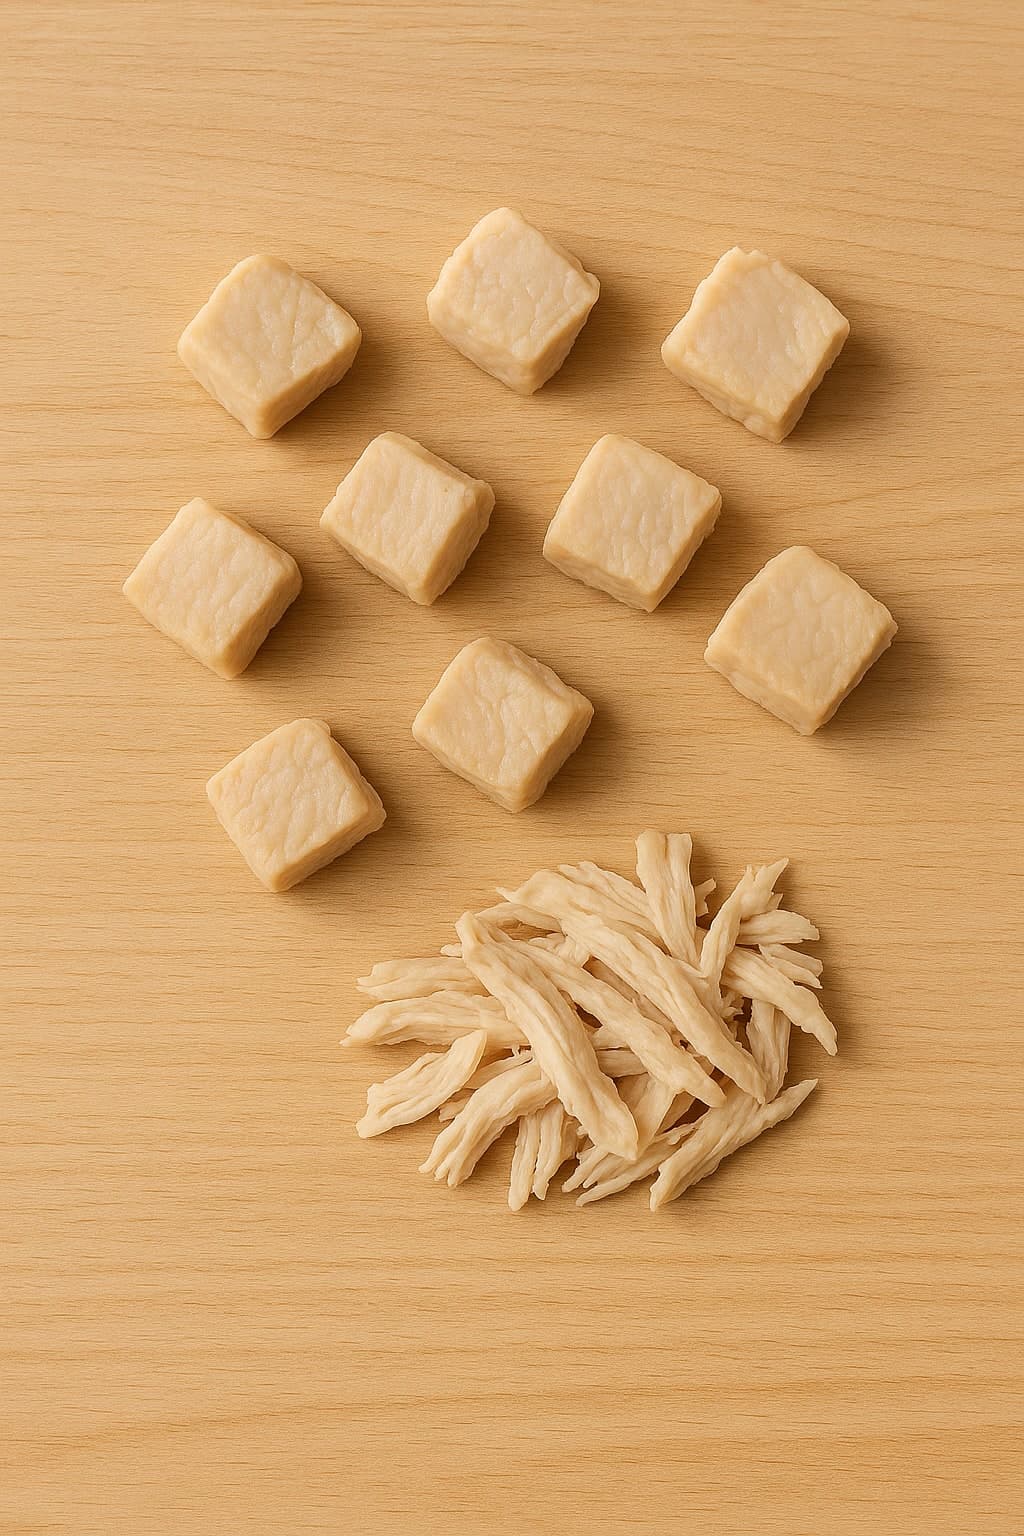
How to cut pork for a 12 month old: At 12 months, offer bite-sized pieces of well-cooked tender pork, approximately 1.5 to 2 cm. Ensure pork is lean and easy to chew to promote independent eating.
How to Cut White Fish for Baby
Read full cutting guide6–8 months
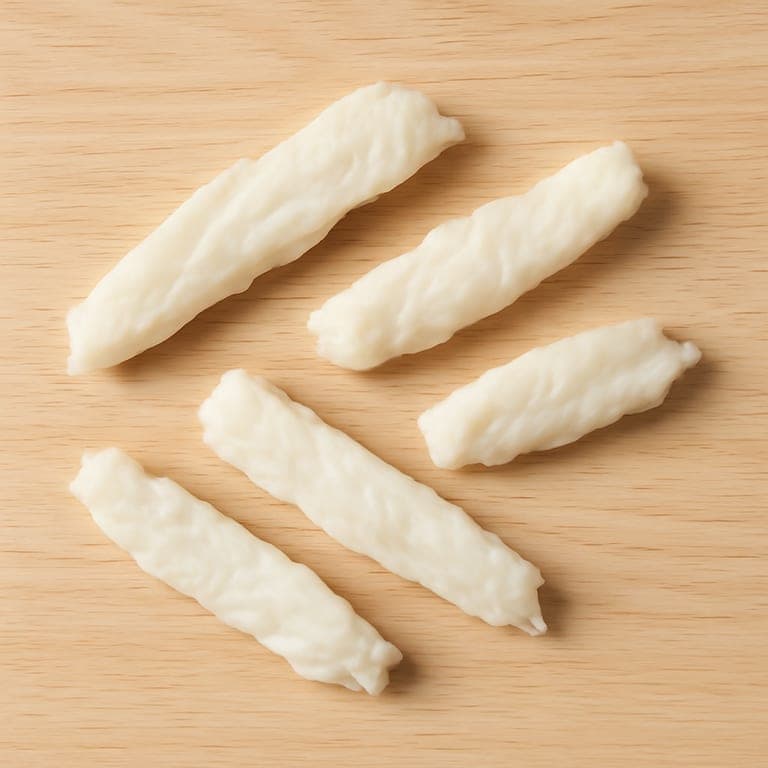
How to cut white fish for a 6 month old: Serve long flakes approximately 1 cm wide by 5 cm long of fully cooked, boneless white fish. Always check thoroughly for bones by feeling the fish with your fingers before offering it to your baby.
9–11 months
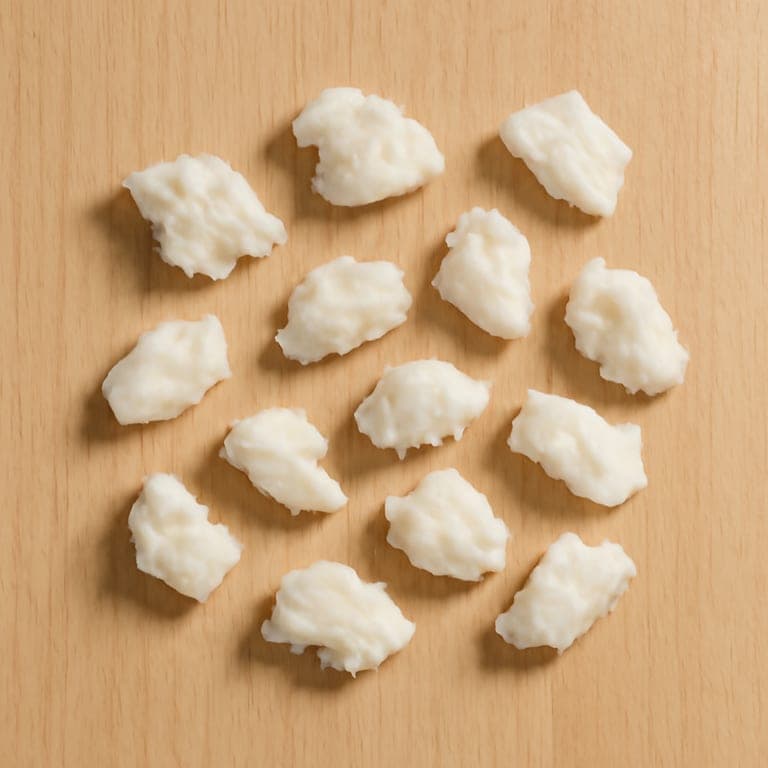
How to cut white fish for a 9 month old: Offer smaller flakes about 1 cm in size of cooked, boneless white fish. Continue to check carefully for any bones to ensure safe self-feeding.
12+ months
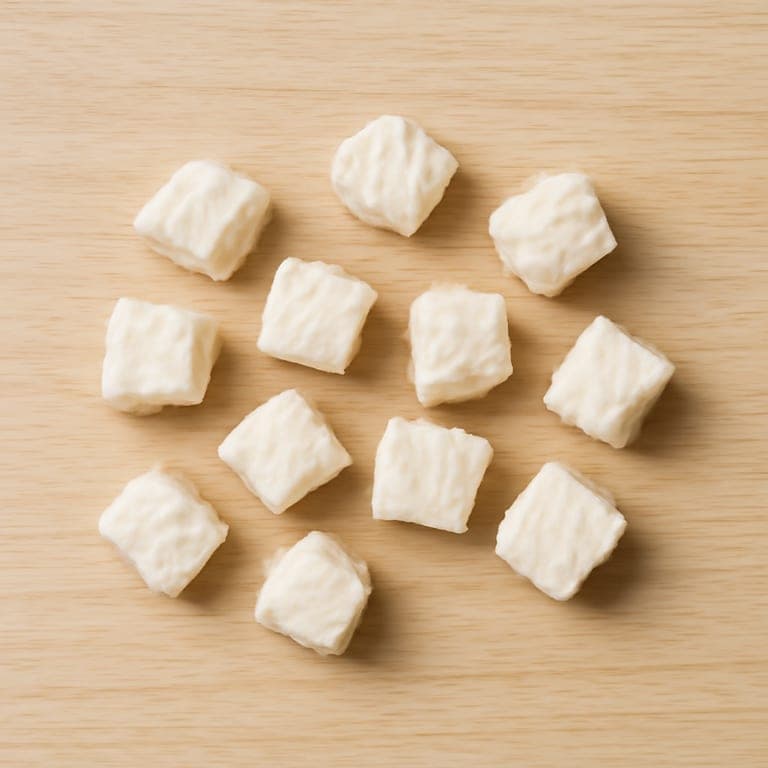
How to cut white fish for a 12 month old: Provide bite-sized chunks approximately 1.5 to 2 cm of cooked, boneless white fish. Keep checking for bones to maintain safety as your baby develops more advanced chewing skills.
How to Cut Pineapple for Baby
Read full cutting guide6–8 months
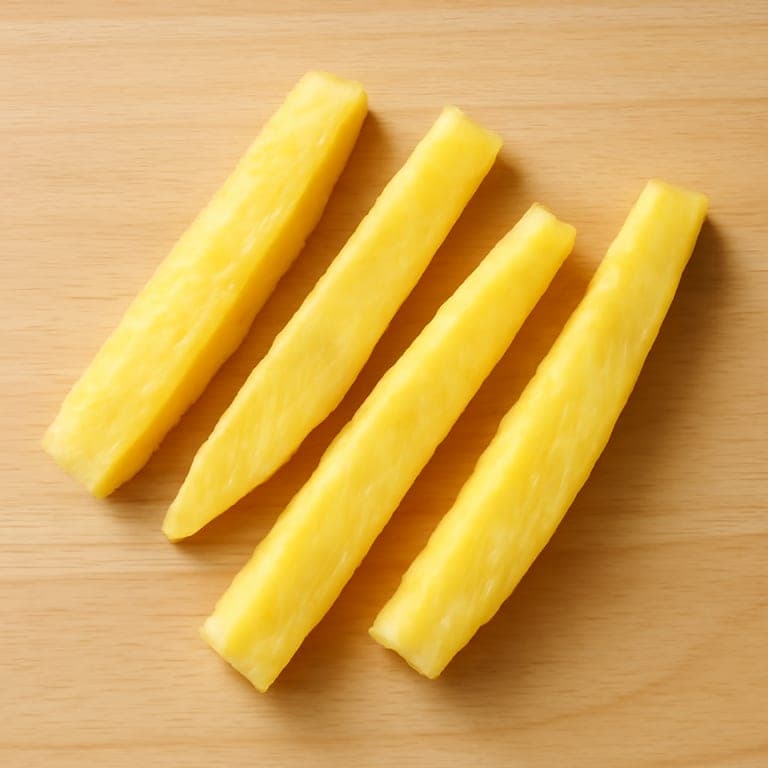
How to cut pineapple for a 6 month old: Offer long peeled wedges of ripe pineapple with the skin and tough core fully removed. Each wedge should be about finger-thick and palm-length to allow easy grasping and safe chewing.
9–11 months
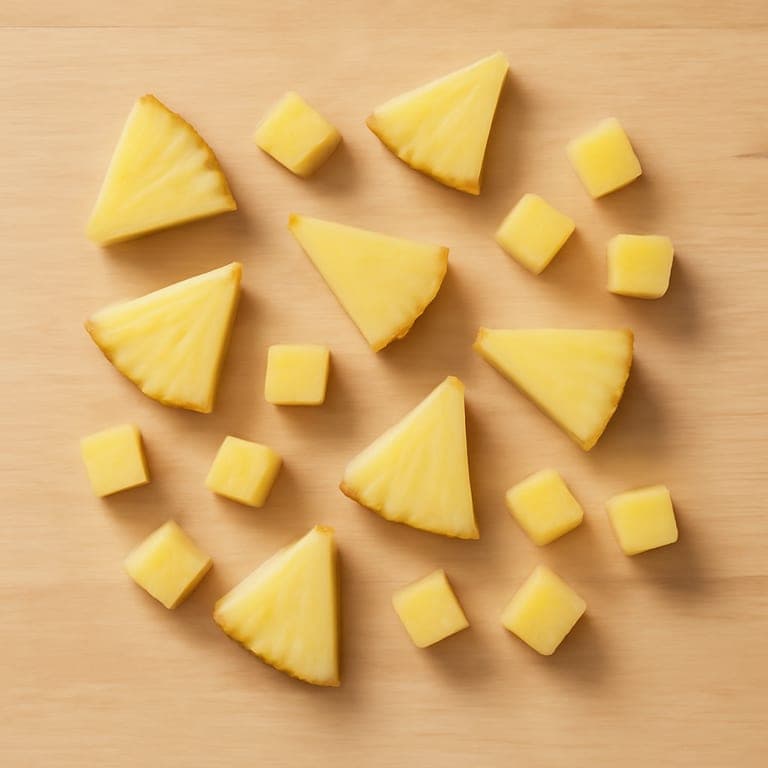
How to cut pineapple for a 9 month old: Cut pineapple into smaller wedges and small cubes approximately 1.5 cm in size, ensuring the core is removed. These sizes help babies develop chewing skills while minimizing choking risk.
12+ months
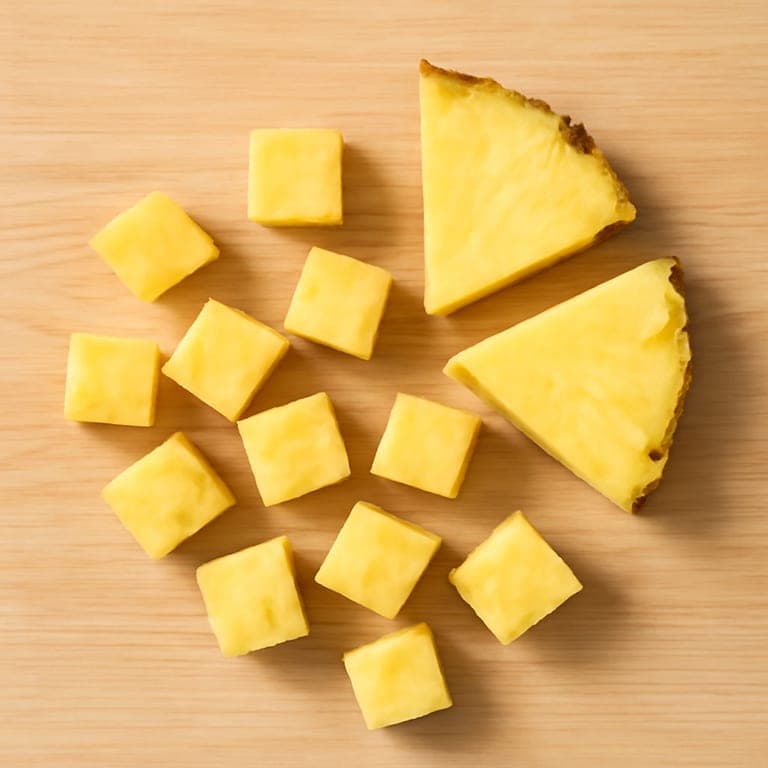
How to cut pineapple for a 12 month old: By 12 months, babies can handle bite-sized cubes and thin wedges of pineapple. Continue to remove the core and skin, and offer manageable pieces that encourage independent eating.
How to Cut Rotini Pasta for Baby
Read full cutting guide6–8 months
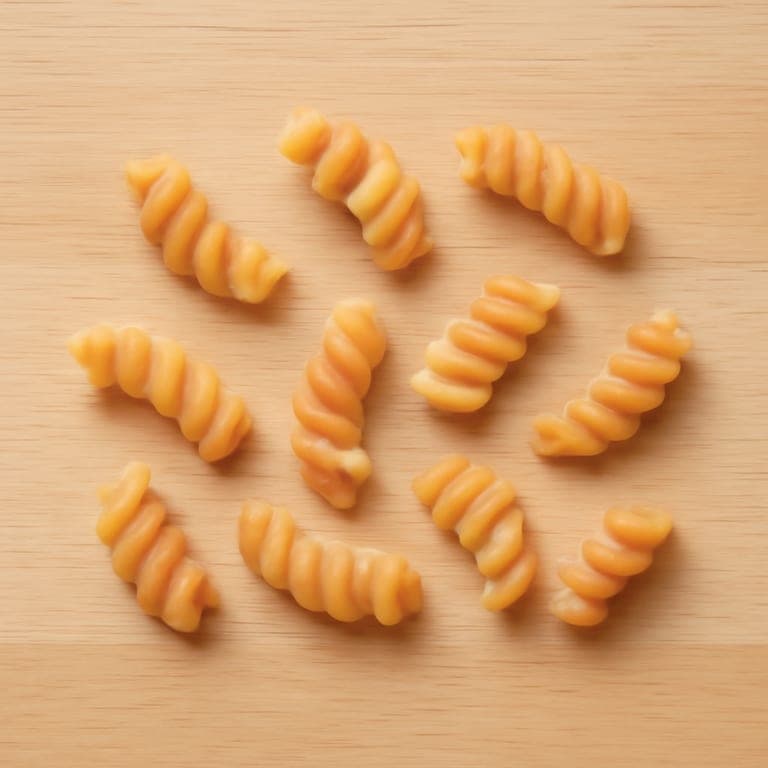
How to cut rotini pasta for a 6 month old: Cook rotini pasta very soft and cut each piece in half along the spiral to reduce size and make it easier to handle. Use only a small amount of sauce to avoid choking hazards.
9–11 months
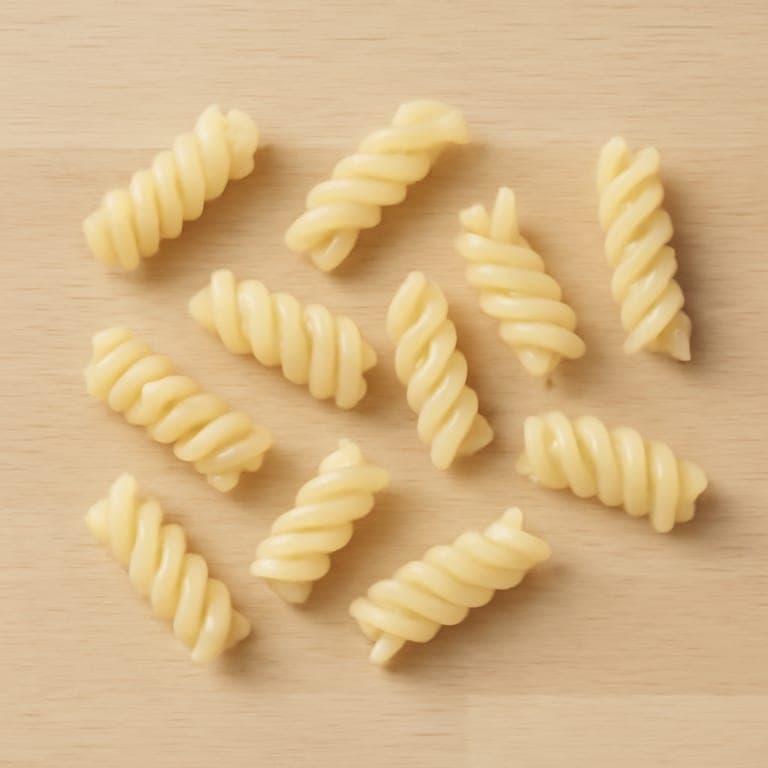
How to cut rotini pasta for a 9 month old: Offer whole well-cooked rotini pasta if it is soft enough to mash easily with gums. If your baby gags or struggles, quarter the pasta pieces to reduce size and improve safety.
12+ months
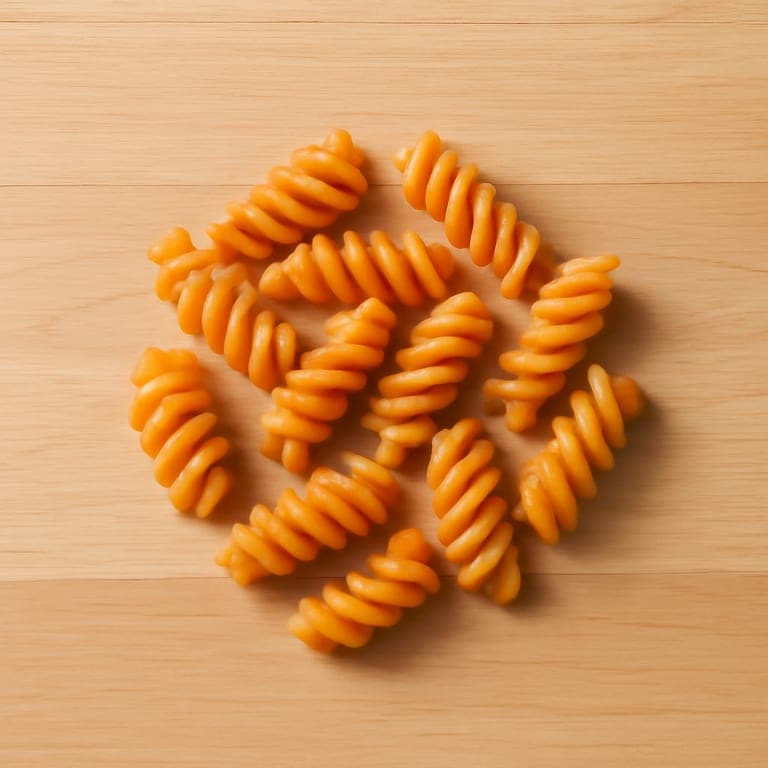
How to cut rotini pasta for a 12 month old: At 12 months, toddlers can eat whole well-cooked rotini pasta safely. Ensure the pasta is soft and easy to chew to support safe eating.
How to Cut Fig for Baby
Read full cutting guide6–8 months
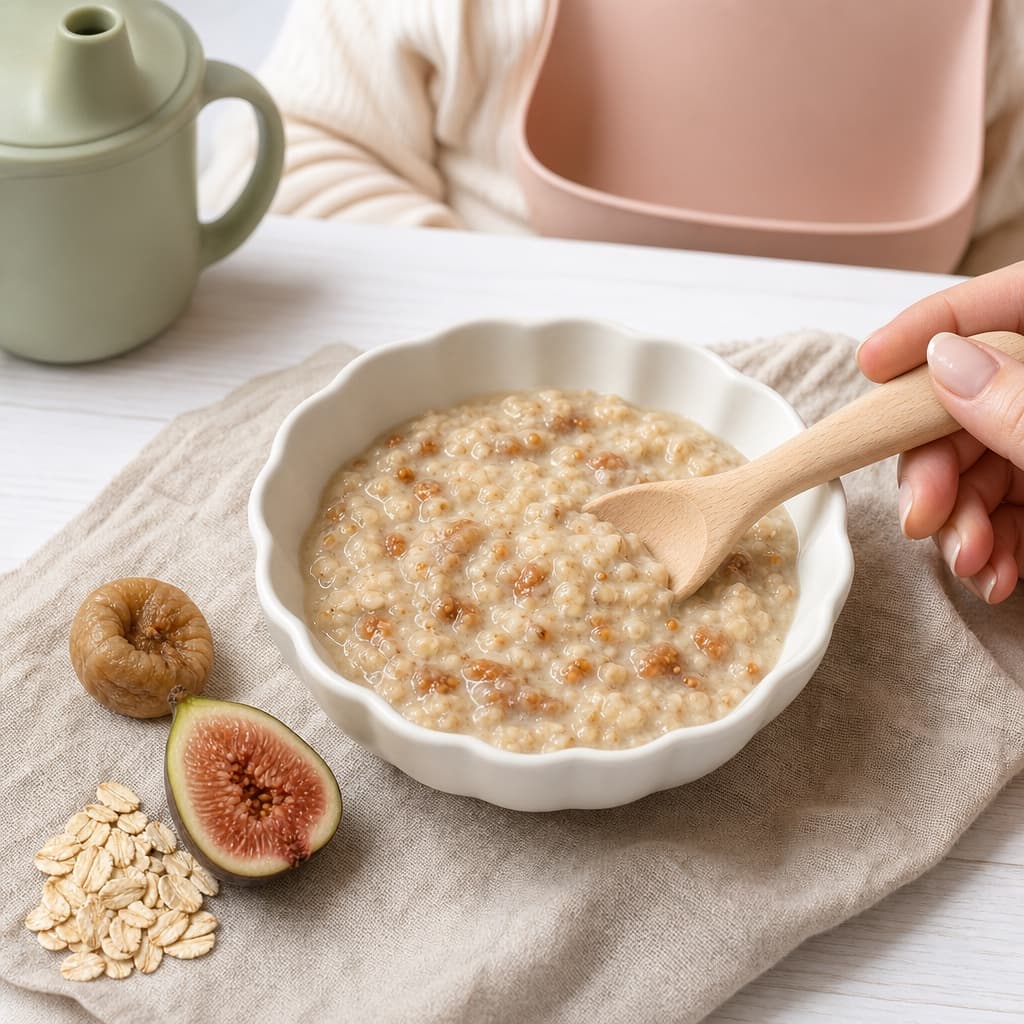
How to cut fig for a 6 month old: At 6 months, choose a very ripe, soft fig that gives easily when you press it, and wash it well. Cut it lengthwise into halves or quarters, so each wedge is roughly 1.5 to 2 cm wide and long enough for your baby to hold in a whole-fist grasp with a bit sticking out the top to gnaw on. Never offer a whole fig, since its round shape is a choking hazard. The thin skin can stay on if it is very soft, which also helps with grip, or you can peel it if you prefer. The tiny seeds are soft and safe to leave in. You can also mash ripe fig with a fork and stir it into plain yogurt or oatmeal, or offer it on a preloaded spoon. Keep your baby seated upright and stay within arm's reach for every bite.
9–11 months
How to cut fig for a 9 month old: Around 9 months, many babies are developing the pincer grasp, using the thumb and forefinger to pick up smaller pieces. Wash a ripe fig, cut it lengthwise into quarters first, then chop the flesh into small, soft pieces about 1 cm in size, roughly the size of your fingernail. Make sure each piece squashes easily between your fingers, and peel the skin if it feels chewy. Because ripe fig is soft and slightly sticky, the pieces are usually easy to grip, but you can roll them in a little baby cereal or ground oats if they slip. Continue to offer a larger quartered wedge as well if your baby still prefers to gnaw, and keep servings modest since fig is high in fiber. Supervise every bite with your baby seated upright.
12+ months
How to cut fig for a 12 month old: By 12 months, most toddlers can handle bite-size pieces and are getting better at chewing. Wash the fig, halve or quarter it lengthwise, and cut the flesh into bite-size chunks about 1.5 cm across, small enough to chew but never so large that they could be swallowed whole. Ripe fig is soft enough to leave the skin on at this age, though you can still peel it if your toddler prefers. A whole fig is still off the table, so keep halving or quartering before you cut smaller pieces. Offer the pieces on a plate or in a bowl and let your toddler self-feed with fingers or a fork. Keep mealtimes calm and seated, avoid letting your child walk or run with food, and always supervise while they eat.
How to Cut Apricot for Baby
Read full cutting guide6–8 months
How to cut apricot for a 6 month old: At 6 months, choose a very ripe apricot, wash it, remove the pit, and peel the skin. Offer a soft, peeled half or a thick wedge about 1.5 to 2 cm wide, large enough for your baby to hold in a whole-fist grasp with a bit sticking out the top to gnaw on. If the fruit is firm, cook it briefly by steaming or simmering until it is very soft, then serve it warm rather than hot. You can also mash ripe or cooked apricot with a fork and offer it on a preloaded spoon, or stir it into plain yogurt or oatmeal. Skip raw, firm apricot at this stage, since unripe fruit is too hard to gum safely, and avoid small, round, or bite-size pieces. Keep your baby seated upright and stay within arm's reach while eating.
9–11 months
How to cut apricot for a 9 month old: Around 9 months, many babies are developing the pincer grasp, using the thumb and forefinger to pick up smaller pieces. Wash the apricot, remove the pit, peel the skin, and cut ripe, soft flesh into small pieces about 1 to 1.5 cm in size. Every piece should squash easily between your fingers; if it does not, cook the fruit until it does. Avoid round or coin shapes, and cut pieces so they are never the size or shape that could block the airway. Because ripe apricot can be slippery, you can roll the pieces in a little baby cereal or ground oats to help with grip. If you offer dried apricot at this stage, simmer it until plump and soft and chop it finely, never whole. Keep supervising every bite while your baby sits upright.
12+ months
How to cut apricot for a 12 month old: By 12 months, most toddlers can handle bite-size pieces and are getting better at chewing. Wash the apricot, remove the pit, and cut the flesh into bite-size chunks about 1.5 cm across, small enough to chew but never so large that they could be swallowed whole. Once your toddler chews well, you can leave thin, soft skin on, though peeling is still fine if they prefer it. Continue to avoid whole dried apricots, which stay firm, sticky, and easy to choke on; finely chop or soften them instead. Offer the pieces on a plate or in a bowl and let your toddler self-feed with fingers or a fork. Keep mealtimes calm and seated, avoid letting your child walk or run with food, and always supervise while they eat.
How to Cut Tomato for Baby
Read full cutting guide6–8 months
How to cut tomato for a 6 month old: At 6 months, choose a large, ripe, soft tomato and peel it first: blanch it in hot water for about 30 seconds, then move it to an ice bath and the skin slips right off. Cut the tomato into wedges, scoop out the seeds and watery pulp, and slice the flesh into thick strips about 1.5 to 2 cm wide and roughly the length of an adult finger, so your baby can hold one in a whole-fist grasp. Each strip should be soft enough to squash easily between your fingers. You can also mash peeled, seeded tomato with a fork, or stir cooked tomato into a homemade, low-sodium sauce over soft pasta or rice. Skip jarred pasta sauces, which are usually high in salt, and avoid round slices at this age. Keep your baby seated upright and supervise every bite.
9–11 months
How to cut tomato for a 9 month old: Around 9 months, many babies are developing the pincer grasp, using the thumb and forefinger to pick up smaller pieces. Continue to peel and de-seed ripe tomato, then chop the soft flesh into small pieces around pea size, roughly 0.5 to 1 cm, that your baby can pick up and chew. Keep everything soft, and avoid round slices or chunks with tough skin attached. Cooked tomato remains a great option too, folded into scrambled eggs, soft pasta, rice, or a mild homemade sauce without added salt. If your baby gets a little redness around the mouth from the acidity, wipe the face gently after the meal and offer sips of water; it usually fades quickly. Keep supervising every bite while your baby sits upright.
12+ months
How to cut tomato for a 12 month old: By 12 months, most toddlers manage raw tomato well if they are chewing confidently. Wash a ripe tomato and cut it into bite-size chunks about 1 to 1.5 cm across, still avoiding round slices, which can seal over the airway. Around this age you can start leaving soft, ripe skin on, though it is fine to keep peeling if the skin seems tough or your toddler struggles with it, and you no longer need to remove every seed. Remember that cherry tomatoes still follow their own rule: quartered lengthwise, never whole or halved into rounds, until at least age 4. Offer tomato pieces on a plate with meals, keep salty sauces and dressings off your toddler's portion, and always supervise while they eat, seated at the table.
How to Cut Orange for Baby
Read full cutting guide6–8 months
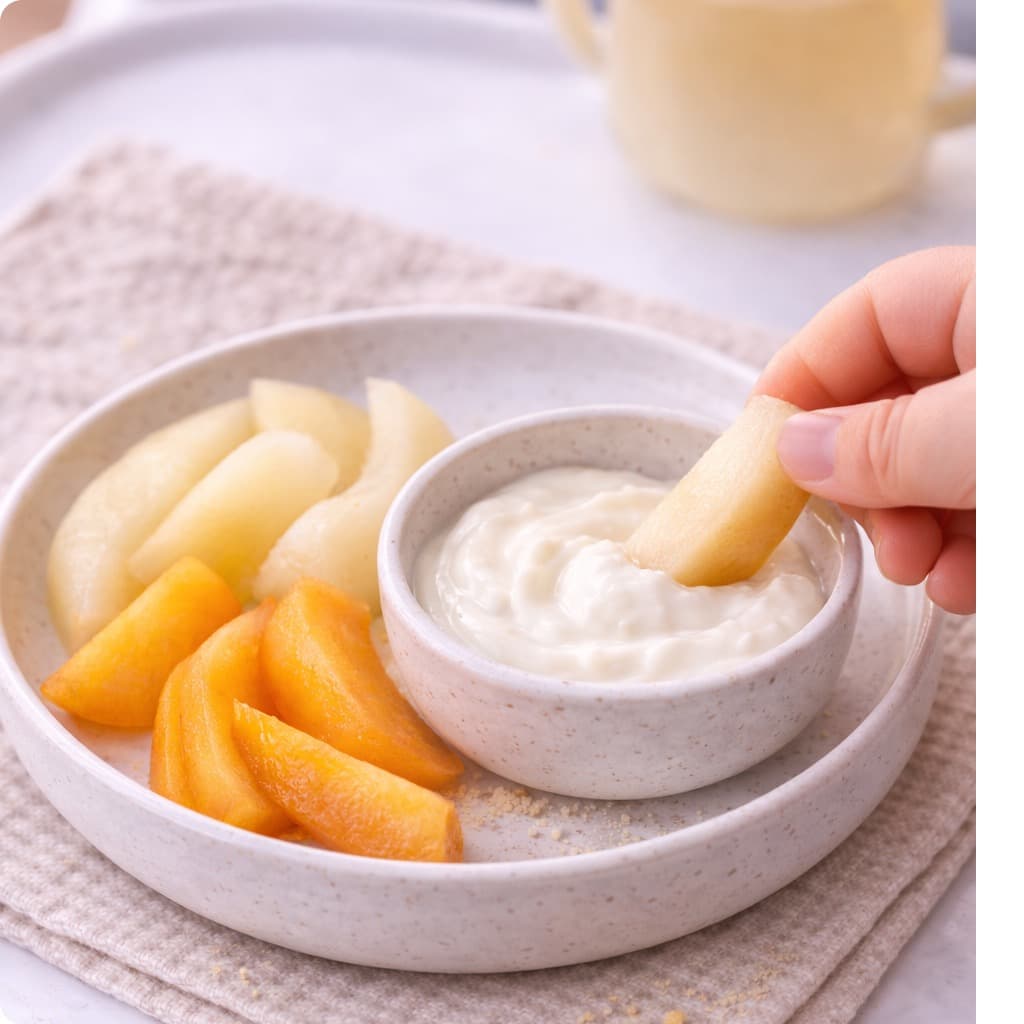
How to cut orange for a 6 month old: At 6 months, supreme the orange: slice off the peel and white pith with a knife, then cut along both sides of each membrane to release the soft, membrane-free flesh, removing any seeds as you go. Serve thick strips of supremed flesh about the size of an adult finger, roughly 4 to 5 cm long, so your baby can hold one in a whole-fist grasp, or smash the segments lightly with a fork so no tight membrane pockets remain. Every piece should pass the squish test and mash easily between your fingers. For mandarins or clementines, peel them, remove any seeds, and smash or finely chop the segments rather than serving them whole, since the intact membrane holds each segment together as a slippery, rounded piece. Keep your baby seated upright and stay within arm's reach while eating.
9–11 months
How to cut orange for a 9 month old: Around 9 months, once the pincer grasp emerges, switch to pea-sized pieces of membrane-free orange flesh, roughly 0.5 to 1 cm. Supreme the orange as before, removing peel, pith, membranes, and seeds, then chop the flesh small. You can also finely chop orange and stir it into plain yogurt or oatmeal, which is a nice way to pair its vitamin C with iron-rich foods. For mandarins and clementines, peel each segment's stringy fibers away where you can, check for seeds, and cut every segment into two or three small pieces rather than offering whole segments, which are still slippery and rounded at this age. If juice runs everywhere, roll the pieces in a little baby cereal for grip. Keep supervising every bite while your baby sits upright.
12+ months
How to cut orange for a 12 month old: By 12 months, most toddlers chew well enough to handle slightly bigger pieces of orange, about 1 to 1.5 cm, and can start managing the thin membranes of soft mandarin or clementine segments if you cut each segment in half and remove any seeds first. Tough, chewy membranes on regular oranges are still worth trimming away, since they can sit in the mouth as a rubbery layer, and always remove the peel and any seeds. Avoid hard frozen wedges and dried peel. Offer the pieces on a plate and let your toddler self-feed with fingers or a fork, wiping the face afterward if the acidity causes redness. Keep skipping juice in favor of whole fruit, keep mealtimes seated and calm, and always supervise while they eat.
How to Cut Shrimp for Baby
Read full cutting guide6–8 months
How to serve shrimp to a 6 month old: At 6 months, cook shrimp thoroughly until opaque and firm, then peel it, devein it, and remove the tail completely. Chop the flesh very finely, into pieces of about 0.5 cm or smaller, or mash it with a fork, because whole or large pieces of shrimp are firm and springy and a real choking risk at this age. Mix the finely chopped shrimp into a soft carrier your baby can manage, such as plain rice, soft pasta, mashed avocado, or mashed sweet potato, so the texture is easy to swallow. Add no salt or seasoning. Since this is a top allergen, keep the first serving small and offer no other new foods that day, watching for any reaction over the next 2 hours. Keep your baby seated upright and supervise every bite.
9–11 months
How to serve shrimp to a 9 month old: Around 9 months, keep chopping cooked, peeled, and deveined shrimp very finely, into pieces of roughly 0.5 cm, since shrimp stays firm and bouncy no matter how well it is cooked and official guidance is to chop finely or mash for babies under 12 months. Your baby's developing pincer grasp means the small pieces can now double as finger food practice when mixed into rice, soft vegetables, or pasta, or you can fold minced shrimp into a soft fritter or patty cooked without salt. If earlier servings went well, you can gradually offer shrimp more regularly, which also helps maintain tolerance to the allergen. Continue to skip salty and breaded preparations, keep your baby seated upright, and supervise every bite.
12+ months
How to serve shrimp to a 12 month old: By 12 months, toddlers with good chewing skills can handle pea-sized pieces of soft, well-cooked shrimp, around 1 cm, served as finger food. Still peel, devein, and remove tails, and keep cutting each shrimp into several pieces; a whole shrimp remains too firm, curved, and springy to be safe for a young toddler. Chopped shrimp works well stirred into rice, mild pasta dishes, or soft vegetable mixes, and unseasoned pieces can sit alongside the family meal. Continue to avoid fried, breaded, and heavily seasoned shrimp dishes, which add salt and tough coatings. Keep mealtimes seated and calm, never let your toddler walk or run with food, and always supervise while they eat.
How to Cut Beef for Baby
Read full cutting guide6–8 months
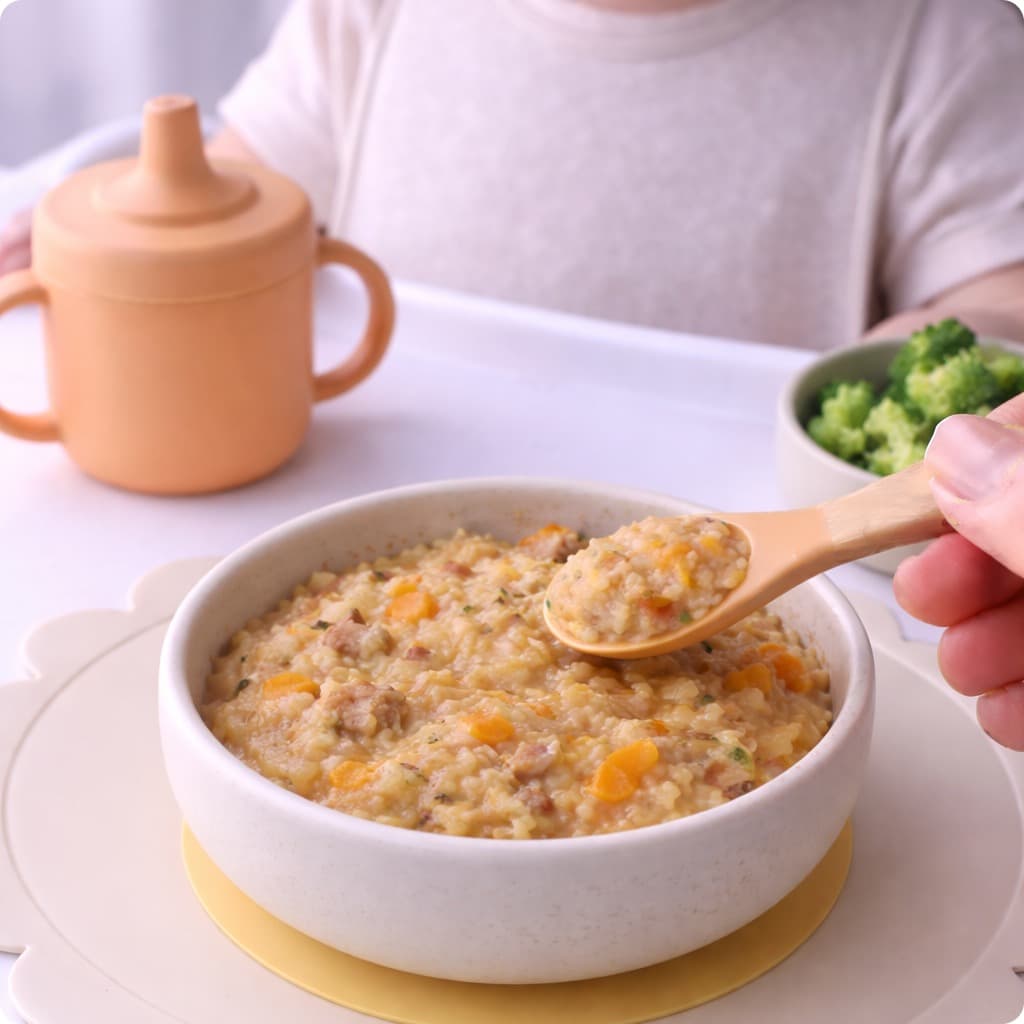
How to cut beef for a 6 month old: At 6 months, offer beef in forms that are easy to gum and swallow. For baby-led weaning, cook a tender cut low and slow until it is very soft, then cut a single thick strip about 1.5 to 2 cm wide and the length of an adult finger. Your baby will grip it in a fist and suck and gnaw on it, drawing out the iron-rich juices even before they can bite pieces off, so a strip they mostly cannot break chunks from is exactly the point. Alternatively, blend well-cooked beef into a smooth puree thinned with breast milk, formula, or cooking liquid, or stir very finely shredded beef into a soft vegetable mash. Make sure everything is cooked through with no pink remaining, skip the salt, and stay within arm's reach with your baby seated upright.
9–11 months
How to cut beef for a 9 month old: Around 9 months, as the pincer grasp develops, switch to minced and shredded textures your baby can pick up and chew. Offer well-cooked ground beef broken into small crumbles, finely shredded strands of slow-cooked beef, or soft, salt-free meatballs broken into pea-sized bits of roughly 0.5 to 1 cm. Keep everything moist by mixing it with a little cooking liquid, mashed vegetables, or a mild homemade sauce, since dry, crumbly meat is harder to swallow. Avoid tough, chewy, or gristly pieces and round or coin-shaped chunks that could block the airway. You can still offer a large, soft strip to gnaw alongside the smaller pieces if your baby enjoys it. Keep supervising every bite while your baby sits upright.
12+ months
How to cut beef for a 12 month old: By 12 months, most toddlers can manage small, soft pieces of beef about 1 to 1.5 cm, as long as the meat itself is tender. Slow-cooked, fall-apart cuts, well-cooked ground beef, and soft meatballs quartered into small pieces all work well; steak-style pieces that spring back when pressed are still too chewy, so keep favoring braised and stewed textures and continue to mince or shred tougher cuts well into the toddler years. Serve beef pieces with vegetables and grains at family meals, keeping added salt off your toddler's portion. The iron in beef keeps supporting brain development through toddlerhood, so aim for regular servings. Keep mealtimes seated and calm, never let your toddler walk with food, and always supervise while they eat.
How to Cut Dates for Baby
Read full cutting guide6–8 months
How to cut dates for a 6 month old: At 6 months, do not offer dates as pieces at all. Remove the pit, soak the date in warm water until it is plump and soft, then mash it into a smooth paste and stir it into oatmeal, plain yogurt, or a fruit puree. Mixing the mash into other foods thins out the stickiness so it cannot clump together in your baby's mouth. You can also blend a few pitted, soaked dates with a little warm water into a thin date puree and offer it on a preloaded spoon. Never give a whole date or a large sticky chunk at this stage, because sticky pieces can lump together and block the airway. Keep the amount small, since dates are very sweet, and always supervise with your baby seated upright.
9–11 months
How to cut dates for a 9 month old: Around 9 months, many babies develop the pincer grasp and can pick up small pieces with the thumb and forefinger. Remove the pit, soften the date by soaking if it feels dry, then finely chop it into soft pieces no larger than a pea, about 0.5 to 1 cm. You can also slice the softened date lengthwise into very thin slivers and press them into a strip of toast or a banana piece so they do not stick together in the mouth. Keep mixing mashed date into porridge, yogurt, and thicker mashes too, and offer only one or two small pieces at a time rather than a handful, so your baby cannot stuff several sticky bits at once. Skip very dry, chewy date varieties, and keep supervising every bite.
12+ months
How to cut dates for a 12 month old: By 12 months, most toddlers chew more confidently, but dates stay firm and sticky, so careful prep still matters. Remove the pit and slice the date lengthwise into thin strips about 0.5 cm wide, or keep chopping it into small, soft, pea-sized pieces around 1 cm. Never serve a whole date, half a date, or thick round pieces, since these can be swallowed whole and are a real choking risk well into the toddler years. Softer varieties like Medjool are easier to manage than very dry, chewy dates. Chopped dates also work well stirred into oatmeal, yogurt, or homemade baked goods as a no-added-sugar sweetener. Keep your toddler seated while eating, offer small amounts, and continue to supervise closely.
How to Cut Prunes for Baby
Read full cutting guide6–8 months
How to cut prunes for a 6 month old: At 6 months, serve prunes only as a smooth, lump-free puree. Check that each prune is pitted, soak the prunes in warm water until they are plump and soft, then blend until completely smooth, adding a little of the soaking water or your baby's usual milk to loosen the texture. Offer the puree on a preloaded spoon, or stir a spoonful into oatmeal, yogurt, or another puree your baby already enjoys. Never give a whole prune or a chunk of dried prune at this stage, because prunes are firm and sticky and can block the airway. Keep the portion small, around a teaspoon or two, since prunes have a gentle laxative effect, and always supervise with your baby seated upright.
9–11 months
How to cut prunes for a 9 month old: Around 9 months, as the pincer grasp develops, you can move beyond puree to small, manageable pieces. Use pitted prunes, soak them until soft, then finely chop or mash them into soft, flattened bits no larger than a pea, about 0.5 to 1 cm. You can also smear mashed prune thinly onto toast strips or a preloaded spoon so the sticky texture stays spread out instead of clumping. Avoid whole prunes and large chunks, which stay firm and stick together in the mouth. Offer one small piece at a time and let your baby finish before giving more. Prune puree stirred into porridge or yogurt is still a great option at this age, especially when your baby needs a little digestive help.
12+ months
How to cut prunes for a 12 month old: By 12 months, most toddlers chew a wider range of textures, but a whole prune is still a choking hazard because it is firm, sticky, and just the right size to be swallowed whole. Keep using pitted prunes and slice them lengthwise into thin strips about 0.5 cm wide, or chop them into small, soft pieces around 1 cm. Softening them first in warm water keeps the texture easier to manage. Chopped prunes work well stirred into oatmeal, yogurt, and baked goods, adding natural sweetness without any added sugar. Keep portions modest because of the laxative effect, make sure your toddler eats seated and calm, and continue chopping prunes until they are chewing a full range of textures reliably.
How to Cut Mushroom for Baby
Read full cutting guide6–8 months
How to cut mushroom for a 6 month old: At 6 months, babies grasp with the whole hand, so serve mushroom as large, soft cooked strips they can hold with some sticking out of the fist. Choose larger mushrooms such as portobello or big cremini, wash them, and cook them by sauteing, steaming, or roasting until they are very soft and tender all the way through. Slice the cooked mushroom into strips about 1 to 2 cm wide and roughly the length of an adult finger. Each strip should squash easily when you press it between two fingers; if it feels firm or rubbery, cook it longer. You can also chop well-cooked mushroom very finely and stir it into a mash or puree. Never serve raw mushroom or small firm pieces at this age, and always supervise with your baby seated upright.
9–11 months
How to cut mushroom for a 9 month old: Around 9 months, many babies start picking up smaller pieces with the thumb and forefinger. Cook mushrooms until fully soft, then chop them into small pieces about 1 cm in size so your baby can practice the pincer grasp. Keep checking the texture: every piece should mash easily between your fingers, with no rubbery or chewy bits, and tougher stems are best trimmed away or chopped extra fine. Chopped cooked mushroom mixes nicely into scrambled eggs, rice, pasta, or a soft vegetable mash, which also makes the slippery pieces easier to pick up. You can still offer a large soft strip for gnawing alongside the small pieces. Continue to avoid raw mushroom completely, and supervise every bite.
12+ months
How to cut mushroom for a 12 month old: By 12 months, most toddlers manage bite-size pieces well. Cook mushrooms until soft and cut them into bite-size pieces about 1 to 1.5 cm, small enough to chew easily but not so large that a piece could be swallowed whole. Soft cooked mushroom slices and quarters work well as finger food, stirred into omelets and pasta, or served alongside the family meal without added salt. Even at this age, keep mushrooms well cooked rather than raw, since raw mushroom remains firm, hard to digest, and a choking risk for young children. Keep meals seated and calm, avoid letting your toddler walk or run with food, and continue to supervise while they eat.
How to Serve Edamame for Baby
Read full cutting guide6–8 months
How to serve edamame for a 6 month old: At 6 months, remove the beans from their pods and never offer the pod itself, which is too tough and stringy to chew. Cook the shelled beans until they are very soft, then peel off the thin outer skin and mash them into a smooth puree, adding a little water, breast milk, or formula to loosen the texture if needed. You can fold the mash into foods your baby already knows, like mashed avocado, sweet potato, or oatmeal, or offer it on a preloaded spoon. If you prefer pieces, smash each bean completely flat between your fingers so there are no whole, firm, round beans about 1 cm in size that a baby could choke on. Serve it plain without salt, and supervise closely with your baby seated upright.
9–11 months
How to serve edamame for a 9 month old: Around 9 months, your baby's pincer grasp is developing, and edamame makes great fine-motor practice as long as the beans are prepared safely. Cook the shelled beans until very soft, peel off the thin skins, and then flatten each bean or cut it into small, quarter-sized pieces of roughly 0.5 cm, so nothing round and firm remains. Whole, intact edamame beans are still a serious choking hazard at this age, just like whole peas or grapes, so every single bean should be smashed or chopped before it goes on the tray. Offer a small amount at a time rather than a handful, so your baby is not tempted to stuff several beans in at once, and keep meals plain, seated, and closely supervised.
12+ months
How to serve edamame for a 12 month old: At 12 months and beyond, keep smashing or chopping edamame rather than serving whole beans. Cook the shelled beans until soft, peel them, and flatten each one or chop it into small pieces of about 0.5 to 1 cm; the flattened shape is what removes the choking risk. Whole, firm, round beans remain a hazard for toddlers, so save intact edamame for later, once your child is chewing a wide range of textures reliably and well past the first birthday. Flattened edamame works well stirred into rice, pasta, and soft grain bowls, and after 12 months a tiny pinch of seasoning is fine, though plain is still best. Serve small amounts at a time, keep your toddler seated, and continue to supervise every meal.
How to Serve Chickpeas for Baby
Read full cutting guide6–8 months
How to serve chickpeas for a 6 month old: From 6 months, serve chickpeas as a completely smooth puree or a soft, well-mashed paste with no whole or firm pieces. Cook them until they are very soft, then blend with a little water, breast milk, formula, or the cooking liquid to reach a loose, spoonable texture. Hummus made without added salt is another easy option: offer it on a preloaded spoon or spread it thinly on a soft strip of toast your baby can hold. If you want to offer pieces, flatten each soft-cooked chickpea completely between your fingers so nothing round about 1 cm in size remains. Peeling the thin skins is optional; it makes the texture smoother, but soft-cooked skins are safe. Always supervise with your baby seated upright.
9–11 months
How to serve chickpeas for a 9 month old: Around 9 months, as the pincer grasp develops, chickpeas become brilliant self-feeding practice. Cook them until very soft, then gently smash or flatten each chickpea between your fingers so it is no longer round and firm; a flattened chickpea about 1 cm across is easy to pick up and safe to gum. Never serve whole, firm chickpeas, because their round shape and size make them a choking hazard. Offer just a few flattened chickpeas at a time rather than a pile, so your baby cannot scoop up a handful at once. You can also stir smashed chickpeas into soft rice, pasta, or vegetable mash, or keep offering no-salt hummus on toast strips. Peel the skins if your baby seems to struggle with them, and supervise every bite.
12+ months
How to serve chickpeas for a 12 month old: By 12 months, your toddler is chewing better, but whole, firm chickpeas are still risky, so keep flattening or smashing them until you are confident in your child's chewing ability. Serve soft-cooked, flattened chickpeas about 1 to 1.5 cm across, coarsely mashed chickpeas on toast, or soft chickpea patties and falafel-style bites cooked without added salt. Hummus remains a favorite: spread it on toast fingers, use it as a dip for soft vegetable sticks, or stir it into pasta. Homemade or low-salt hummus is best, since store-bought versions are often high in sodium. Offer chickpeas as part of varied meals, keep your toddler seated while eating, and continue to supervise closely.
How to Serve Peas for Baby
Read full cutting guide6–8 months
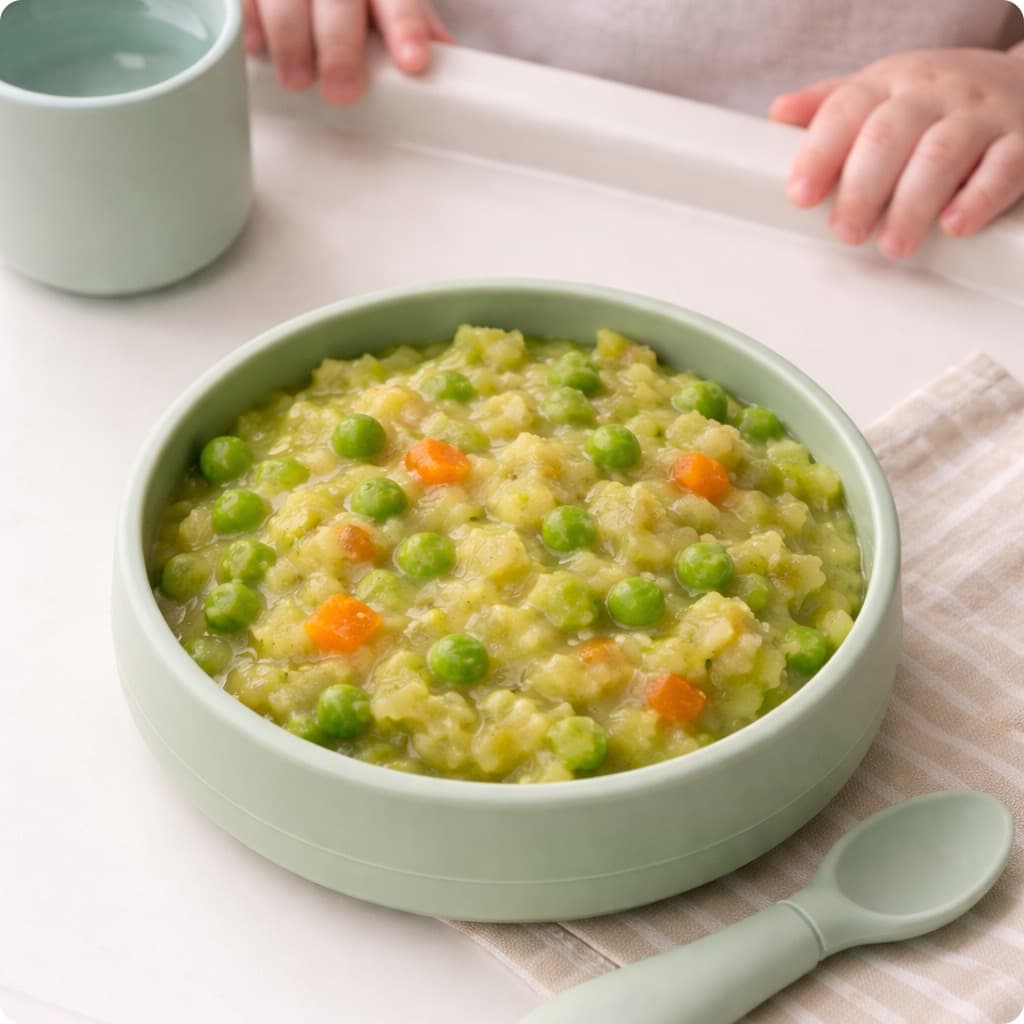
How to serve peas for a 6 month old: At 6 months, the main concern with peas is their small, round shape, which can be a choking hazard if they are served whole and firm. Cook fresh or frozen peas until they are very soft, then mash or puree them into a smooth or lightly textured consistency, making sure each pea, roughly 1 cm in size, is broken down rather than left whole. Stir mashed peas into other purees, blend them into a mild soup, or offer them on a preloaded spoon for your baby to bring to their mouth. A thick pea mash also spreads nicely on a soft toast strip for early self-feeding. Never serve raw or firm peas, or peas straight from the freezer bag, and always supervise with your baby seated upright.
9–11 months
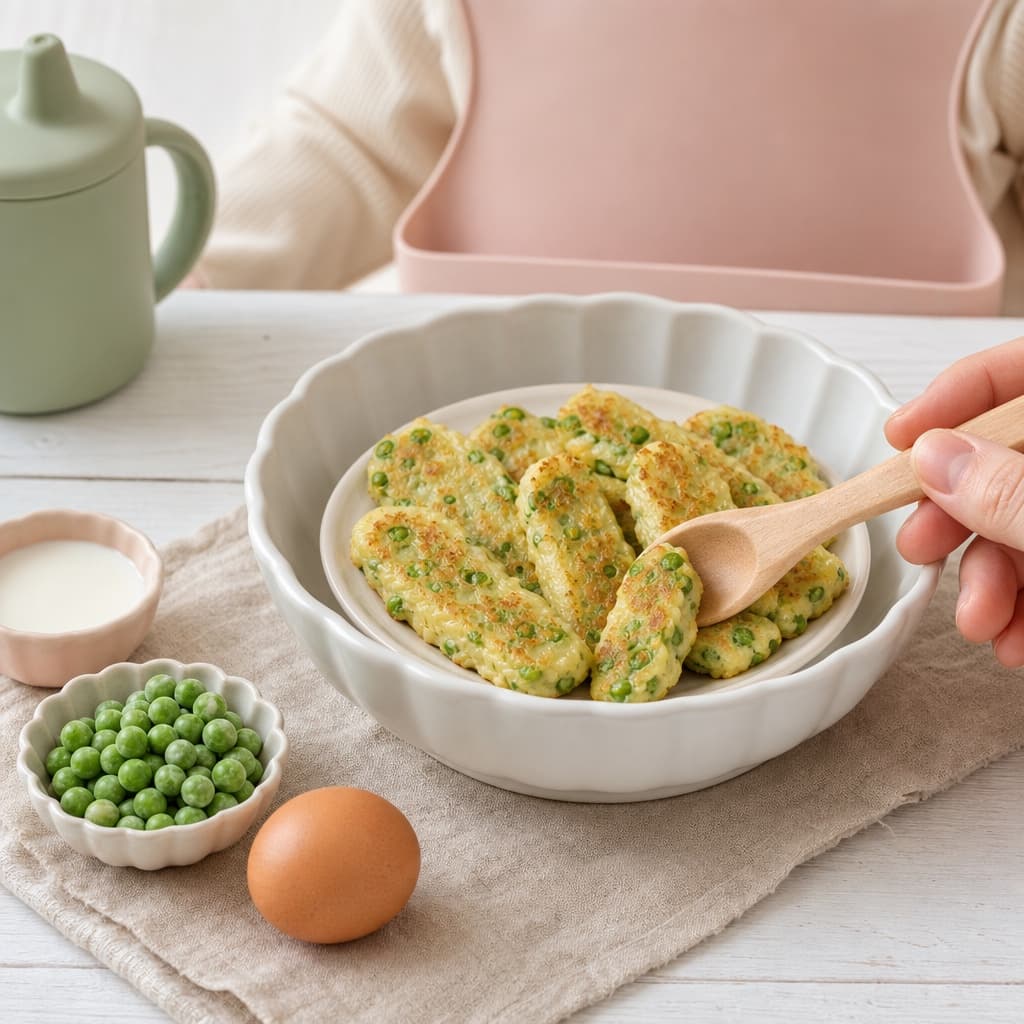
How to serve peas for a 9 month old: Around 9 months, as your baby develops the pincer grasp and stronger chewing skills, peas become wonderful fine-motor practice. Cook them until soft, then flatten or gently smash each pea between your fingers so the round shape is broken; a squashed pea about 0.5 to 1 cm across is easy to pick up and much safer to manage. Offer a small scatter of flattened peas on the tray rather than a big pile, so your baby cannot scoop up a mouthful at once. You can also mix soft peas into mashes, mild fritters, or small pasta, which makes them easier to handle. Keep smashing every pea at this stage rather than serving them whole and firm, and supervise every bite while your baby sits upright.
12+ months
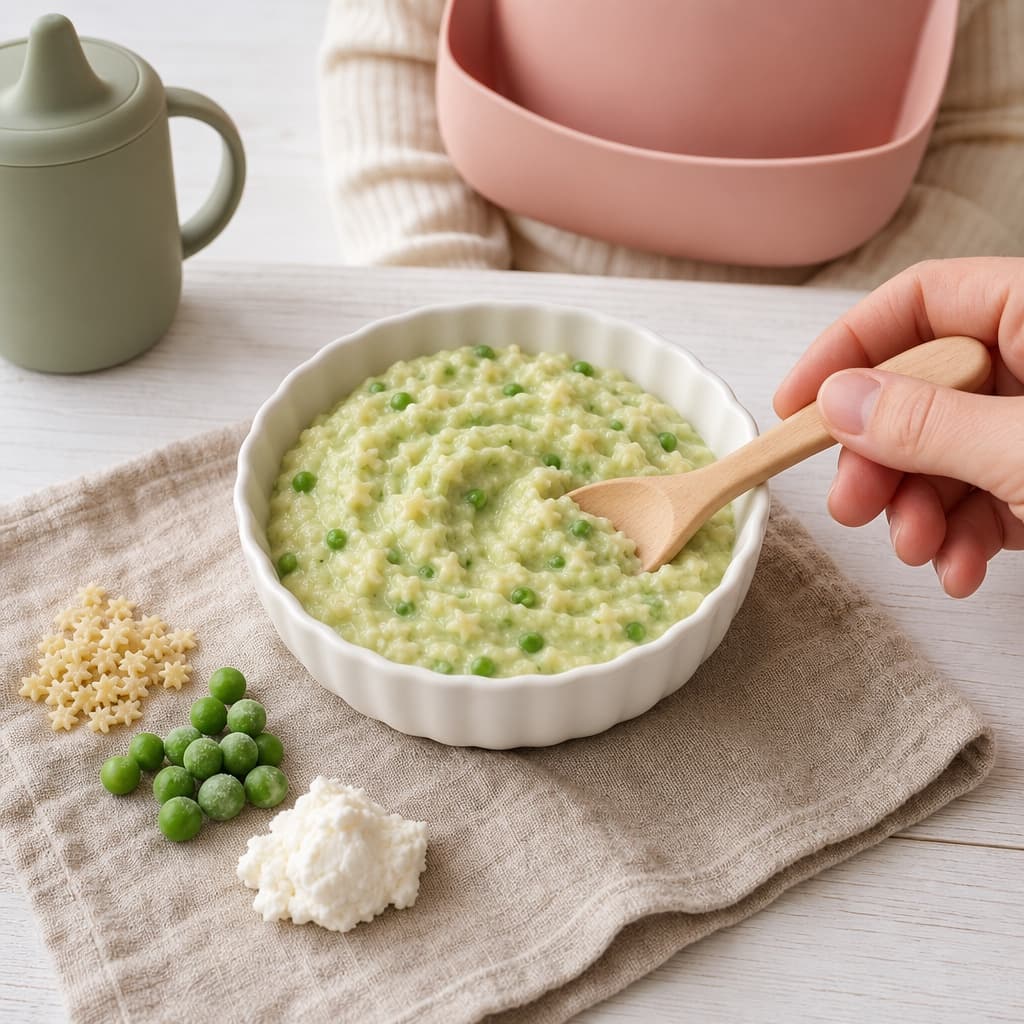
How to serve peas for a 12 month old: By 12 months, many toddlers are chewing well enough to manage whole peas, as long as the peas are cooked until soft. Offer soft-cooked whole peas, about 1 cm each, in small amounts at a time, and keep flattening or smashing them until you are confident in your child's chewing ability; if in doubt, a quick squash with a fork keeps them extra safe. Avoid serving large amounts of firm, whole peas at once, and never offer raw, hard, or frozen peas straight from the bag. Soft peas stir easily into pasta, rice, mashed potato, and family stews without added salt. Keep mealtimes seated and calm, avoid eating on the move, and continue supervising while your toddler eats.
How to Serve Peanut Butter for Baby
Read full cutting guide6–8 months
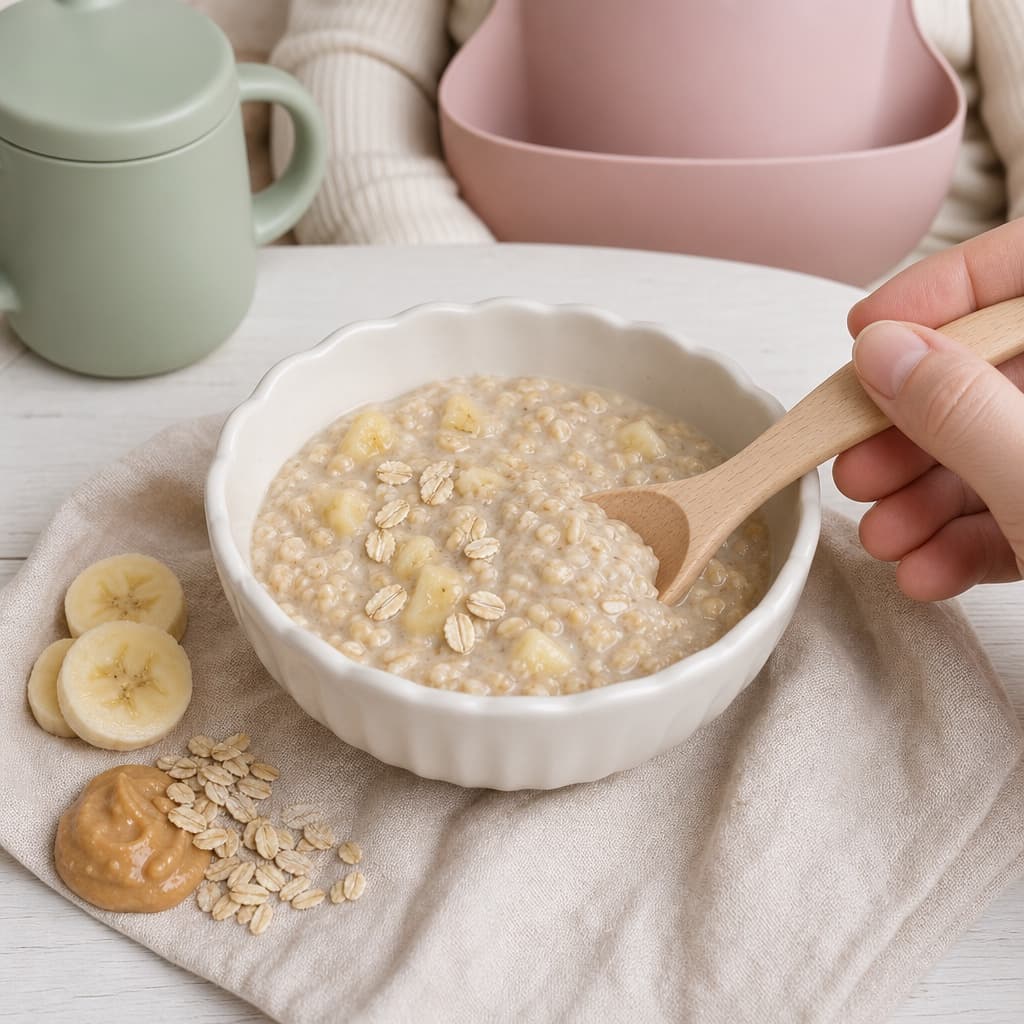
How to serve peanut butter for a 6 month old: At 6 months, never offer peanut butter on its own from a spoon; the thick, sticky texture can block a small airway. Instead, stir 1 to 2 teaspoons of smooth, unsalted, unsweetened peanut butter into 1 to 2 tablespoons of warm water, breast milk, or formula until it is completely runny, then offer it on a preloaded spoon. Mixing it into oatmeal or porridge, plain whole-milk yogurt, or a fruit puree like mashed banana works just as well; the final texture should pour or scoop easily, never sticky or thick. Choose smooth peanut butter with no chunks, no added salt or sugar, no xylitol, and no honey before 12 months. Offer the first taste in the morning at home, watch your baby for about 2 hours, and keep them seated upright and supervised throughout.
9–11 months
How to serve peanut butter for a 9 month old: Around 9 months, once peanut has been introduced and tolerated, keep it in the rotation regularly. Continue stirring thinned peanut butter into oatmeal, yogurt, or fruit puree, and add a new option: spread a very thin, scraped layer of smooth peanut butter on a soft toast strip or soft pancake that your baby can hold and gnaw. Thin means barely visible; a thick smear behaves like a glob and stays a choking risk. Thinning the peanut butter with a little water before spreading makes it even less sticky. Never offer spoonfuls of plain peanut butter, thick blobs, or whole or chopped peanuts. Aim for about 2 teaspoons of peanut butter per week across 2 to 3 servings, in line with the LEAP maintenance approach, and supervise every bite.
12+ months
How to serve peanut butter for a 12 month old: At 12 months, the safety rules do not change: peanut butter should still be thinned into foods or spread in a very thin layer, never served in spoonfuls or thick globs, because sticky masses of peanut butter remain one of the top choking foods for young children. Good options now include a thin layer on toast fingers or rice cakes, peanut butter swirled into oatmeal or plain yogurt, blended into a smoothie, or baked into soft, baby-friendly muffins or pancakes. Whole and chopped peanuts stay off the menu throughout the toddler years; they are a serious choking hazard well past the first birthday. Keep peanut on the menu a couple of times a week to maintain tolerance, keep your toddler seated while eating, and continue to supervise closely.
How to Serve Yogurt for Baby
Read full cutting guide6–8 months
How to serve yogurt for a 6 month old: At 6 months, plain whole-milk yogurt is a lovely early self-feeding food because it needs no chewing at all. Offer it on a preloaded spoon: dip the spoon, hand it to your baby, and let them steer it to their mouth, reloading as needed. A thicker plain Greek yogurt or skyr can be easier for beginners because it clings to the spoon. You can serve it completely plain or stir in a little mashed banana, fruit puree, or a thin swirl of smooth nut butter; skip added sugar entirely and never add honey before 12 months because of infant botulism risk. Expect gloriously messy hands and face, keep your baby seated upright in their highchair, and stay within arm's reach for the whole meal.
9–11 months
How to serve yogurt for a 9 month old: Around 9 months, yogurt becomes a versatile base and a brilliant dip. Keep offering preloaded spoons while your baby practices scooping from their own small bowl, and start serving plain whole-milk yogurt as a dip for soft finger foods: soft fruit wedges, lightly toasted bread strips, or well-cooked vegetable sticks. Dipping is great fine-motor practice and makes familiar foods interesting again. You can also stir yogurt into oatmeal, swirl in mashed berries or fruit puree, or freeze small dots of yogurt into soft, quick-melting drops. Keep everything unsweetened, and hold portions to roughly a small pot a day, about 2 to 4 oz, so dairy does not blunt your baby's appetite for iron-rich foods. Supervise every meal with your baby seated upright.
12+ months
How to serve yogurt for a 12 month old: By 12 months, most toddlers can manage a spoon and a small open bowl of yogurt with growing independence, and whole cow's milk can now join the menu as a drink. Yogurt shines in simple parfaits: layer plain whole-milk yogurt with soft fruit pieces and a sprinkle of oats, or blend it into a fruit smoothie. It also works as a savory base, stirred into mild dips for vegetable sticks or used instead of mayonnaise in soft sandwich fillings. Stick with plain, unsweetened yogurt and sweeten only with fruit; flavored yogurts often contain more sugar than a dessert. After the first birthday a drizzle of honey is no longer off-limits, but the AAP recommends keeping added sugar minimal before age 2. Keep your toddler seated while eating and continue to supervise.
How to Serve Rice for Baby
Read full cutting guide6–8 months
How to serve rice for a 6 month old: At 6 months, the easiest starting point is a smooth rice porridge: mix iron-fortified infant rice cereal with breast milk or formula until spoonable, and offer it on a preloaded spoon. If you prefer real grains, cook white or brown rice until very soft and slightly overdone, then mash it into vegetable puree, lentil puree, or another moist food so it forms a soft, cohesive mash rather than loose grains, which are hard for a new eater to gather in the mouth. You can also press soft, sticky rice into a thick log or small patty your baby can palm and gnaw. Rinse the rice before cooking and cook it in extra water, then drain, to reduce arsenic, and keep it plain with no added salt. Always supervise with your baby seated upright.
9–11 months
How to serve rice for a 9 month old: Around 9 months, sticky rice becomes real finger food. Cook rice until very soft and a little wetter than you would for adults, so it clumps naturally, then press it into small balls or clumps about 2 to 3 cm across that your baby can pick up and bring to the mouth; the developing pincer grasp also lets them work on individual soft grains. Short-grain and sushi-style rice clump best, while dry, separate long-grain rice tends to scatter and frustrate. You can roll the balls in finely ground seeds or mix in mashed vegetables, lentils, or flaked cooked fish for flavor and nutrition, always without salt. Keep varying grains across the week to limit arsenic exposure, avoid dry mounds of firm rice, and supervise every bite.
12+ months
How to serve rice for a 12 month old: By 12 months, rice can look much more like family food. Keep it cooked soft, and serve sticky rice balls, rice pressed into patties, or spoonfuls of rice stirred through mild curries, dal, vegetable stews, and no-salt stir-fries; a toddler practicing with a spoon will find slightly sticky rice much easier to keep on board than loose grains. Plain cooked sushi-style rice is fine when seasoning is minimal, but skip raw fish entirely. Continue the arsenic-smart habits: rinse before cooking, cook in extra water and drain when practical, and rotate rice with oats, barley, quinoa, and pasta across the week rather than serving it daily. Keep meals seated and supervised, and hold off on salty sauces like soy sauce.
How to Serve Lentils for Baby
Read full cutting guide6–8 months
How to serve lentils for a 6 month old: At 6 months, rinse red or yellow lentils well and cook them until they are completely soft and falling apart, then mash thoroughly or blend into a smooth, lump-free puree. Thin the puree with water, breast milk, or formula until it is spoonable, and offer it on a preloaded spoon or stirred into familiar foods like mashed sweet potato or vegetable puree. A mild, homemade dal works beautifully at this stage as long as it is made without salt and with only gentle, baby-friendly seasonings; let it cool to lukewarm before serving. A thick lentil mash also spreads nicely on a soft toast strip for early hand-feeding practice. Never serve firm or undercooked lentils, and always supervise with your baby seated upright.
9–11 months
How to serve lentils for a 9 month old: Around 9 months, as the pincer grasp and chewing skills develop, you can move from smooth purees to thicker mashes and soft whole lentils. Cook any variety until each lentil squishes easily between your fingers, then offer chunky lentil and vegetable mash on a spoon, soft whole lentils stirred into rice or tiny pasta, or lentil mash spread on soft toast fingers. Brown and green lentils hold their shape better than red, which makes them good pincer practice, but only if they are cooked fully tender; firm or undercooked lentils are harder for a baby to manage. Keep portions modest while your baby's digestion adjusts to the fiber, keep everything unsalted, and supervise every bite with your baby seated upright.
12+ months
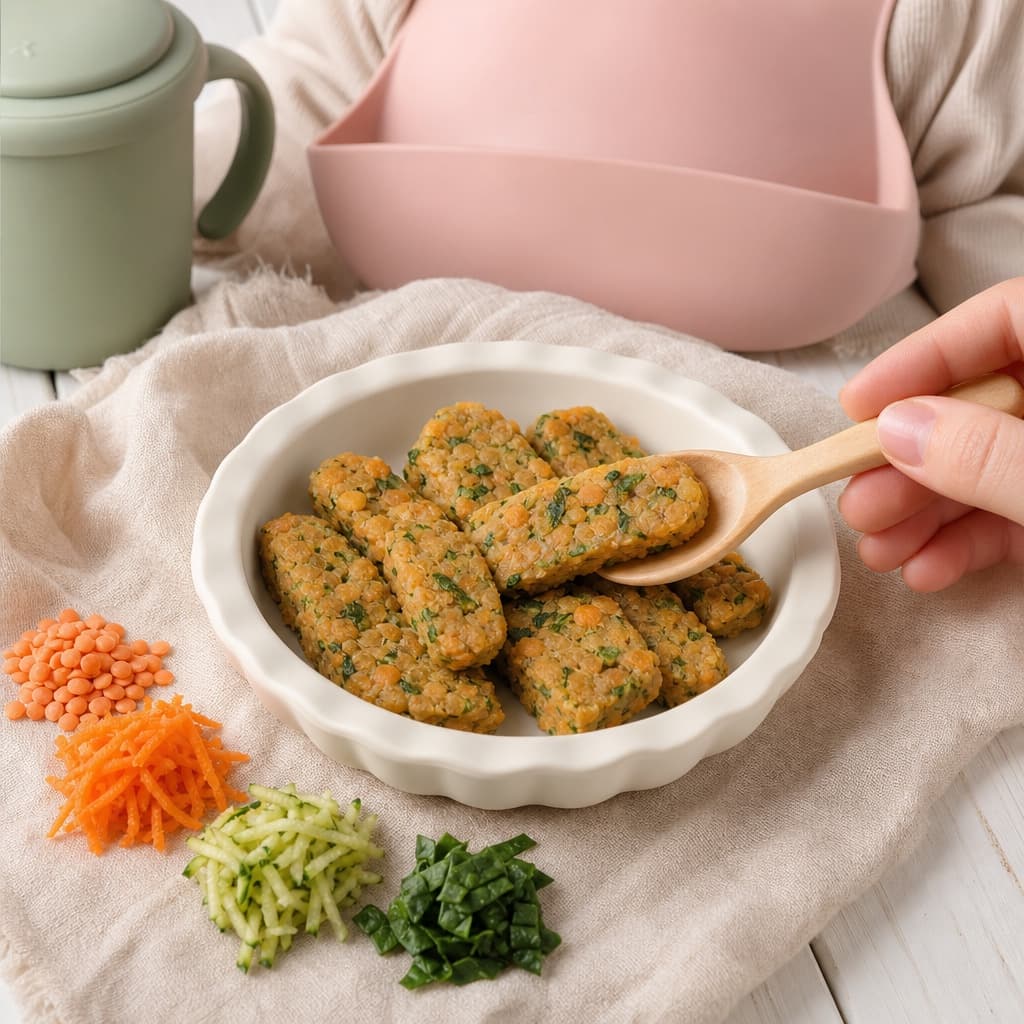
How to serve lentils for a 12 month old: By 12 months, lentils can slot straight into family meals. Serve soft whole lentils folded into rice bowls, mild dals and lentil soups with a lukewarm, low-salt finish, or soft lentil patties, nuggets, and veggie squares that toddler hands can grip and bite. Lentils also make an easy pasta sauce base when blended with tomatoes, which adds the vitamin C that boosts iron absorption. Every lentil should still be cooked fully tender and squishable; skip very spicy or heavily salted family versions and set aside a baby portion before seasoning. Canned lentils are fine if they are no-salt-added or rinsed well and heated until soft. Keep your toddler seated during meals and continue to supervise while they eat.
How to Serve Tuna for Baby
Read full cutting guide6–8 months
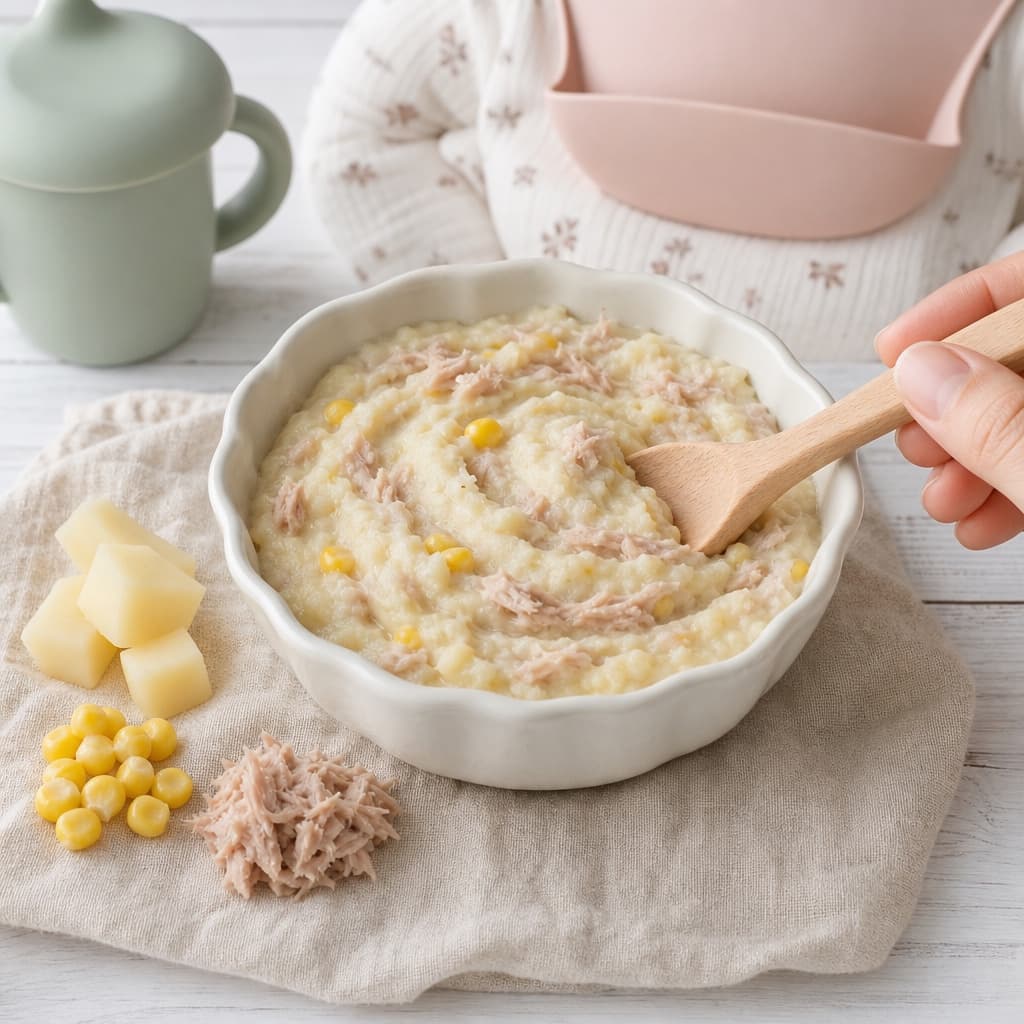
How to serve tuna for a 6 month old: At 6 months, open a can of light tuna in water, drain it well to shed excess sodium, and check through the flakes for any stray bones. Flake the tuna very finely with a fork, then mix it into a soft, moist carrier: mashed potato, mashed avocado, sweet potato, or plain whole-milk yogurt all work well and stop the fish from being dry or crumbly in a new eater's mouth. Aim for a soft, scoopable mash you can offer on a preloaded spoon, and keep the tuna portion to about 1 oz, no more than once or twice this week. Skip salt entirely, avoid tuna packed in oil or brine, and never offer raw or seared tuna. Introduce it on its own first, since fish is a top-9 allergen, and supervise with your baby seated upright.
9–11 months
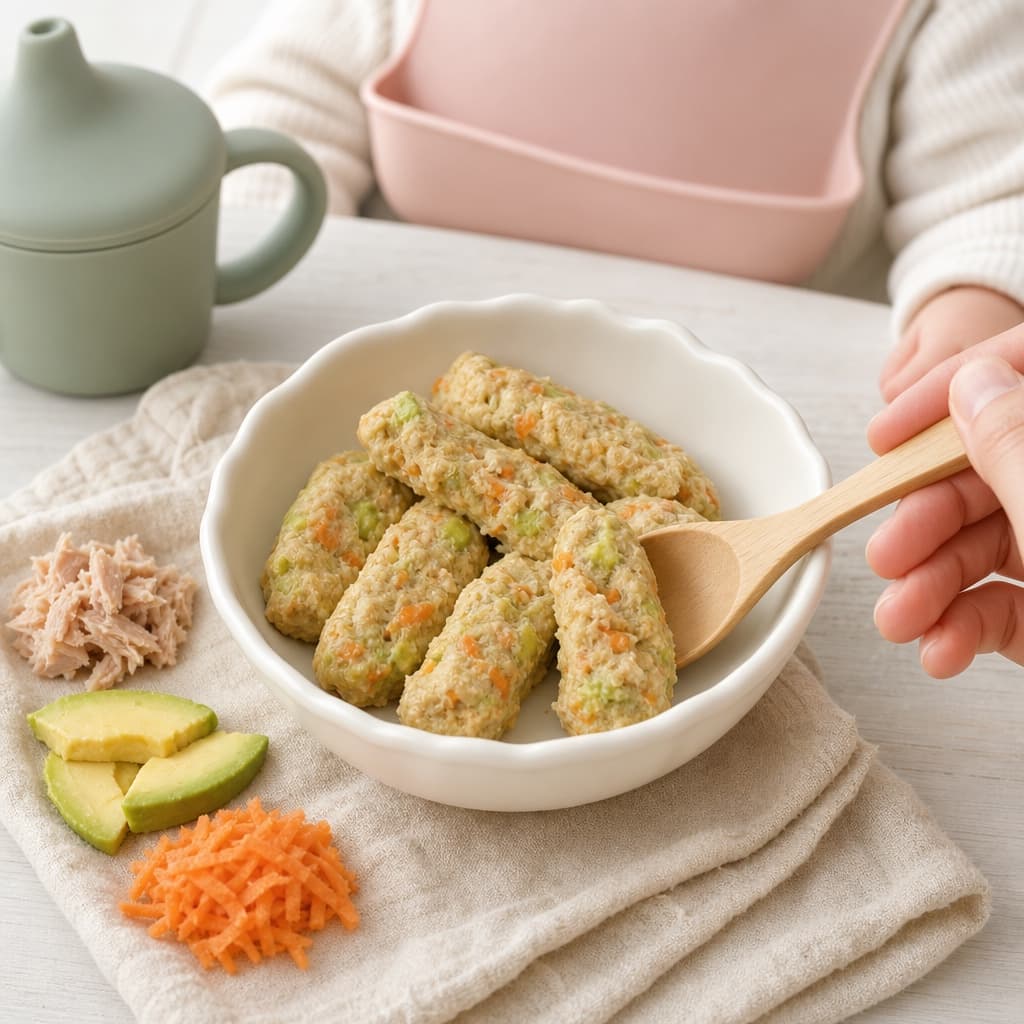
How to serve tuna for a 9 month old: Around 9 months, finely flaked tuna starts working as more than a mash. Keep draining canned light tuna well and flaking it small, then stir it through soft pasta shapes, fold it into mashed sweet potato, or spread a tuna and avocado or tuna and yogurt mash onto a soft toast finger your baby can grip. A simple homemade tuna salad made with plain whole-milk yogurt instead of mayonnaise is a good sandwich-style filling. The pincer grasp also lets your baby pick up small, moist flakes straight from the tray. Continue to check for stray bones, keep everything unsalted, and hold the line on mercury limits: about 1 oz of light tuna once or twice a week, with lower-mercury fish covering other fish meals. Supervise every bite.
12+ months
How to serve tuna for a 12 month old: By 12 months, tuna can appear in toddler-friendly family meals: soft tuna and potato patties or mini cakes, tuna melted into a low-salt pasta bake, tuna and yogurt filling in a soft sandwich cut into strips, or flakes stirred through rice. Keep the fish moist by mixing it with mashed vegetables, avocado, or yogurt rather than serving dry flakes alone, and keep preparations low-salt with no mayonnaise-heavy salads. The mercury limits do not relax at the first birthday: stick with canned light tuna in water at about 1 oz once or twice a week for toddlers, save albacore and fresh tuna steak for much later, and never serve raw tuna. Keep your toddler seated while eating and continue supervising every meal.
How to Serve Spinach for Baby
Read full cutting guide6–8 months
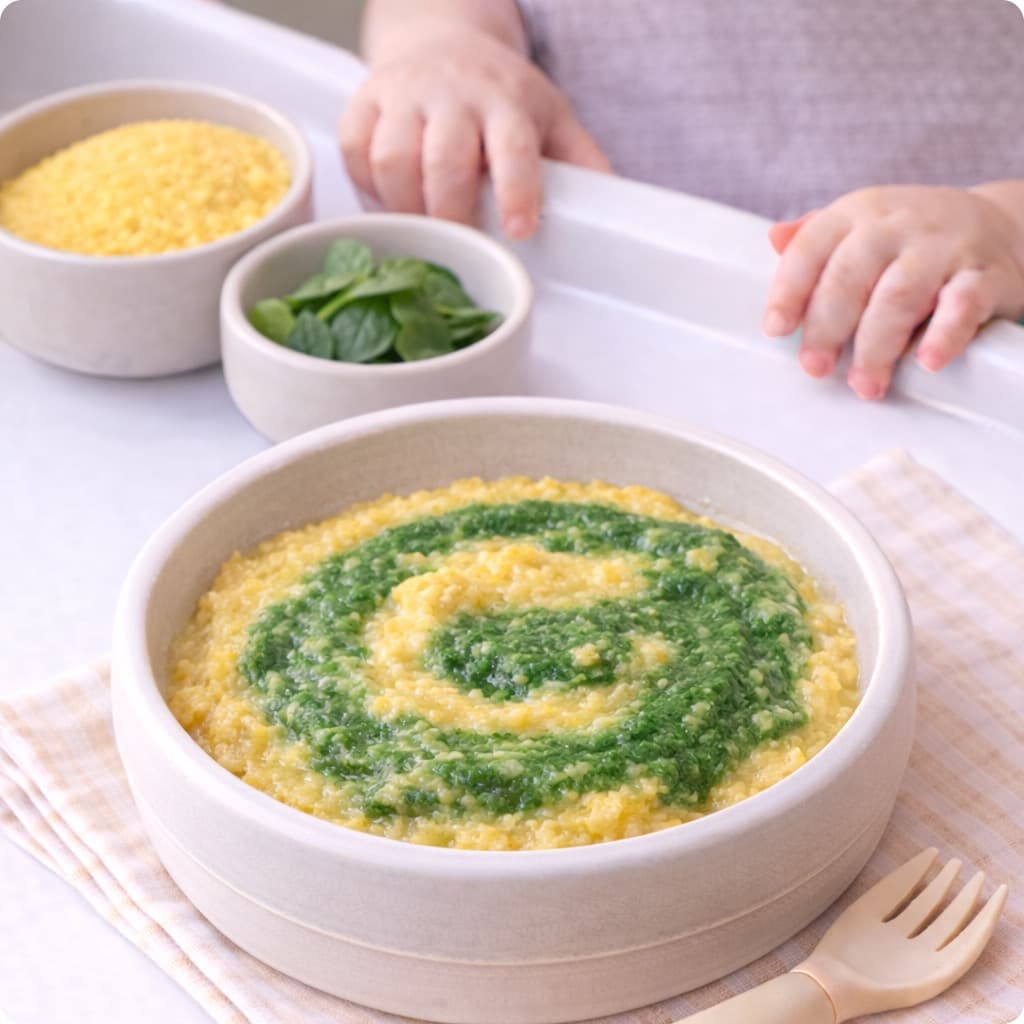
How to serve spinach for a 6 month old: At 6 months, cook spinach until it is very soft and fully wilted, by steaming or simmering it briefly, then chop or blend it finely. Whole wilted leaves can bunch up and stick together in a baby's mouth, so the goal is small, soft flecks rather than intact leaves. Stir the finely chopped spinach into smooth or lightly textured foods your baby already knows: mashed potato, sweet potato, oatmeal, plain whole-milk yogurt, or a vegetable puree, and offer it on a preloaded spoon or as a thick mash your baby can scoop. A spoonful or two folded into a meal is plenty at this age. Use fresh or frozen spinach cooked just before the meal, keep portions modest because of its natural nitrate content, and always supervise with your baby seated upright.
9–11 months
How to serve spinach for a 9 month old: Around 9 months, as the pincer grasp develops, spinach works best folded into soft finger foods rather than served on its own. Cook it until very soft, squeeze out excess water, and chop it finely, then mix it into scrambled egg, a mini omelet, soft patties or fritters, or stir it through well-cooked pasta, rice, or mashed vegetables. Cutting the omelet or patties into small, graspable pieces gives your baby great self-feeding practice while the spinach stays evenly mixed in and easy to chew. Keep avoiding whole leaves on their own, since they can still clump and be hard to manage. Pairing the meal with a vitamin C rich fruit or vegetable helps iron absorption, and as always, supervise every bite with your baby seated upright.
12+ months
How to serve spinach for a 12 month old: By 12 months, most toddlers chew well enough to handle spinach in a wider range of dishes, but finely chopped and well cooked is still the way to go. Fold chopped cooked spinach into pasta bites, risotto, savory muffins, pancakes, omelets, or a mild curry, or stir it into soups and stews without added salt. Large pieces of whole leaf, raw spinach salads, and stringy stems are still hard for a toddler to manage, so keep breaking the leaves down into small, soft pieces. Rotate spinach with other greens and vegetables through the week rather than serving big portions daily, and keep offering vitamin C alongside for better iron absorption. Serve meals seated and supervised, and let your toddler self-feed with fingers or a fork.
How to Serve Kale for Baby
Read full cutting guide6–8 months
How to serve kale for a 6 month old: At 6 months, start by stripping the leaves off the tough central stems and ribs, which are too stringy for a baby to chew and should always be removed. Steam, boil, or saute the leaves until they are very soft, soft enough to mash easily between your fingers, then puree or chop them very finely. Blend the kale into smooth purees, mashed potato or sweet potato, plain yogurt, or a mild vegetable mash so the texture stays easy to manage, and offer it on a preloaded spoon or as a thick, scoopable mash. If you follow a baby-led approach, a single large, very soft cooked leaf can be offered for your baby to grasp and gum, since a big piece is easier to control than small bits at this stage. Never offer raw kale or crunchy pieces, and supervise closely with your baby seated upright.
9–11 months
How to serve kale for a 9 month old: Around 9 months, as chewing skills and the pincer grasp develop, finely chopped kale becomes a great mix-in for soft finger foods. Remove the stems, cook the leaves until very soft, squeeze out extra water, and chop them finely, then fold the kale into soft patties or fritters, scrambled egg or mini omelets, mashed vegetables, rice, or small pasta. Cooking kale into a patty or fritter is especially helpful, because the egg or potato base holds the leaf pieces together and stops them feeling stringy. Keep pieces small and soft, continue to avoid raw kale, kale chips, and any firm or stringy bits, and supervise every bite while your baby sits upright.
12+ months
How to serve kale for a 12 month old: By 12 months, your toddler can handle finely chopped, well-cooked kale stirred through more of the family menu: pasta, rice, soups, stews, savory muffins, and egg dishes, all without added salt. Keep removing the tough stems and cooking the leaves until soft, and keep chopping them finely, since large pieces of leaf are still hard to chew and can be difficult to manage. Crunchy kale chips remain a poor choice for young children: the hard, brittle texture is a choking risk, so save them for well into the toddler and preschool years when chewing is reliable. If your toddler is unsure about the bitter taste, keep offering small amounts mixed into favorite dishes without pressure. Serve meals seated, calm, and supervised.
How to Serve Beans for Baby
Read full cutting guide6–8 months
How to serve beans for a 6 month old: From 6 months, serve beans as a completely smooth puree or a soft, well-worked mash with no whole or firm pieces. Cook them until they are very soft, then blend or mash them with a little water, breast milk, formula, or the cooking liquid until the texture is loose and spoonable; white beans and pinto beans mash especially smoothly. Offer the mash on a preloaded spoon, spread it thinly on a soft strip of toast, or fold it into mashed vegetables like sweet potato or carrot. If you want to offer pieces, flatten each soft-cooked bean completely between your fingers so nothing round about 1 to 2 cm in size remains. Peeling the thin skins off larger beans gives a smoother texture but is optional when they are well cooked. Serve plain, with no added salt, and supervise with your baby seated upright.
9–11 months
How to serve beans for a 9 month old: Around 9 months, as the pincer grasp develops, flattened beans become excellent self-feeding practice, just like flattened peas and chickpeas. Cook the beans until very soft, then gently smash or flatten each one between your fingers or with a fork so it is no longer round and firm; a flattened bean is easy to pick up and safe to gum. Never leave whole, intact beans on the tray, since their smooth, round shape is exactly the kind of piece that can block a small airway. Offer just a few flattened beans at a time rather than a pile, so your baby cannot scoop up a handful at once. Smashed beans also stir nicely into soft rice, small pasta, vegetable mash, or a mild, no-salt bean stew. Rinse canned beans well, keep everything unsalted, and supervise every bite.
12+ months
How to serve beans for a 12 month old: By 12 months, your toddler is chewing better, but whole, firm beans are still risky, so keep smashing or flattening each bean until you are confident in your child's chewing ability; a quick press with a fork is all it takes. Serve flattened soft-cooked beans stirred into rice, pasta, or grain bowls, coarsely mashed beans on toast, refried-style bean mash made without salt, or soft bean and vegetable stews. Beans also work well folded into soft patties alongside vegetables. Continue choosing low-sodium canned beans and rinsing them well, or cooking dried beans until fully soft, and keep your toddler's portions unsalted. Offer beans as part of varied meals a few times a week, keep mealtimes seated and calm, and continue to supervise closely.
How to Serve Quinoa for Baby
Read full cutting guide6–8 months
How to serve quinoa for a 6 month old: At 6 months, the easiest way to serve quinoa is as a soft, creamy porridge. Rinse the quinoa well, then cook it in extra water, or in milk-free stock or with breast milk or formula stirred in at the end, until the grains are completely soft and the texture is thick and spoonable, more like oatmeal than a fluffy pilaf. You can blend it briefly for an even smoother finish. Stir in mashed fruit like banana or apple puree, or fold the porridge into vegetable mash for a savory version, and offer it on a preloaded spoon or as a thick scoop your baby can rake up with their hands. The tiny grains are soft and low risk, but keep the texture moist and cohesive rather than dry and crumbly, and always supervise with your baby seated upright.
9–11 months
How to serve quinoa for a 9 month old: Around 9 months, your baby's pincer grasp is developing, but loose quinoa grains are still fiddly, so the trick is to clump it. Cook rinsed quinoa until very soft and slightly sticky, then press it into small balls about 2 to 3 cm across, or mix it with mashed vegetables, egg, or a little grated cheese and shape it into soft patties your baby can hold. Quinoa balls and patties hold together in the fist, give a satisfying piece to gnaw, and keep more food in the mouth than on the floor. You can also keep offering quinoa porridge, stir soft quinoa into thick vegetable mash so it binds together, or mix it through yogurt. Keep everything unsalted, make sure any patties are soft rather than crisp, and supervise every bite.
12+ months
How to serve quinoa for a 12 month old: By 12 months, quinoa can show up all over your toddler's menu. Serve soft quinoa and vegetable patties, quinoa balls, or quinoa stirred into stews, soups, and grain bowls alongside soft vegetables and flaked fish or shredded meat. Many toddlers can now manage looser, fluffier quinoa with a spoon or fingers, though slightly moist, clumped quinoa is still much easier to eat than dry grains. Keep rinsing before cooking and cooking until fully soft, and keep your toddler's portion free of added salt, sugar, and honey. Quinoa also makes a nice base for mild family meals, so your toddler can eat what everyone else eats with the seasoning held back. Serve meals seated and calm, and continue to supervise while your toddler eats.
How to Serve Cottage Cheese for Baby
Read full cutting guide6–8 months
How to serve cottage cheese for a 6 month old: At 6 months, cottage cheese needs no cooking and barely any prep: keep the texture soft and smooth, breaking up any larger curds or lumps with a fork for the youngest eaters. The classic serve is a preloaded spoon: scoop a little cottage cheese onto a baby spoon and hand it over, or rest it on the tray for your baby to grab and steer to their mouth. It is also lovely stirred into mashed fruit like pear, banana, or peach, or folded into mashed vegetables or infant cereal for a creamy, scoopable meal. Give the fridge-cold tub a few minutes at room temperature if your baby prefers it less cold. Use plain, pasteurized, full-fat, low-sodium cottage cheese, avoid any hard or chunky add-ins, and supervise closely with your baby seated upright.
9–11 months
How to serve cottage cheese for a 9 month old: Around 9 months, as the pincer grasp develops, let your baby get hands-on with cottage cheese. Offer it in a small bowl to scoop with fingers or a spoon, spread it on soft toast strips your baby can hold, or stir it into well-cooked pasta or soft pancakes. Mixing it with fruit is still a favorite; just keep the fruit choking-safe by mashing or finely chopping soft fruits, and never add whole grapes, firm chunks, or anything hard. Messy self-feeding at this stage is exactly how spoon skills develop, so preload the spoon and let your baby take over. Keep choosing the plain, full-fat, low-sodium tub, and supervise every bite with your baby seated upright in a high chair.
12+ months
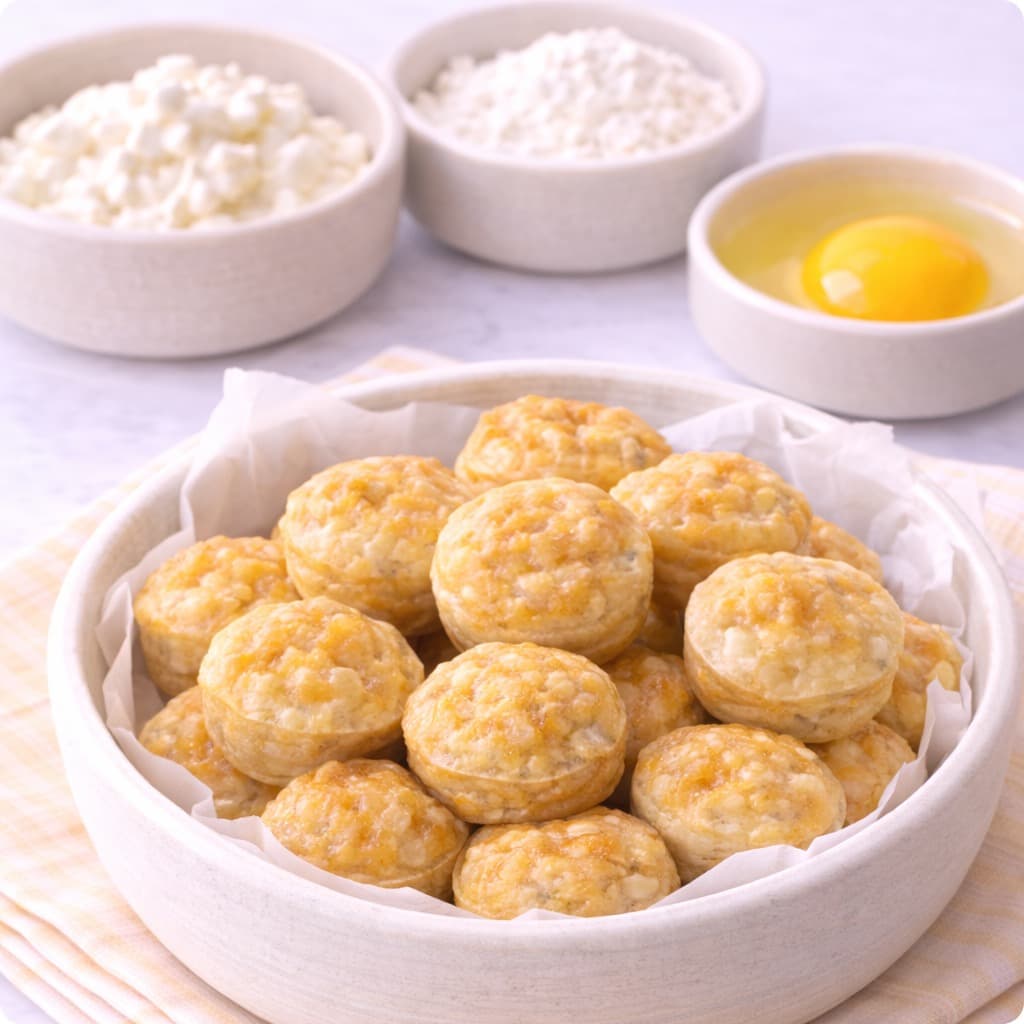
How to serve cottage cheese for a 12 month old: By 12 months, cottage cheese fits almost anywhere on your toddler's menu. Serve it as a dip for soft vegetable sticks or fruit slices, spread it on toast fingers, fold it into scrambled eggs, pasta, or baked potato, or bake it into soft cottage cheese muffins and pancakes. Stirred with mashed berries or chopped soft fruit it makes a quick, protein-rich breakfast or snack, and many toddlers enjoy scooping it independently with a spoon. Stick with full-fat dairy until at least age 2, and keep comparing labels for sodium, since some brands carry far more salt than others. Keep any fruit mix-ins choking-safe, quartering grapes lengthwise and skipping whole firm pieces, and keep your toddler seated and supervised while eating.
How to Cut Lamb for Baby
Read full cutting guide6–8 months
How to cut lamb for a 6 month old: At 6 months, the safest way to serve lamb is as one large, graspable strip your baby can hold in a whole-fist grip and gnaw on. Slow cook or braise a boneless leg or shoulder cut until it is meltingly tender and shreds when pressed with a fork, then slice a strip about the size of an adult finger, roughly 1 to 2 cm thick and 5 to 6 cm long, similar in shape to a rib. Your baby will suck and gnaw on the strip and draw out the iron-rich juices even before being able to bite pieces off, so keep the meat moist and remove any bone, gristle, or dry crust before serving. If you prefer purees or a mixed approach, blend well-cooked lamb with a little water or its own cooking liquid until completely smooth and stir it into a vegetable puree such as sweet potato or carrot. Avoid small chunks and dry, crumbly pieces at this age, keep your baby seated upright, and always stay within arm's reach during the meal.
9–11 months
How to cut lamb for a 9 month old: Around 9 months, many babies develop the pincer grasp and begin picking up smaller pieces between thumb and forefinger. This is the stage to move from large strips to finely minced or shredded slow-cooked lamb. Pull braised leg or shoulder meat apart into soft shreds, or chop it into small, soft pieces about the size of a chickpea, roughly 1 cm across, and moisten everything with a spoonful of the cooking juices so nothing is dry or crumbly. Every piece should squash easily between your fingers; if it resists, the meat needs more cooking time or a finer chop. Well-cooked ground lamb, broken into small crumbles, works well at this age too. You can still offer a large tender strip for gnawing alongside the small pieces if your baby enjoys it, and you should continue to supervise every bite with your baby seated upright.
12+ months
How to cut lamb for a 12 month old: By 12 months, most toddlers chew more effectively and can handle small bite-size pieces of tender lamb about 1 to 1.5 cm across, cut from slow-cooked leg or shoulder and kept moist with cooking juices. Soft lamb meatballs are a toddler favorite at this age; cook them through, then quarter each one so no piece is round or large enough to block the airway. What has not changed is the texture rule: never hand a toddler tough, dry chunks of lamb, and do not offer lamb chops with bone or gristle for independent eating, since fibrous meat that cannot be chewed through is a real choking hazard. Let your toddler self-feed with fingers or a fork, keep meals calm and seated, avoid walking or running with food, and always supervise while they eat.
How to Cut Cabbage for Baby
Read full cutting guide6–8 months
How to cut cabbage for a 6 month old: At 6 months, cut the cabbage into wedges and slice out the hard core and any thick, woody ribs, since those stay firm even after cooking. Steam or simmer a wedge until it is very soft, soft enough that the leaves squash easily between your fingers, which usually takes 10 to 15 minutes. Offer your baby one large wedge about the length of an adult finger and 2 to 3 cm wide, so they can hold it in a whole-fist grasp with a piece sticking out the top to gnaw on. Big, graspable pieces are safest at this stage because your baby cannot yet pick up small bits. If you prefer spoon-feeding, finely shred the cooked leaves and fold them into mashed potato, vegetable mash, or warm porridge. Keep your baby seated upright and stay within arm's reach for every bite.
9–11 months
How to cut cabbage for a 9 month old: Around 9 months, many babies develop the pincer grasp and start picking up smaller pieces with the thumb and forefinger. Cook the cabbage until very soft, then slice the leaves into thin ribbons and chop them into small pieces about 1 cm across, roughly the size of a chickpea. Always remove the core and any thick ribs first, and check that every piece squashes easily between your fingers before serving. Soft-cooked ribbons are easy to pick up and practice chewing, and you can stir them into rice, pasta, or mashed vegetables if your baby prefers mixed textures. Some babies still enjoy gnawing a large soft wedge too, so feel welcome to offer both shapes. Supervise closely and keep your baby seated upright throughout the meal.
12+ months
How to cut cabbage for a 12 month old: By 12 months, most toddlers chew more effectively and can handle smaller pieces with growing independence. Cook the cabbage until tender, remove the core and thick ribs, and chop the leaves into small pieces about 1 to 1.5 cm, then mix them straight into everyday meals such as soups, stews, rice dishes, or scrambled eggs. Cooked cabbage still needs to be soft at this age, so keep steaming or simmering it well rather than serving it with a crunch. Finely shredded raw cabbage waits until around 24 months, and crisp raw wedges are best saved for about 4 years, when chewing skills are far stronger. Let your toddler self-feed with fingers or a fork, keep meals seated and calm, and continue to supervise every bite.
How to Cut Paneer for Baby
Read full cutting guide6–8 months
How to cut paneer for a 6 month old: At 6 months, cut paneer into soft finger-length batons about 1 to 2 cm thick and roughly the length of an adult finger, so your baby can hold one in a whole-fist grasp with a bit sticking out the top to gnaw on. Firm store-bought paneer should be softened first: steam the batons for a few minutes or soak them in warm water for 10 to 15 minutes until each piece squashes easily between your thumb and finger. Homemade paneer made from pasteurized milk is naturally softer and often needs no extra step. You can lightly warm the batons in a dry or lightly oiled pan to bring out flavor, but do not fry them until crisp, since a hard, browned crust is difficult for gums to break down. Keep everything unsalted, avoid small cubes or crumbles at this stage, and always stay within arm's reach with your baby seated upright while eating.
9–11 months
How to cut paneer for a 9 month old: Around 9 months, many babies are developing the pincer grasp, using the thumb and forefinger to pick up smaller pieces. Cut softened paneer into small cubes about 1 to 1.5 cm, roughly the size of a chickpea, or crumble it into soft, irregular pieces your baby can practice picking up. Check that each cube still squashes easily between your fingers, and give firmer store-bought blocks a quick steam or warm-water soak before cutting if needed. Crumbled paneer is wonderful stirred into soft rice, mashed vegetables, or mild lentils, and the slightly uneven texture actually makes it easier to grip than slippery cubes. Continue to offer a larger baton now and then if your baby still prefers to gnaw, keep everything unsalted, and supervise every bite while your baby sits upright.
12+ months
How to cut paneer for a 12 month old: By 12 months, most toddlers can handle bite-size pieces and are getting better at chewing. Cut paneer into bite-size cubes about 1.5 cm across, soft enough to squash between your fingers but never so large that they could be swallowed whole. This is a lovely age to fold paneer cubes into family meals: stir them into a mild, unsalted vegetable curry, a gentle spinach and paneer dish, or a simple veggie and rice bowl. Season with soft spices like turmeric, cumin, or cinnamon rather than salt, and keep chili heat out of your toddler's portion. Skip fried paneer with a crisp shell and salty restaurant versions, which carry far more sodium than a toddler needs. Let your toddler self-feed with fingers or a fork, keep mealtimes calm and seated, and always supervise while they eat.
How to Cut Plantain for Baby
Read full cutting guide6–8 months
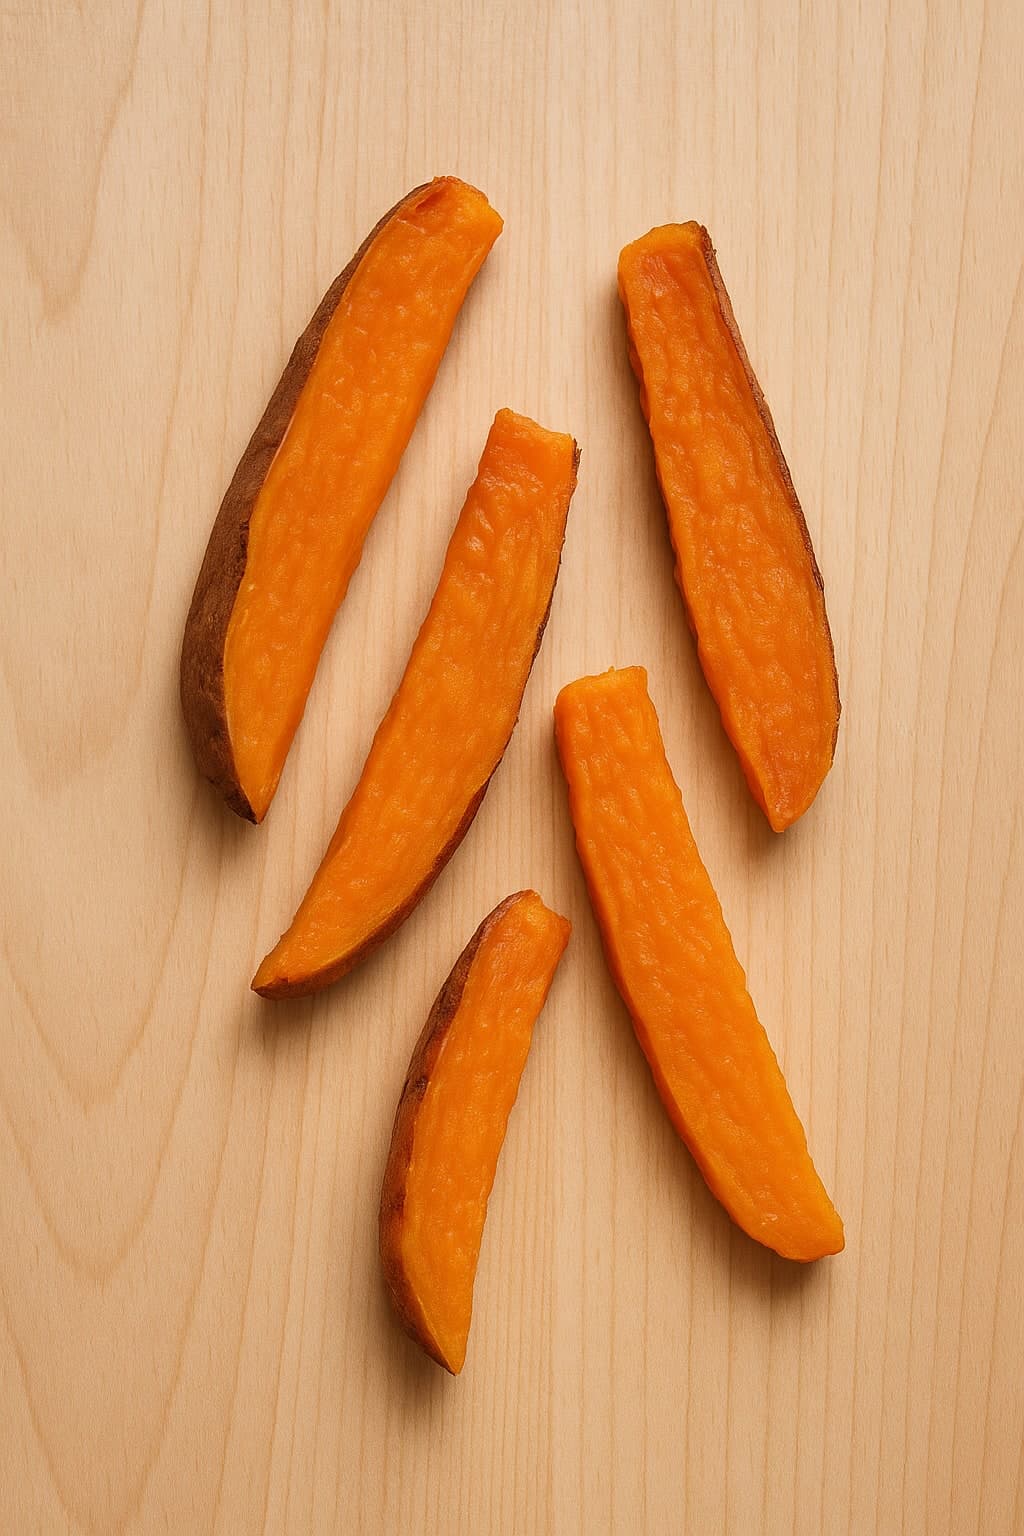
How to cut plantain for a 6 month old: At 6 months, choose a ripe plantain with a yellow or black-speckled peel, then peel it and steam, boil, or bake it until it is very soft and squashes easily between your fingers. Cut the cooked flesh into large spears about 1 to 2 cm thick and roughly the length of an adult finger, so your baby can hold one in a whole-fist grasp with a bit sticking out the top to gnaw on. Large, graspable pieces are safest at this stage because your baby cannot yet pick up small bits and is still learning to bring food to the mouth. If you only have green plantain, boil it until completely tender, then mash it thoroughly with a little breast milk, formula, or water and offer it on a preloaded spoon, since green plantain is too firm and starchy to serve as finger food. Never offer raw plantain, fried tostones, or plantain chips, and always keep your baby seated upright within arm's reach while eating.
9–11 months
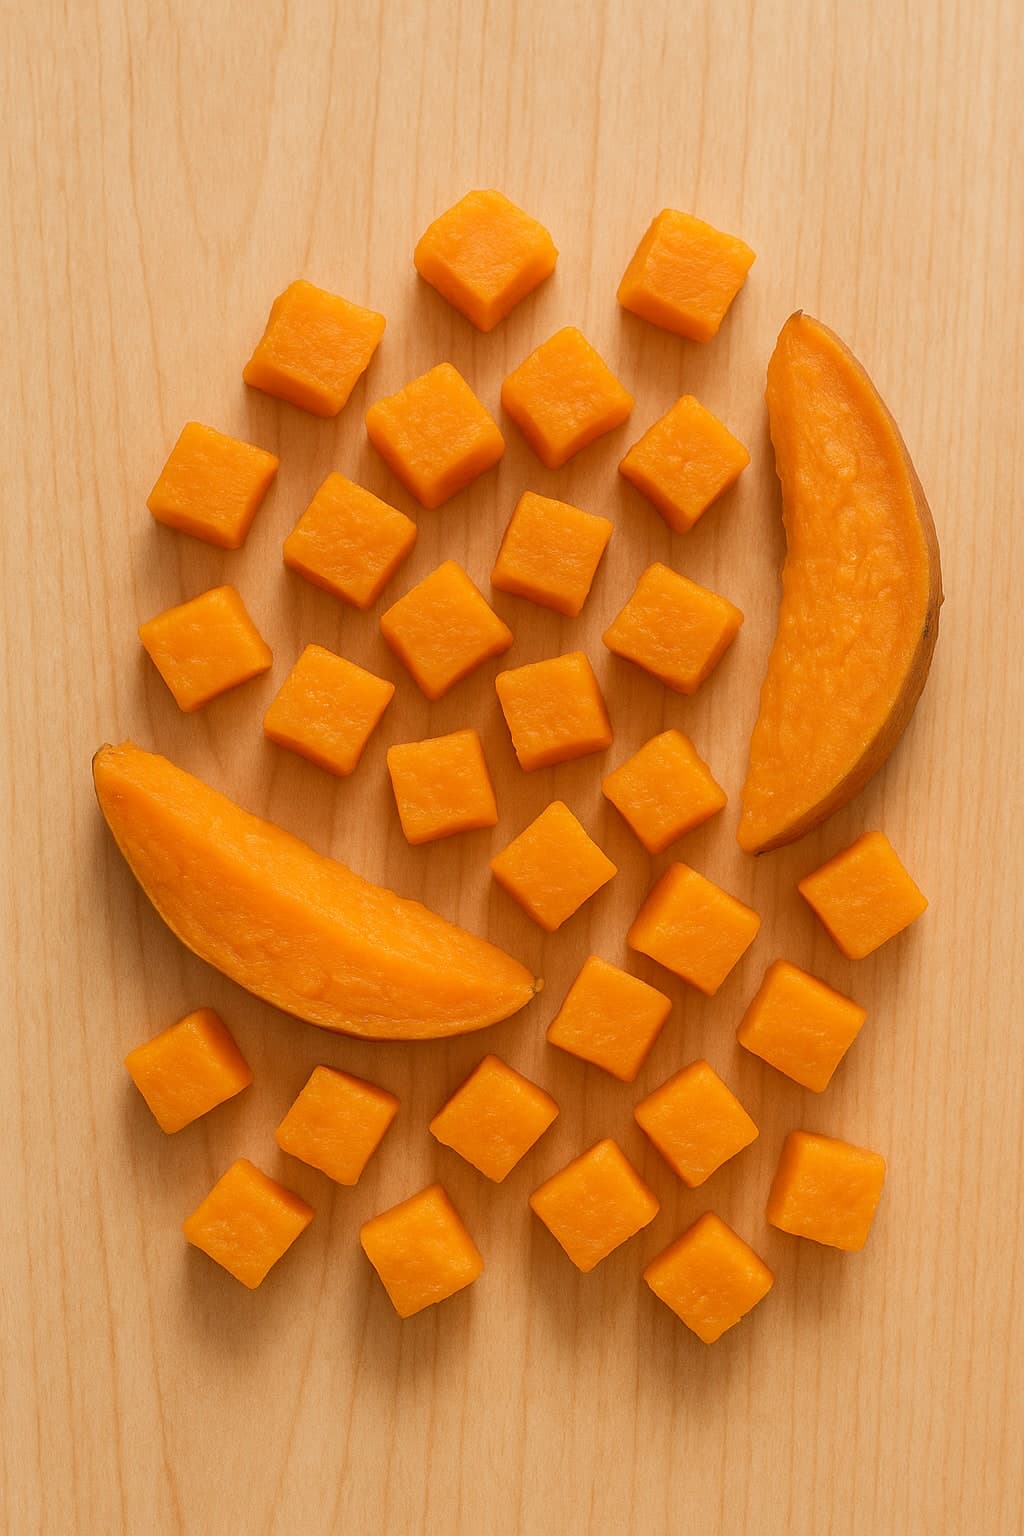
How to cut plantain for a 9 month old: Around 9 months, many babies are developing the pincer grasp, using the thumb and forefinger to pick up smaller pieces. Cook a ripe plantain until very soft, then cut it into small cubes about 1 to 1.5 cm in size, roughly the size of a chickpea, so your baby can practice picking them up and chewing. Check that every piece squashes easily between your fingers before it goes on the tray, and cook it a few minutes longer if it still feels firm in the middle. You can also serve a thick mash with soft lumps to help your baby get used to more texture, or keep offering a larger spear alongside the cubes if your baby still prefers to gnaw. Boiled green plantain works at this age too, as long as it is fully tender and mashed or cubed very small. Continue to skip salt, sugar, and anything fried, and supervise every bite while your baby sits upright.
12+ months
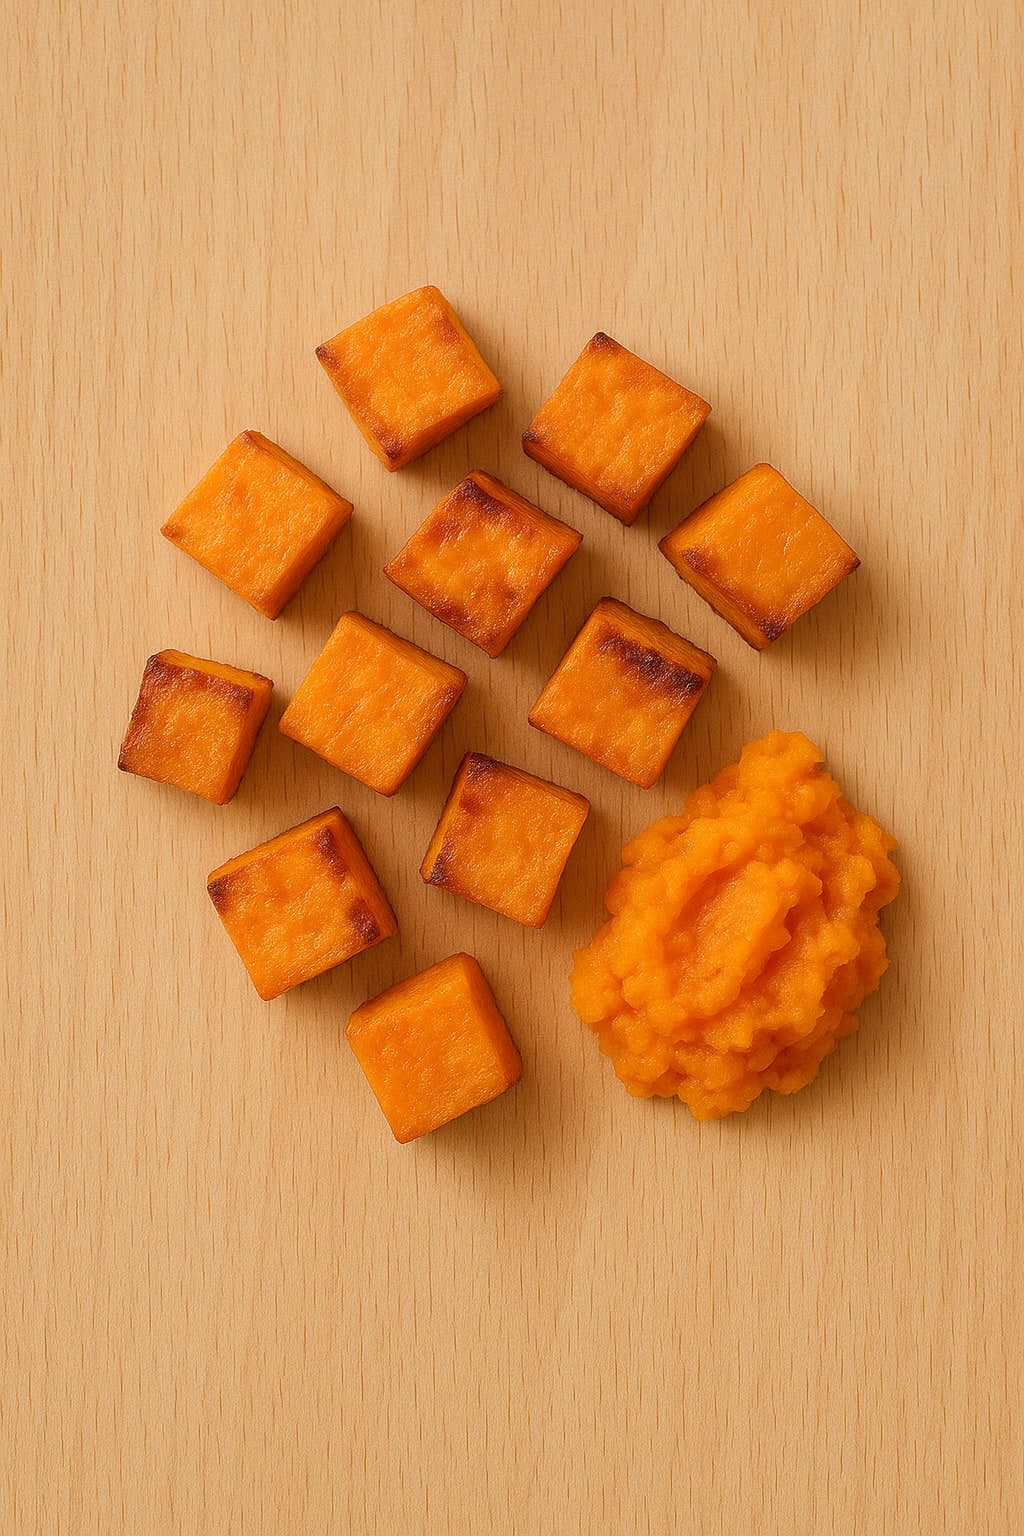
How to cut plantain for a 12 month old: By 12 months, most toddlers can handle bite-size pieces and are getting better at chewing. Cook the plantain until soft, then cut it into bite-size pieces about 1.5 cm across, small enough to chew comfortably but never so large that they could be swallowed whole. Soft baked slices of ripe plantain, cooked in the oven without salt or sugar until tender, are a favorite at this age and easy for toddlers to pick up with fingers or spear with a fork. Boiled green plantain can be served as small soft chunks or folded into mashed dishes. Even at this stage, keep plantain fully cooked and skip crispy fried tostones and salted plantain chips, which stay hard, crunchy, and salty and remain a choking and sodium concern well past the first birthday. Keep mealtimes calm and seated, avoid letting your child walk or run with food, and always supervise while they eat.
How to Cut Olives for Baby
Read full cutting guide6–8 months
How to cut olives for a 6 month old: At 6 months, start with plain pitted olives and rinse them well under cool running water to wash away as much of the salty brine as you can. Check each olive with your fingers for pit fragments even if the jar says pitted, then quarter it lengthwise from top to bottom so you get four thin wedges about 0.5 cm wide and 2 cm long, never crosswise rounds. These quarters are too small for a 6 month old's whole-fist grasp to manage on their own, so the safest way to serve them is as flavor: finely chop or mash one or two quarters and stir them into mashed avocado, vegetable puree, plain whole-milk yogurt, or unsweetened oatmeal. Keep the amount to one or two quarters per meal because of the sodium, never offer a whole or halved olive, and always keep your baby seated upright and within arm's reach while eating.
9–11 months
How to cut olives for a 9 month old: Around 9 months, many babies develop the pincer grasp and can pick up small pieces between thumb and forefinger, which makes quartered olives a workable finger food. Rinse pitted olives thoroughly under running water to reduce the salt, feel each one for stray pit pieces, and cut every olive lengthwise into quarters, giving thin wedges roughly 0.5 cm wide and 2 cm long that your baby can grip and chew. The lengthwise cut matters because it breaks up the round, slippery grape-like shape that can block a baby's airway, so never serve olives whole, halved crosswise, or sliced into rings. Because of the sodium, keep the portion to a few quarters alongside lower-salt foods like soft vegetables, pasta, or eggs, and supervise every bite while your baby sits upright.
12+ months
How to cut olives for a 12 month old: By 12 months, most toddlers chew more skillfully, but olives still need the same careful prep because their shape and slippery skin remain risky. Rinse pitted olives well, check for pit fragments, and cut them lengthwise into quarters or smaller pieces about 0.5 to 1 cm in size, then stir them into pasta, scrambled eggs, rice, or grain bowls where they add flavor without dominating the meal. Never hand your toddler a whole olive, and do not be tempted by halves either, since a half olive can still hold its rounded shape. Just like grapes, whole olives should wait until at least age 4, when chewing and swallowing are mature enough to handle them. Skip stuffed and marinated olives, which add garlic, chili, extra oil, and even more salt, and keep your toddler seated and supervised at every meal.
How to Cut Steak for Baby
Read full cutting guide6–8 months
How to cut steak for a 6 month old: At 6 months, cook the steak to at least medium-well with no pink center, let it rest for a few minutes so the juices settle back into the meat, then slice one long, thick strip about the width and length of an adult finger, cutting across the grain so the fibers are short. Hand the strip to your baby or place it on the tray and let them grip it in a fist and suck and gnaw on it. The goal at this stage is not to swallow pieces of meat but to extract the iron-rich juices, which babies can do surprisingly well with just their gums. Replace the strip once it turns ragged or dry, and take it away if small pieces start to break off. If you prefer, slow-cooked or braised cuts such as chuck can be shredded into soft, moist pieces and mashed into vegetables or offered on a preloaded spoon. Never serve rare or pink steak to a baby, and always stay within arm's reach while they eat.
9–11 months
How to cut steak for a 9 month old: Around 9 months, most babies are developing the pincer grasp and can pick up small pieces between thumb and forefinger. Cook a tender steak to at least medium-well, rest it, then slice it across the grain and chop or mince it finely into pieces about the size of a chickpea, roughly 0.5 to 1 cm. Keep the meat moist by spooning the resting juices back over it or stirring it into mashed potato or soft vegetables, since dry crumbles are much harder for a baby to manage. Slow-cooked steak that shreds easily is ideal at this age because it stays soft and juicy. Check a piece between your fingers before serving: it should squash or shred with gentle pressure. Continue to supervise every bite with your baby seated upright.
12+ months
How to cut steak for a 12 month old: By 12 months, most toddlers can chew small bite-size pieces of tender steak. Choose naturally tender cuts such as flank, tenderloin, or slow-cooked chuck, cook them through, rest the meat, and always slice against the grain before cutting it into pieces about 1 to 1.5 cm across. The meat should still be moist and soft enough to squash between your fingers, so avoid dry, overcooked cubes that turn crumbly and hard to chew, and trim away any gristle, silverskin, or chewy fat. Serve the pieces with a small fork so your toddler can practice self-feeding, and add a soft side like mashed sweet potato to help each bite go down. Keep meals seated and calm, never let your child walk or run with food, and keep supervising while they eat.
How to Cut Pancakes for Baby
Read full cutting guide6–8 months
How to cut pancakes for a 6 month old: At 6 months, cook a thin, moist pancake about 0.5 to 1 cm thick, let it cool, and slice it into strips roughly the size of an adult finger, about 2 cm wide and 6 to 8 cm long. This finger-length shape is ideal for a whole-fist palm grip, so your baby can hold the strip and gnaw on the part sticking out of the top of the fist. A banana-oat style batter with no added sugar or syrup keeps the pancake naturally soft and moist, which matters because thick or doughy pancakes turn gummy and can clump in a baby's mouth. Test a strip yourself before serving: it should squish easily between your fingers and feel tender, not rubbery or dry. Offer the strips plain or with a thin smear of fruit puree, keep your baby seated upright, and stay within arm's reach for every bite.
9–11 months
How to cut pancakes for a 9 month old: Around 9 months, most babies are developing the pincer grasp and can pick up smaller pieces between thumb and forefinger. Cut a thin, cooled pancake into small squares or pieces about 1 to 1.5 cm across, roughly the size of a chickpea, so your baby can practice picking them up one by one. Keep the pancake itself thin and moist, since a thick, doughy center is much harder for a baby to chew and move around the mouth. If the pieces seem at all dry, moisten them with a little fruit puree or a very thin layer of smooth nut butter rather than syrup or honey. You can offer a mix of small squares and one larger strip if your baby still likes to gnaw, and keep supervising every bite while your baby sits upright.
12+ months
How to cut pancakes for a 12 month old: By 12 months, most toddlers can manage bigger pieces and want more independence at the table. Cut a whole thin pancake into quarters or small wedges and let your toddler bite pieces off, or keep cutting smaller pieces about 1.5 to 2 cm across if that suits your child better. This is also a great age for fork practice, so pre-pierce a few wedges or let your toddler stab pieces on their own while still eating some with their hands. Continue to keep pancakes thin and moist rather than thick and doughy, and top them with mashed fruit, fruit puree, or a thin spread of smooth nut butter instead of syrup, honey, or sugary spreads. Serve at a calm, seated mealtime, avoid letting your child walk or run with food, and always supervise while they eat.
How to Cut Bagel for Baby
Read full cutting guide6–8 months
How to cut bagel for a 6 month old: At 6 months, slice the bagel and cut a thin strip from the softer inner part, about the length of an adult finger and roughly 1 cm wide, then toast it lightly so it does not gum up into a sticky lump in your baby's mouth. Spread a thin smear of cream cheese or mashed avocado over the strip to add moisture and taste, keeping the layer thin rather than a glob. Your baby will hold the strip in a whole-fist grasp with a bit sticking out the top to work on. Do not hand over a big chunk of bagel to gnaw the way you might with some firm fruits: bagel is so dense and chewy that a baby can gum off a large doughy piece that forms a difficult bolus. Stay within arm's reach, keep your baby seated upright, and take the strip away once it gets soggy and starts falling apart.
9–11 months
How to cut bagel for a 9 month old: Around 9 months, many babies are developing the pincer grasp and can pick up smaller pieces between thumb and forefinger. Slice the bagel thinly, toast it lightly, and cut it into small, thin pieces about 1 to 1.5 cm across, roughly the size of a chickpea, so each bite stays manageable in a small mouth. Keep the pieces thin rather than cube-shaped, since a thick cube of dense bagel is much harder to chew down. A thin smear of cream cheese, mashed avocado, or hummus adds moisture and helps the pieces go down more easily, but keep toppings to a light layer, never a glob. Offer a few pieces at a time, watch that your baby is not stuffing several in at once, and keep supervising every bite while your baby sits upright.
12+ months
How to cut bagel for a 12 month old: By 12 months, most toddlers chew more effectively and can handle slightly larger pieces with more independence. Cut a thin slice of bagel into quarter-slices, so each wedge is a thin, flat piece your toddler can hold and bite from, and toast them lightly to keep the texture from turning gummy. Spread a thin layer of cream cheese, mashed avocado, nut butter thinned with a little water, or hummus over each quarter, always a thin smear rather than a thick glob. Stick with plain, lower-sodium bagels and continue to avoid seeded and everything-style varieties, since the whole seeds and salty seasoning are still not toddler-friendly. Let your toddler self-feed from a plate, keep mealtimes calm and seated, and stay close by to supervise, because dense bagel remains chewier than most breads even for confident eaters.
How to Cut Sandwich for Baby
Read full cutting guide6–8 months
How to cut a sandwich for a 6 month old: At 6 months, skip the closed sandwich entirely and serve open-faced strips instead. Lightly toast a slice of low-salt bread so it holds its shape and does not ball up in your baby's mouth, then add a thin, even layer of a soft spread such as mashed avocado, hummus, or a smooth nut butter thinned with water or breast milk. Cut off the crusts and slice the toast into strips about 2 cm wide and the length of an adult finger, so your baby can hold one in a whole-fist grasp with a bit sticking out the top to gnaw on. A true closed sandwich is hard work at this age because the filling squeezes out the sides and soft bread compresses into a gummy wad. Keep spreads thin rather than in thick globs, stay within arm's reach, and keep your baby seated upright while eating.
9–11 months
How to cut a sandwich for a 9 month old: Around 9 months, many babies are developing the pincer grasp, using the thumb and forefinger to pick up smaller pieces. Keep serving the sandwich open-faced, but cut it into small squares about 1.5 to 2 cm across, roughly bite-size, so your baby can practice picking them up one at a time. Lightly toast the bread as before, and mash soft fillings such as avocado, egg, beans, or ripe banana until thin and smooth so they sit flat on the bread instead of falling off in lumps. Offer just a few squares at a time to keep your baby from overstuffing, and include the occasional larger strip if they still prefer to gnaw. As always, supervise every bite with your baby seated upright.
12+ months
How to cut a sandwich for a 12 month old: By 12 months, most toddlers can manage a proper closed sandwich as long as the filling lies flat. Lightly toast two slices of low-salt bread, spread a thin layer of a flat filling such as mashed egg, a single slice of cheese, or hummus, then press the sandwich gently and cut it into quarters, small triangles, or fingers about 2 to 3 cm wide. Skip thick globs of nut butter, which can stick to the roof of the mouth, and whole deli meat slices, which can fold into a wad and are high in salt. Leave out jam and other sugary spreads too, since added sugar should stay minimal before age 2. Let your toddler self-feed at the table, and keep supervising while they eat.
How to Cut Fennel for Baby
Read full cutting guide6–8 months
How to cut fennel for a 6 month old: At 6 months, wash the fennel bulb, trim off the stalks, and peel away the tough outer layer, which stays stringy even after cooking. Cut the bulb in half from top to bottom and slice out the dense core, then cut the halves into thick wedges about 1 to 2 cm wide and roughly the length of an adult finger, keeping a bit of the base on each wedge so the layers hold together. Steam or braise the wedges for 15 to 20 minutes until they are completely soft and squash easily between your thumb and finger. At this age your baby holds food in a whole-fist grasp and gnaws on the part sticking out of the top, so large, graspable, fully soft wedges are the safest shape. Never offer raw or firm fennel, and always stay within arm's reach with your baby seated upright while eating.
9–11 months
How to cut fennel for a 9 month old: Around 9 months, many babies develop the pincer grasp and start picking up smaller pieces with the thumb and forefinger. Prepare the bulb the same way, removing the tough outer layer and the dense core, then cut soft-cooked fennel into small pieces about 1 to 1.5 cm, roughly the size of a chickpea. Another lovely option at this age is thin ribbons: slice the bulb into strips a few millimeters thick and braise them in unsalted broth until they are silky and collapse easily. Check every piece by pressing it between your fingers; if it does not squash, cook it longer. Keep offering a soft wedge to gnaw on if your baby still prefers larger pieces, and supervise every bite with your baby seated upright.
12+ months
How to cut fennel for a 12 month old: By 12 months, most toddlers manage bite-size pieces and are chewing more confidently, but fennel should still be served cooked and soft. Cut cooked fennel into small pieces about 1 to 1.5 cm and stir them into pasta, soups, stews, or a mild tomato sauce, where the soft layers almost melt into the meal. This is also a great age to let your toddler self-feed fennel with a fork from a bowl of brothy vegetables. Hold off on raw fennel until around 3 to 4 years, and even then serve it thinly shaved rather than in chunks, since the raw bulb stays crunchy and fibrous. The feathery fronds, chopped very fine, make a safe and flavorful garnish at any stage. Keep meals seated and supervised, and never let your toddler walk or run with food.
How to Serve Sardines for Baby
Read full cutting guide6–8 months
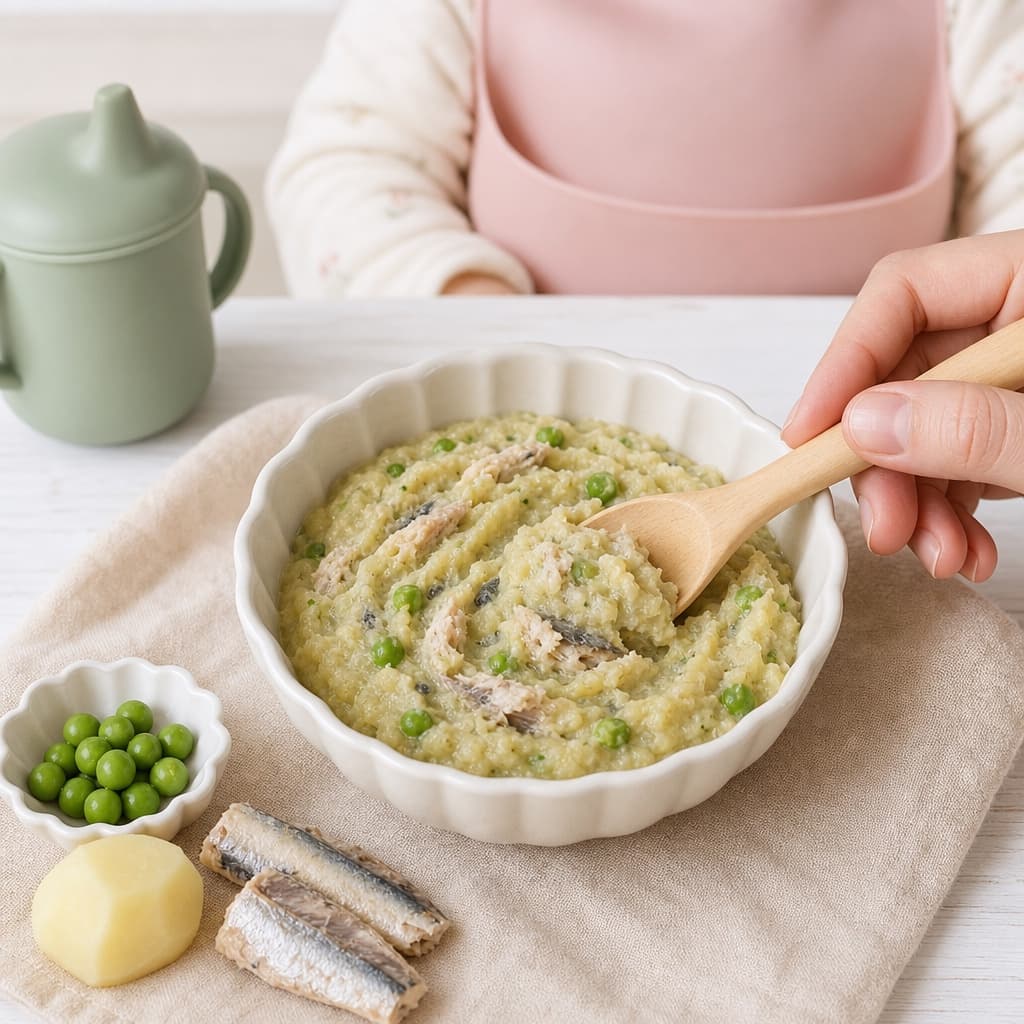
How to serve sardines for a 6 month old: At 6 months, the easiest route is canned sardines packed in water: rinse them under cool water to wash off surface salt, then mash them thoroughly with a fork, soft bones and all, into mashed potato, sweet potato, or a pea and vegetable mash. The bones in canned sardines are cooked so soft they crush between your fingers, and mashing them in is exactly what you want, since they carry most of the calcium; just work the mash until no gritty flecks remain. Aim for a moist, cohesive texture your baby can scoop by hand or take from a preloaded spoon, using about half a sardine to one sardine stirred through a few tablespoons of mash. If you cook fresh sardines instead, bake or grill them until the flesh flakes, then check meticulously for the fine spine and rib bones and remove every one before mashing. Keep it plain with no added salt, and supervise with your baby seated upright.
9–11 months
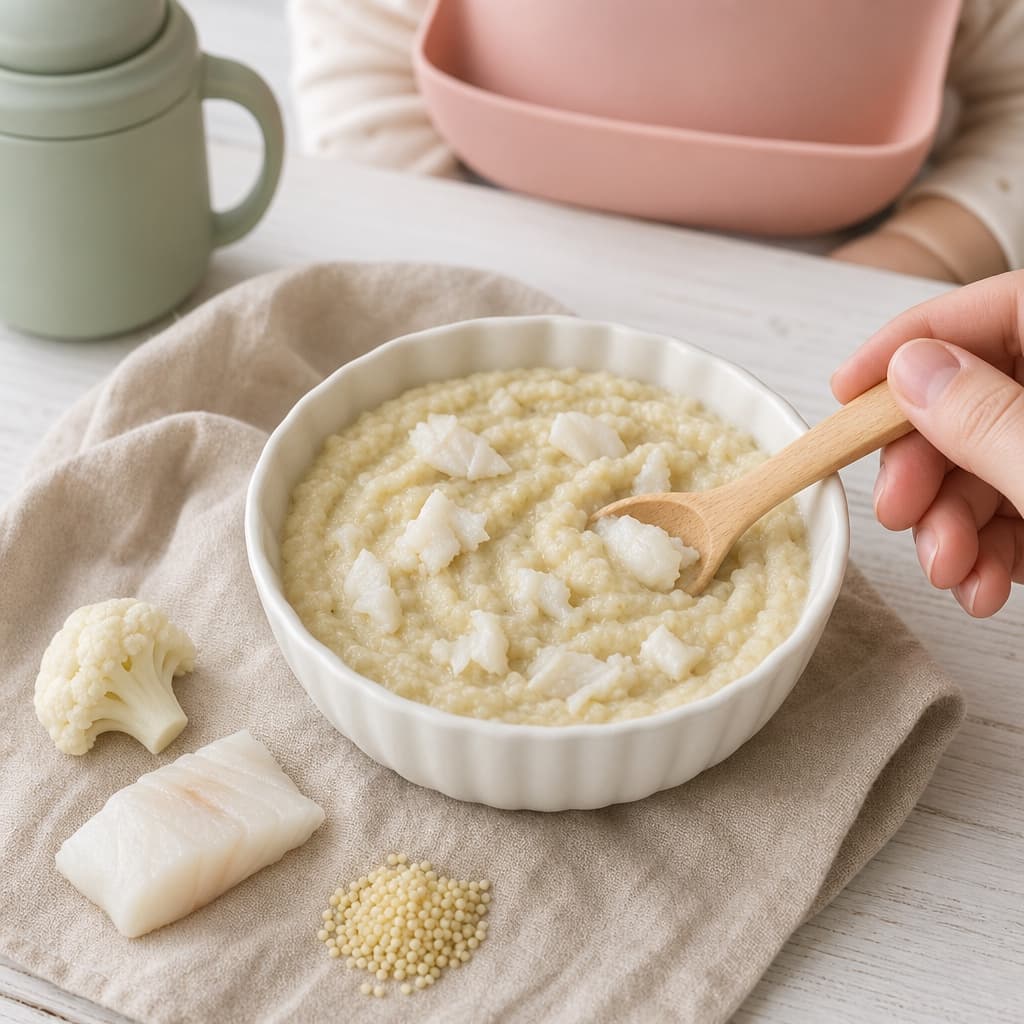
How to serve sardines for a 9 month old: Around 9 months, a developing pincer grasp opens up flaked textures. Fold small flakes of rinsed, water-packed sardines through soft grains like millet, couscous, or well-cooked rice, or through mashed cauliflower, so each bite stays moist and easy to gather; a bowl of soft grains with a sardine flaked through is a complete meal on its own. This is also the age for thin fish-cake fingers: mash one or two sardines with cooked potato, shape the mixture into fingers about the width of an adult pinky, and bake or pan-cook them in a little olive oil until just golden outside and soft all the way through. If any of the fish is fresh rather than canned, run your fingers through the flakes and pull out stray fine bones before serving. Keep salt out of the mix, and stay close while your baby practices picking up flakes and fingers.
12+ months
How to serve sardines for a 12 month old: By 12 months, sardines can look like family food. Mash them onto lightly toasted bread and cut it into strips or small squares your toddler can hold, stir small flaked pieces through pasta with a mild tomato sauce, or blend sardines with a spoonful of plain whole-milk yogurt or a drizzle of olive oil into a mild pate to spread thin on toast strips. Watch the salt: sardines canned in brine, tomato sauce, or flavored oils can be surprisingly salty, so keep choosing water-packed tins, rinse before using, and skip salty crackers as the vehicle, since the AAP and NHS advise keeping salt minimal before age 2. One to two servings of oily fish a week, roughly one whole sardine or half a small tin per serving at this age, delivers the omega-3 and calcium benefit without overdoing it. Keep your toddler seated while eating and continue to supervise.
How to Serve Liver for Baby
Read full cutting guide6–8 months
How to serve liver for a 6 month old: At 6 months, the gentlest introduction is well-cooked chicken liver pureed until completely smooth and stirred into a vegetable mash your baby already knows. Cook the liver fully, until no pink remains in the center, then blend it with a splash of water, breast milk, or a no-salt-added broth until silky. Liver has a strong, mineral flavor that can surprise new eaters, so start tiny: stir just a teaspoon of the puree into sweet potato, carrot, or squash mash and offer it on a preloaded spoon. If it is welcomed, build up gradually over the following weeks, keeping the total to about one small serving of liver per week because of its very high vitamin A content. Freeze the rest of the puree in an ice cube tray so nothing is wasted, and always supervise with your baby seated upright.
9–11 months
How to serve liver for a 9 month old: Around 9 months, finely crumbled liver disappears happily into mixed meat dishes. Cook chicken or beef liver through, mince or crumble it finely, and mix it with ground beef to make soft meatballs or thin patties; a ratio of roughly one part liver to three parts beef keeps the flavor mild. Cook them until no pink remains, then serve whole soft meatballs your baby can gnaw or break patties into chunky pieces, and offer smaller crumbles once the pincer grasp appears. Simmering the meatballs in a no-salt-added tomato sauce or gravy keeps them moist and easy to swallow, since plain cooked liver can turn dry and grainy. Count these mixed dishes toward the same limit of about one small serving of liver per week, season with mild herbs only, and supervise every bite with your baby seated upright.
12+ months
How to serve liver for a 12 month old: By 12 months, small amounts of liver can slide into everyday family cooking. Stir minced cooked liver into bolognese, shepherd's pie, meatloaf, or a slow-cooked beef stew, and set aside your toddler's portion before adding salt, since salt should stay minimal until at least 24 months. A spoonful or two of liver in a mixed dish is plenty; the cap of about one small serving a week still applies well into the toddler years because vitamin A is stored in the body. Keep skipping store-bought pate, which is high in salt and even more concentrated in vitamin A than plain cooked liver. Chop everything to bite-size pieces, serve alongside soft vegetables and grains, keep your toddler seated while eating, and continue to supervise every meal.
How to Serve Tempeh for Baby
Read full cutting guide6–8 months
How to serve tempeh for a 6 month old: At 6 months, cut tempeh into finger-length strips about the width of an adult finger, then steam or simmer them for at least 10 minutes until they are soft enough to mash between your fingers. Plain water works, or simmer the strips in unsalted vegetable or chicken broth for gentle extra flavor. The long, soft strip suits the palmar grasp at this age: your baby can grip it in a fist and gnaw on the top. Offer one or two strips at a time, skip salt, soy sauce, and sweet marinades entirely, and stay within arm's reach with your baby seated upright in the highchair.
9–11 months
How to serve tempeh for a 9 month old: Around 9 months, the emerging pincer grasp is ready for smaller pieces. Steam or simmer tempeh until fully soft, then crumble it into pea-sized pieces or cut it into small cubes about the size of a chickpea, and scatter a few on the tray for pick-up practice. Soft tempeh crumbles also mix beautifully into familiar textures: stir them through soft rice, mashed vegetables, well-cooked lentils, or a mild coconut and vegetable stew so every scoop carries protein and iron. Season with garlic, herbs, or mild spices rather than salt, and keep a strip or two on offer if your baby still prefers a bigger grip. Supervise every meal with your baby seated upright.
12+ months
How to serve tempeh for a 12 month old: By 12 months, most toddlers can handle small pan-warmed cubes of tempeh. Steam the cubes first so the inside stays soft, then warm them briefly in a little oil until just golden; skip heavy salty marinades and crisp fried coatings, and season with garlic, coriander, or a splash of unsalted broth instead, since the AAP and NHS advise keeping salt minimal well past the first birthday. This is also the age to fold tempeh into true family meals, MPASI style: soft tempeh cubes alongside rice and vegetables, gentle coconut-based stews, or noodle dishes cut into toddler-sized pieces. Keep your toddler seated while eating and continue to supervise.
How to Serve Couscous for Baby
Read full cutting guide6–8 months
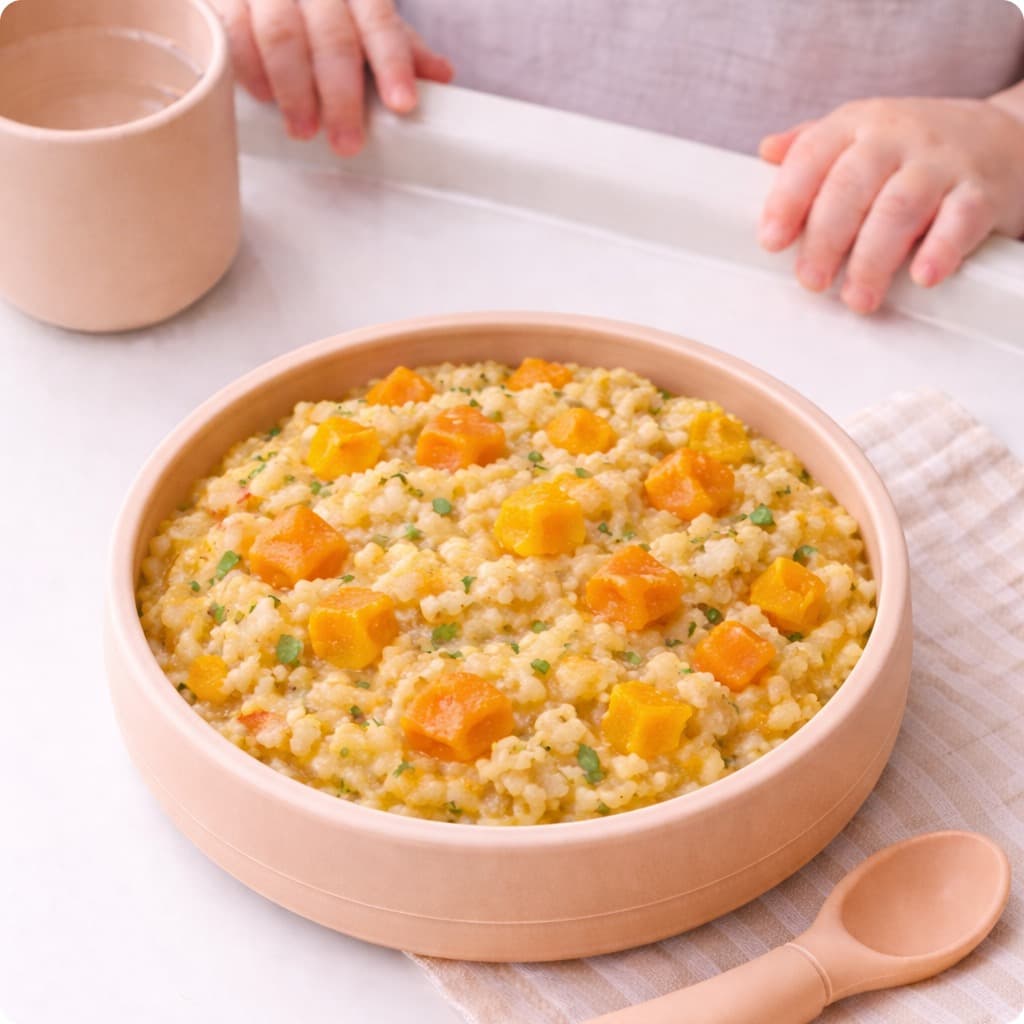
How to serve couscous for a 6 month old: At 6 months, the golden rule is never serve couscous dry: on its own the tiny grains clump into a sticky ball that a new eater cannot manage. Cook it in water or unsalted broth, skipping stock cubes entirely, then fold a tablespoon or two into a smooth vegetable puree such as carrot and pumpkin until the mixture is soft, moist, and spoonable. Aim for a texture closer to thick porridge than a fluffy side dish, loose enough to drop easily off a spoon. Offer it on a preloaded spoon, or let your baby palm small sticky clumps of the moistened mash from the tray. Keep your baby seated upright in the highchair and stay within arm's reach for the whole meal.
9–11 months
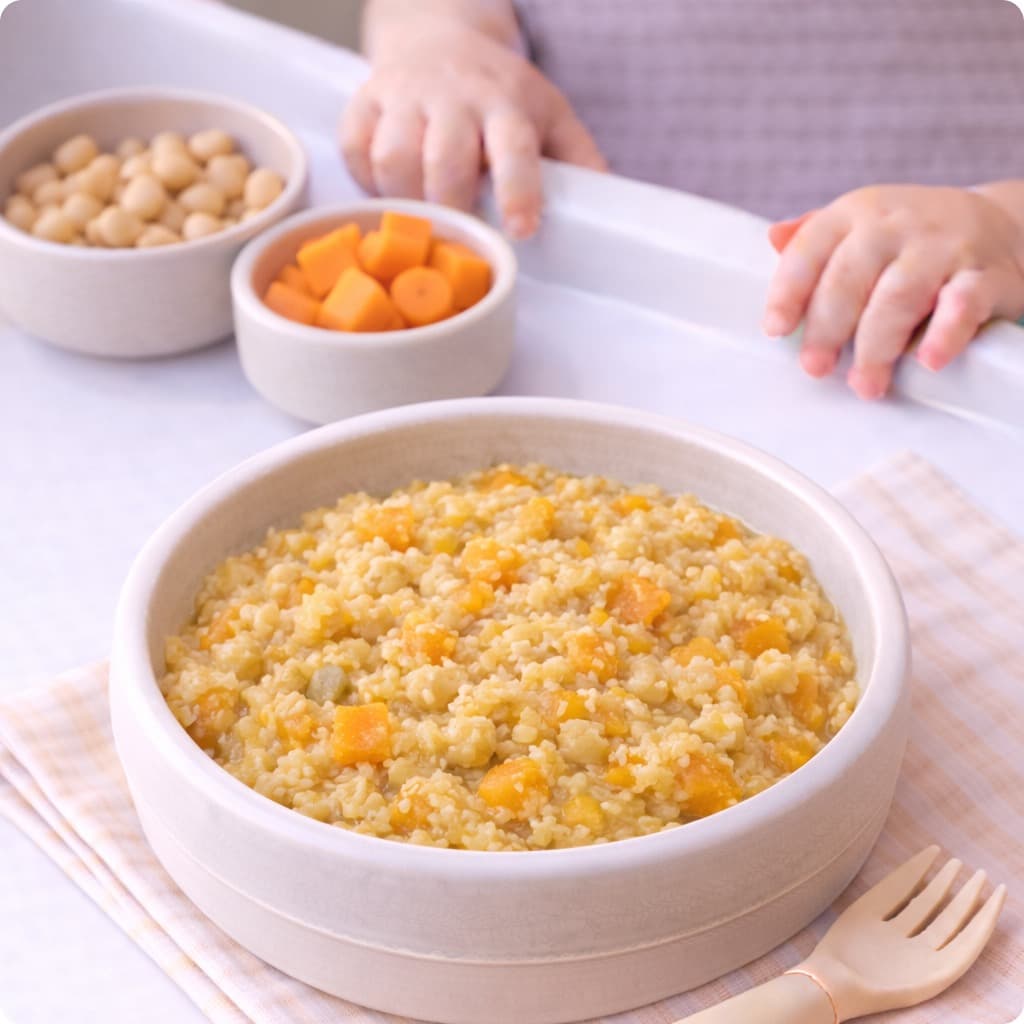
How to serve couscous for a 9 month old: Around 9 months, couscous becomes brilliant self-feeding and scooping practice. Keep it moist, then mix it with soft chopped vegetables and a protein: try couscous folded through mashed chickpeas and pumpkin, flaked well-cooked fish, or finely shredded chicken loosened with a little of its unsalted cooking liquid. Serve it in a small bowl with a baby spoon so your baby can practice scooping, and expect plenty to arrive by the fistful, which is exactly right at this age. A drizzle of olive oil or a spoonful of plain whole-milk yogurt stirred through helps the grains hold together in manageable clumps. Continue cooking in water or unsalted broth, keep added salt off the menu, and supervise every bite with your baby seated upright.
12+ months
How to serve couscous for a 12 month old: By 12 months, most toddlers can handle fluffier textures, so couscous can appear as a proper side dish at family meals: fluff it with a fork and serve a few spoonfuls next to soft chicken, roasted butternut squash, or stewed vegetables, or combine everything in a chunky soup-style bowl. Pearl couscous can join the menu now too; cook the larger pearls until completely soft all the way through, since firm round pearls are harder to chew, and halve them for cautious eaters. Season with herbs, lemon, garlic, or olive oil rather than salt or stock cubes; the AAP advises keeping salt and added sugar minimal before age 2. Keep your toddler seated at the table while eating and continue to supervise.
How to Serve Millet for Baby
Read full cutting guide6–8 months
How to serve millet for a 6 month old: Cook millet soft with roughly three to four parts liquid to one part grain, then blend or mash it into a smooth, spoonable porridge. Use water, breast milk, or formula rather than salted broth, and stir in a familiar fruit or vegetable puree such as carrot, pear, or banana to add flavor and nutrients. Aim for a texture that slides easily off a preloaded spoon: your baby can practice bringing it to their mouth while you spoon-feed alongside. Ragi flour porridge, cooked thoroughly and thinned to the same consistency, is a perfect alternative at this age.
9–11 months
How to serve millet for a 9 month old: Thicken the porridge and leave gentle texture in it: soft-cooked millet grains no longer need to be fully blended, just well cooked and slightly mashed. Stir millet into vegetable mashes, fold it into thick fruit porridges, or mix it with ground meat and soft vegetables for a one-bowl meal. A stickier, thicker porridge also lets your baby practice scooping with their hands or a spoon, which is messy and exactly right for this stage. Keep portions moist so the grains do not dry out and clump.
12+ months
How to serve millet for a 12 month old: Toddlers can eat millet the way the rest of the family does: fluffy cooked grains as a side dish, millet stirred into soups and stews, khichdi-style millet and lentil one-pots, or small soft millet pancakes. Cook the grains until fully tender and keep seasoning gentle, salting the family portion after the baby portion is set aside. Millet also bakes well into soft fingers and bars for self-feeding, and ragi porridge can stay in the breakfast rotation with mashed fruit stirred through.
How to Serve Chia Seeds for Baby
Read full cutting guide6–8 months
How to serve chia seeds for a 6 month old: Stir about one teaspoon of chia seeds into a wet base and let it sit at least 15 minutes: oatmeal, plain full-fat yogurt, or a loose fruit puree all work. For a smoother result, blend the chia together with the puree so the seeds break down completely; this blended version is the gentlest introduction. Keep the overall texture loose and spoonable, and pair chia with foods your baby already knows so the new ingredient is the only variable.
9–11 months
How to serve chia seeds for a 9 month old: Offer real chia pudding now: seeds soaked in milk or a fruit puree until they form a soft gel, mixed with mashed pear, banana, or berries. The slightly textured pudding is excellent scooping practice, whether by hand or with a preloaded spoon. You can also fold soaked chia into thicker porridges and overnight-oat mixtures. Hold the line at one to two teaspoons of seeds a day while your baby's digestion keeps pace with the extra fiber.
12+ months
How to serve chia seeds for a 12 month old: Toddlers can enjoy chia across the day: overnight chia pudding for breakfast, soaked chia blended into smoothies, and chia mixed into pancake or muffin batter where the cooking liquid hydrates the seeds. A thin chia-fruit jam, made by simmering fruit and stirring in seeds, spreads nicely on toast strips without any added sugar. Keep total amounts sensible, offer water alongside fiber-rich meals, and chia stays a helper rather than a tummy-ache.
How to Serve Oatmeal for Baby
Read full cutting guide6–8 months
How to serve oatmeal for a 6 month old: Cook oats soft and blend or whisk them into a smooth, slightly runny porridge using water, breast milk, or formula. Iron-fortified infant oat cereal mixed to the same texture is an equally good start. Stir in a familiar puree such as apple, pear, or carrot, and serve from a spoon or preload a soft-tipped spoon and let your baby steer it in. The porridge should drop slowly off the spoon: thick enough to stay put, thin enough to swallow easily.
9–11 months
How to serve oatmeal for a 9 month old: Move to thicker porridge with soft lumps: regular rolled oats cooked well no longer need blending. Mash banana or soft berries through it instead of pureeing, and let your baby practice loaded-spoon self-feeding and messy hand scooping. This is also the age for soft baked oat pieces: simple banana-oat bites cooked until tender make an easy pincer-grasp food, and thick overnight-oat textures work well if fully softened.
12+ months
How to serve oatmeal for a 12 month old: Toddlers can share the family breakfast: bowls of porridge with fruit stirred through, baked oatmeal squares, oat bars, and oat pancakes all work for self-feeding with hands or a spoon. Keep added sugar out and sweeten with mashed fruit, cinnamon, or a thin swirl of nut butter. Baked oat fingers travel well for snacks, and savory oats cooked with grated vegetables are an underrated lunch. Keep textures moist and portions cut to bite-size where needed.
How to Serve Hummus for Baby
Read full cutting guide6–8 months
How to serve hummus for a 6 month old: Start with a thin smear of low-salt hummus on a strip of lightly toasted bread, or stir a spoonful into a familiar vegetable mash like carrot or sweet potato. A preloaded spoon of slightly thinned hummus also works for babies practicing bringing food to their mouths. Keep first servings small while sesame is new, and thin thick hummus with a little water or breast milk so it never sits in the mouth as a sticky glob.
9–11 months
How to serve hummus for a 9 month old: Hummus becomes a dip: offer it alongside soft-steamed vegetable sticks like carrot, zucchini, or broccoli florets, and let your baby do the dipping, however inaccurately. Spread it on soft pita strips, fold it through warm couscous or rice, or use it as the sauce in a grain-and-veg bowl. Dipping is fantastic pincer-and-wrist practice, and the mess is part of the learning.
12+ months
How to serve hummus for a 12 month old: Toddlers can eat hummus the family way: as a sandwich spread, a dip plate with soft vegetables and pita, pinwheels rolled in a soft tortilla, or a dollop on top of warm bowls. Hummus also stands in for salty spreads on crackers and toast. Keep an eye on total salt across the day if store-bought hummus features often, and rotate flavors like beet or roasted red pepper hummus for variety.
How to Serve Kefir for Baby
Read full cutting guide6–8 months
How to serve kefir for a 6 month old: Offer a few spoonfuls of plain full-fat kefir stirred into foods your baby already eats: oatmeal, mashed banana, fruit purees, or mashed avocado all take kefir well. Preload a soft spoon and let your baby guide it in, or let them dip their fingers and taste; the pourable texture carries no choking concern by itself. Keep it as a mealtime food rather than filling a bottle or cup with it at this age.
9–11 months
How to serve kefir for a 9 month old: Use kefir as a dip and a mix-in: soft fruit wedges dipped in kefir are a favorite self-feeding meal, and a spoonful thinned through vegetable mash rounds out savory bowls. Small sips from an open cup at mealtimes build cup skills with something more forgiving than water's thinness. Thicker kefir varieties can be spooned like runny yogurt, topped with mashed berries or a dusting of cinnamon.
12+ months
How to serve kefir for a 12 month old: Toddlers can drink small cups of plain kefir with meals and use it everywhere yogurt goes: smoothie bases blended with fruit, overnight oats soaked in kefir, kefir bowls with soft granola, and marinades for family cooking. Keep portions moderate so kefir complements rather than crowds out meals, and keep choosing unsweetened versions; mashed fruit sweetens a kefir smoothie better than any flavored tub.
How to Serve Tahini for Baby
Read full cutting guide6–8 months
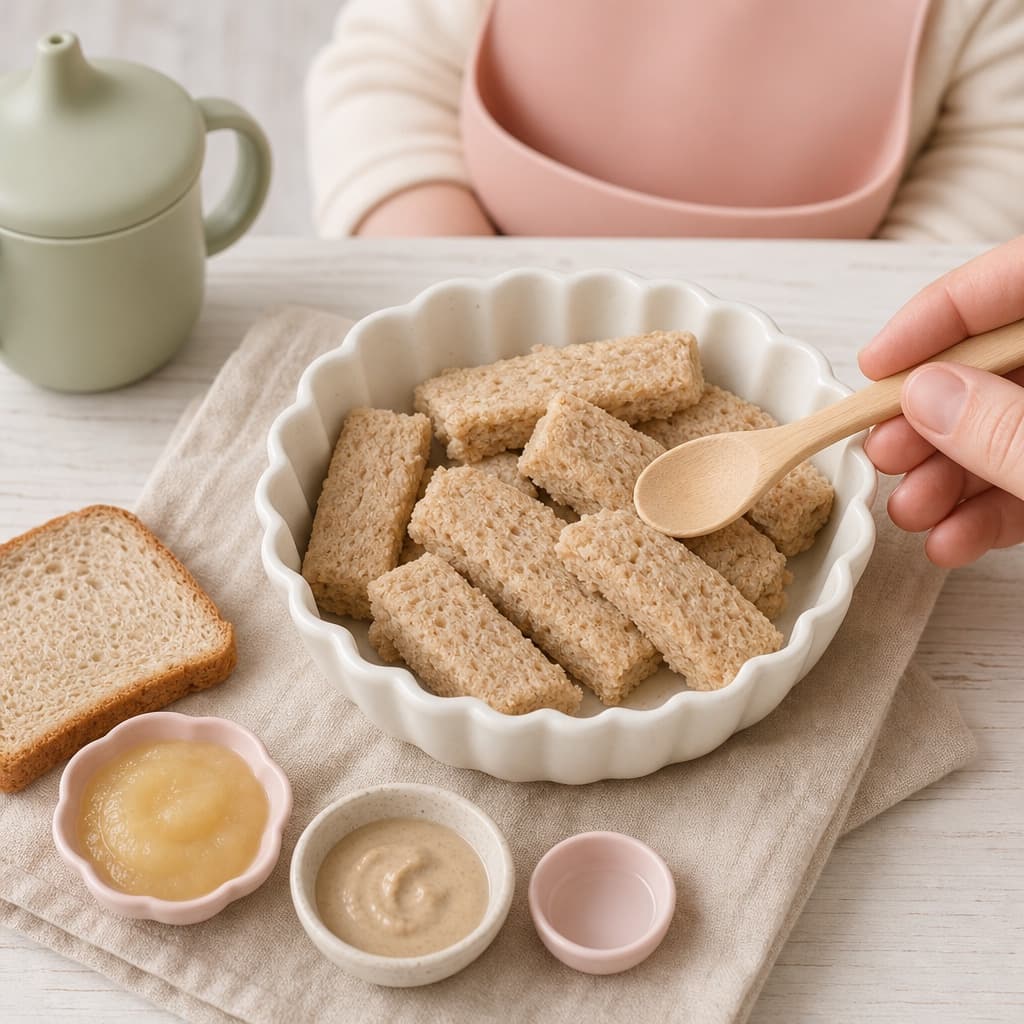
How to serve tahini for a 6 month old: Thin a small spoonful of tahini roughly one-to-one with warm water, breast milk, or formula until it pours, then stir it into oatmeal, yogurt, or a vegetable puree. A wafer-thin smear on a strip of lightly toasted bread also works. Never offer tahini by the thick spoonful: like all seed and nut butters, the undiluted paste is sticky enough to be a choking hazard. Choose plain, unsalted tahini with sesame as the only ingredient.
9–11 months
How to serve tahini for a 9 month old: Keep the thin-and-mix approach while adding variety: tahini whisked into mashed banana, drizzled loosely over soft-roasted sweet potato or broccoli, or blended into a lemony sauce for dipping soft vegetable sticks. Tahini also binds well into soft baked oat fingers. The texture test stays the same at every age: if it pours or spreads paper-thin, it is right; if it clumps on the spoon, thin it more.
12+ months
How to serve tahini for a 12 month old: Toddlers can enjoy tahini across family food: stirred into hummus, whisked with lemon and water into a salad-and-bowl dressing, drizzled over roasted vegetables, spread thinly on toast under mashed fruit, or baked into soft cookies and bars without added sugar. Halva and other sweetened sesame products stay off the menu for now; the sugar load outweighs the sesame benefit at this age.
How to Serve Almond Butter for Baby
Read full cutting guide6–8 months
How to serve almond butter for a 6 month old: Thin a teaspoon of smooth almond butter with an equal amount of warm water, breast milk, or formula until it pours, then stir it through oatmeal or fruit puree. A wafer-thin smear on a lightly toasted bread strip is the other safe format. Choose unsalted, no-added-sugar almond butter with almonds as the only ingredient. Never offer it by the spoonful or in thick smears: sticky boluses of nut butter are a genuine choking risk.
9–11 months
How to serve almond butter for a 9 month old: Keep almond butter in the weekly rotation with more variety: thinned and swirled into porridge with mashed banana, whisked into yogurt, or spread paper-thin on toast fingers topped with soft fruit. Powdered almond butter mixed into purees is another low-risk format if you use it. The consistency check never changes: it should drizzle off a spoon; if it holds its shape, keep thinning.
12+ months
How to serve almond butter for a 12 month old: Toddlers can enjoy thin almond butter spreads on pancakes and toast, almond butter blended into fruit smoothies, and soft baked oat bars with almond butter in the batter. The thick-glob rule still applies, and whole or chopped almonds stay off the plate until around age 4. Pair almond butter days with tahini and peanut butter days so all the introduced allergens keep their regular exposure.
Cutting guide FAQ
- What size should baby food be cut?
- It depends on your baby's age and grasp stage. Before pincer grasp (around 6 to 9 months), cut foods into long finger-shaped pieces about 4 to 5 cm long and as wide as an adult pinky finger. After pincer grasp (around 9 to 12 months), switch to pea-sized pieces (about 1 cm). Always squish foods between your fingers to test softness, if it does not give way easily, it is not soft enough for baby.
- Which foods are choking hazards for babies?
- Round foods (whole grapes, blueberries, cherry tomatoes), hard foods (raw apple, raw carrot, nuts), sticky foods (peanut butter blobs, marshmallow), and tough or stringy foods (hot dogs, sausages, large pieces of meat) are highest-risk. Most can be served safely with the right cut, see each food's individual guide for the exact method.
- When can babies start eating finger foods?
- Babies typically start finger foods around 6 months, when they can sit unsupported, have lost the tongue-thrust reflex, and show interest in food. Start with soft, finger-shaped pieces and let baby self-feed.
- Do I need to peel everything for baby?
- Soft fruit skins (peach, plum, kiwi) can stay on if very ripe and soft, but peeling is safer for younger babies. Tougher skins (apple, pear, cucumber) should be peeled before 9 months. Fibrous skins like mango and tomato are best removed after cooking.
- Is baby-led weaning safer than purées?
- Both are safe when done correctly. Baby-led weaning research (BMJ Open 2016) shows no increased choking risk versus spoon-feeding when foods are prepared in age-appropriate sizes. Cut size and softness matter more than the feeding method itself.
- How do I test if a food is soft enough?
- The squish test: place a piece between your thumb and index finger and press gently. If it gives way without much effort, it is soft enough. If you have to squeeze hard, cook or steam it longer or mash it.
Want this in your pocket?
Nibli's iOS app has age-by-age food guidance, allergen tracking, and a personalised feeding plan.
verifiedSources & References
This guide is informed by current guidelines from leading health organizations: